How to Use ShareSpace Carpool
Step-by-step guides with screenshots to help you get the most out of the app
How to Find a Ride
Open the App
Launch ShareSpace Carpool app on your device. If you're new, you'll see the welcome screen with the bridge graphic. Tap "Sign up" to create an account or "Log in" if you already have one.
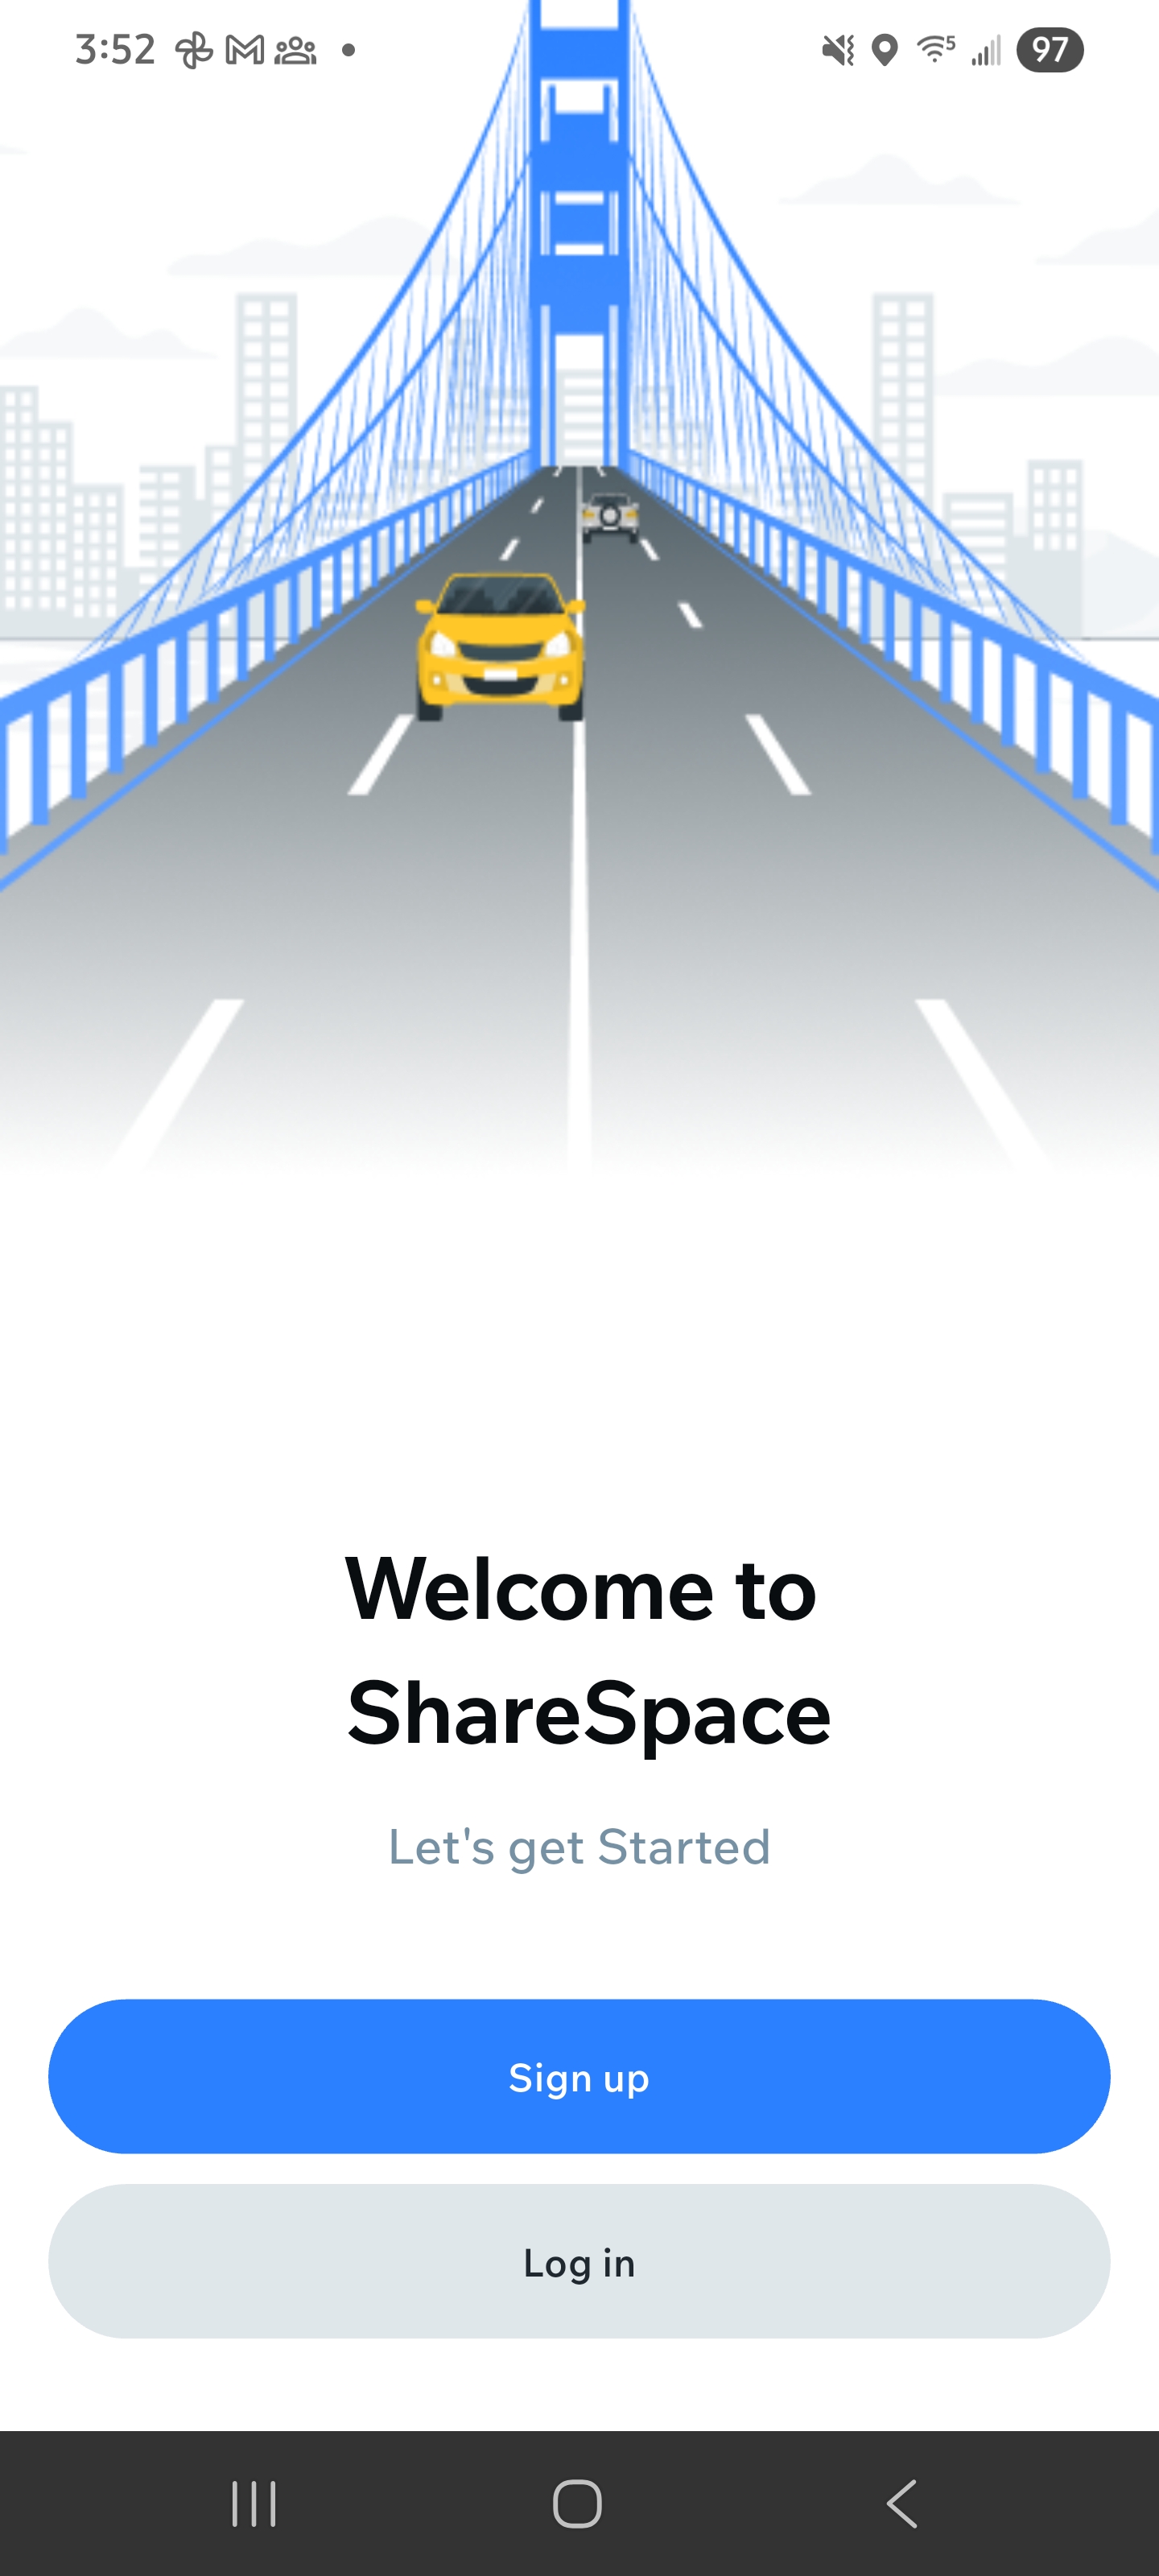
Welcome screen with Sign up and Log in options
Sign Up or Log In
If signing up, enter your phone number on the sign up screen. You'll receive a 6-digit verification code via SMS. Enter the code on the verification screen to complete your registration. You can also continue with Google for faster registration.
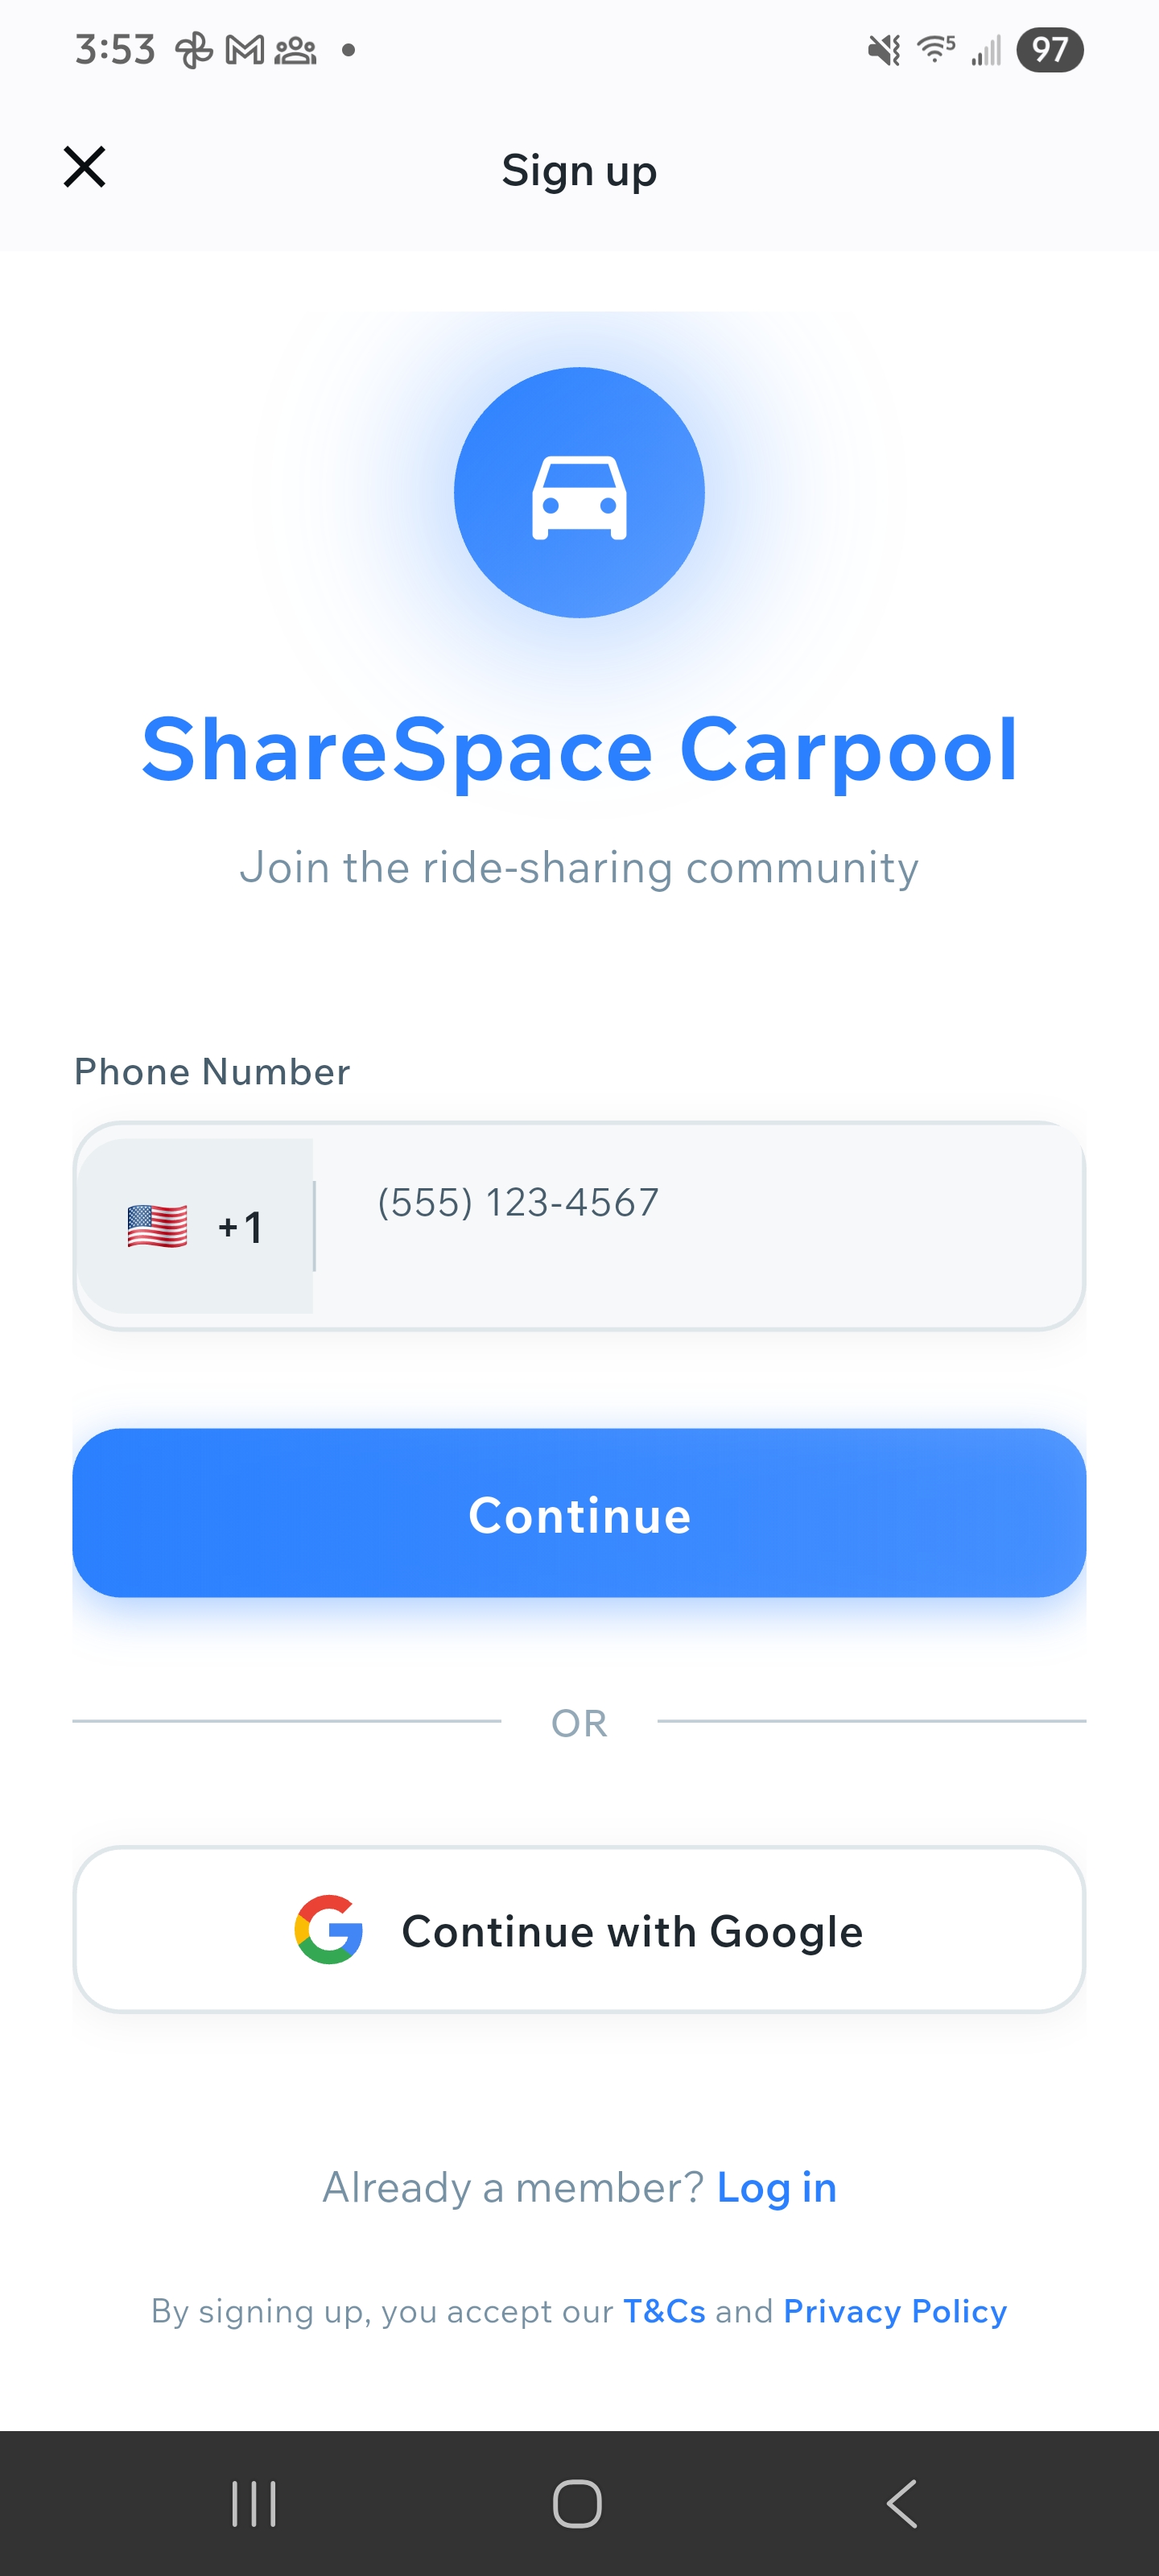
Sign up screen with phone number input
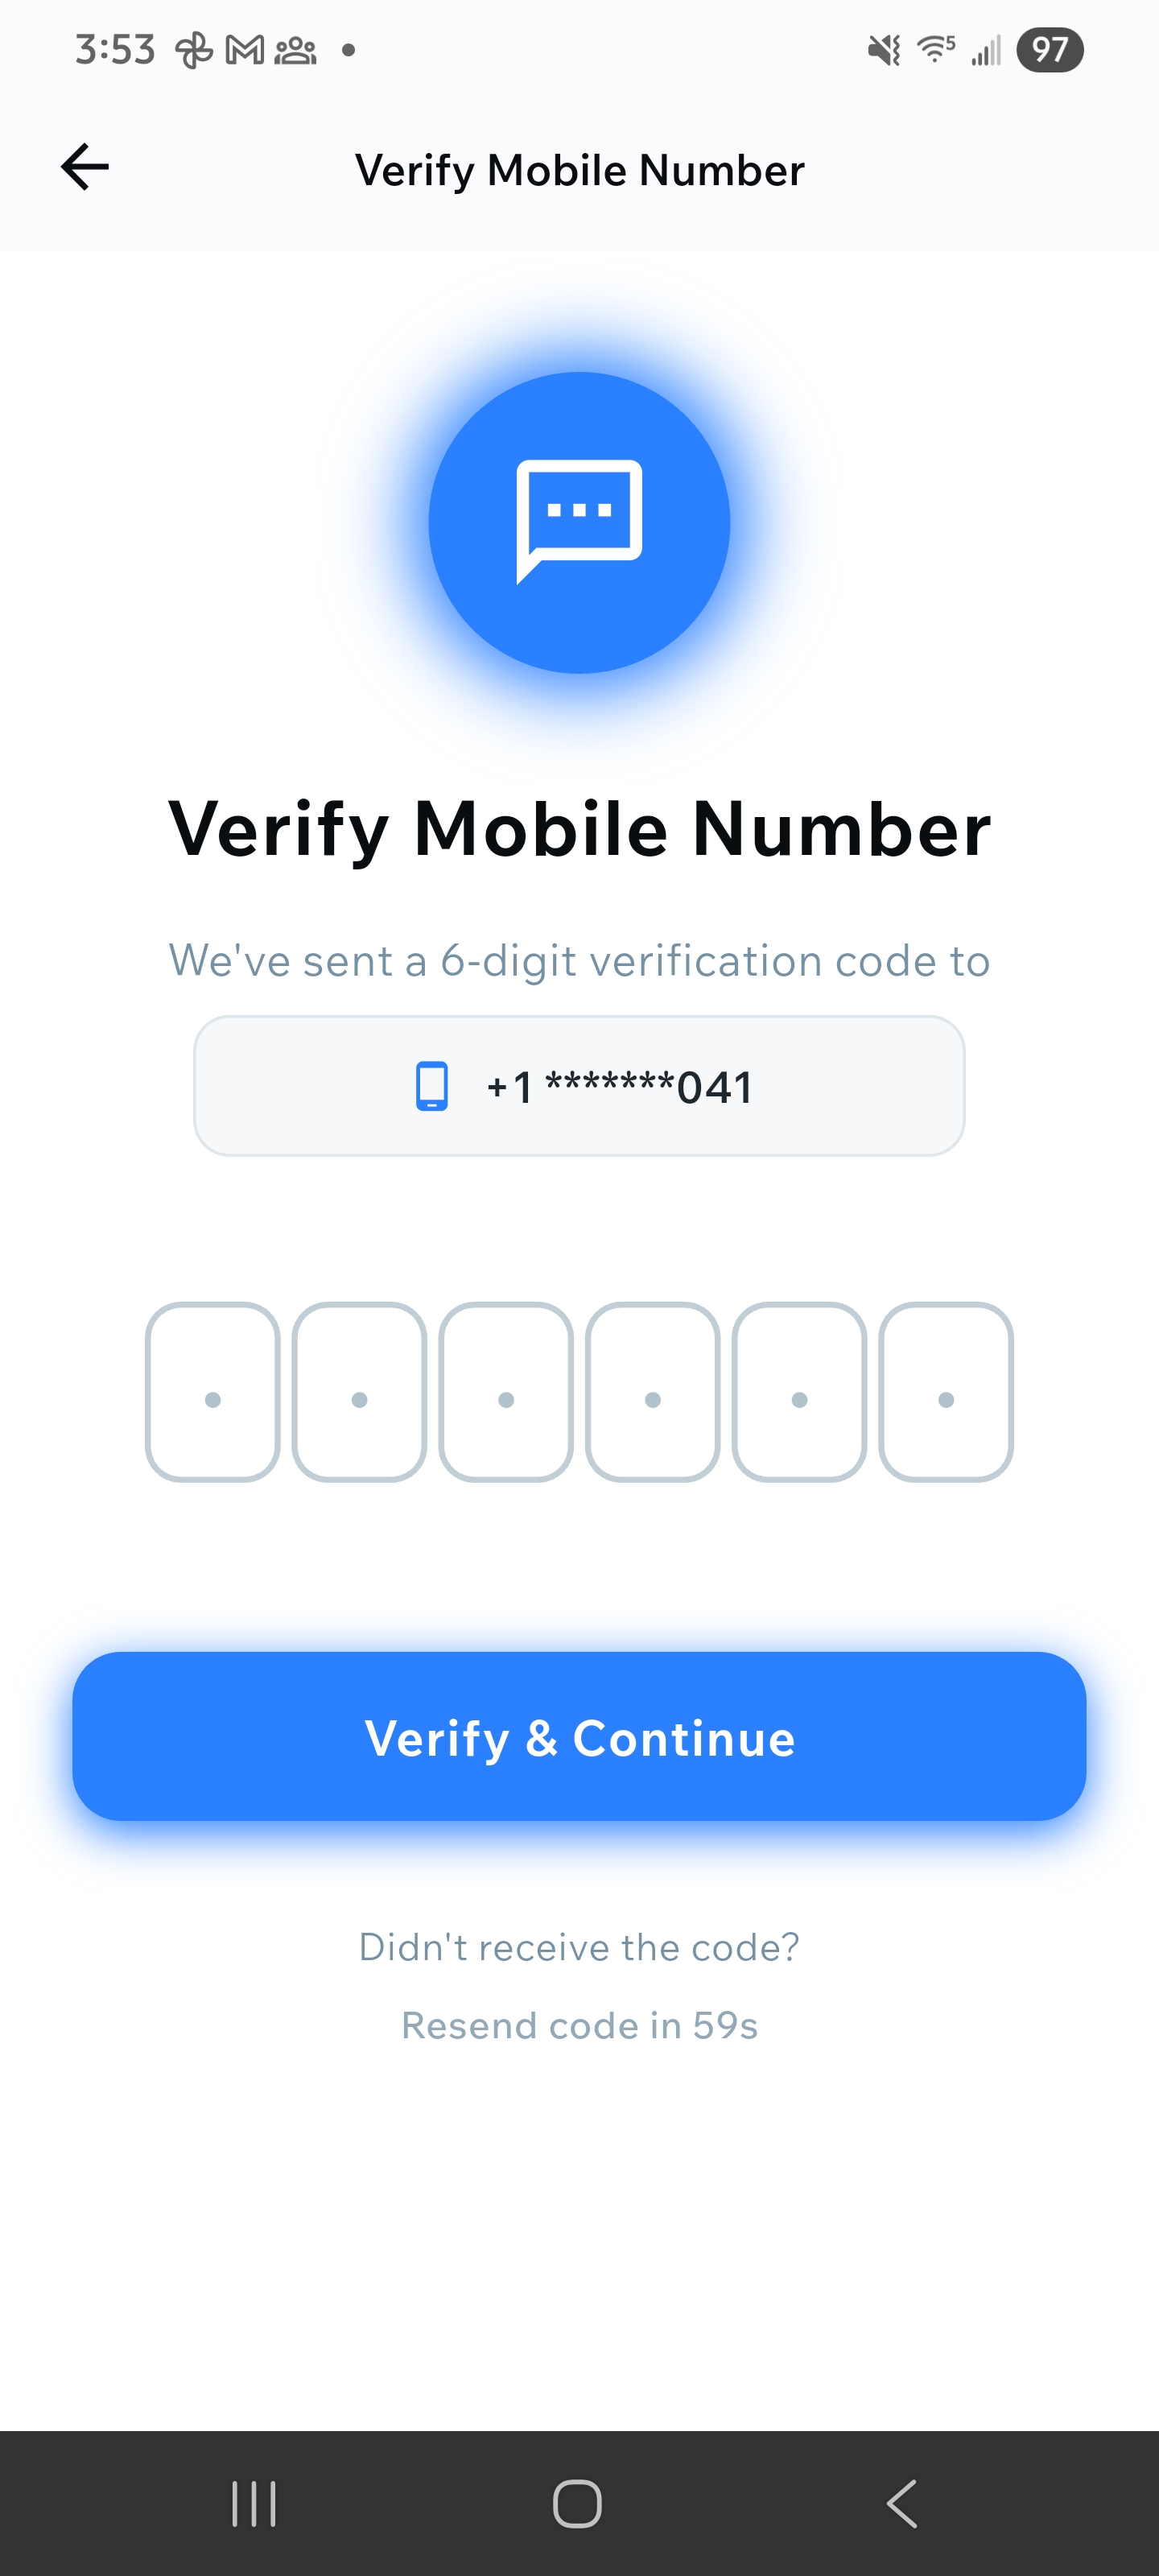
Verification screen with 6-digit code
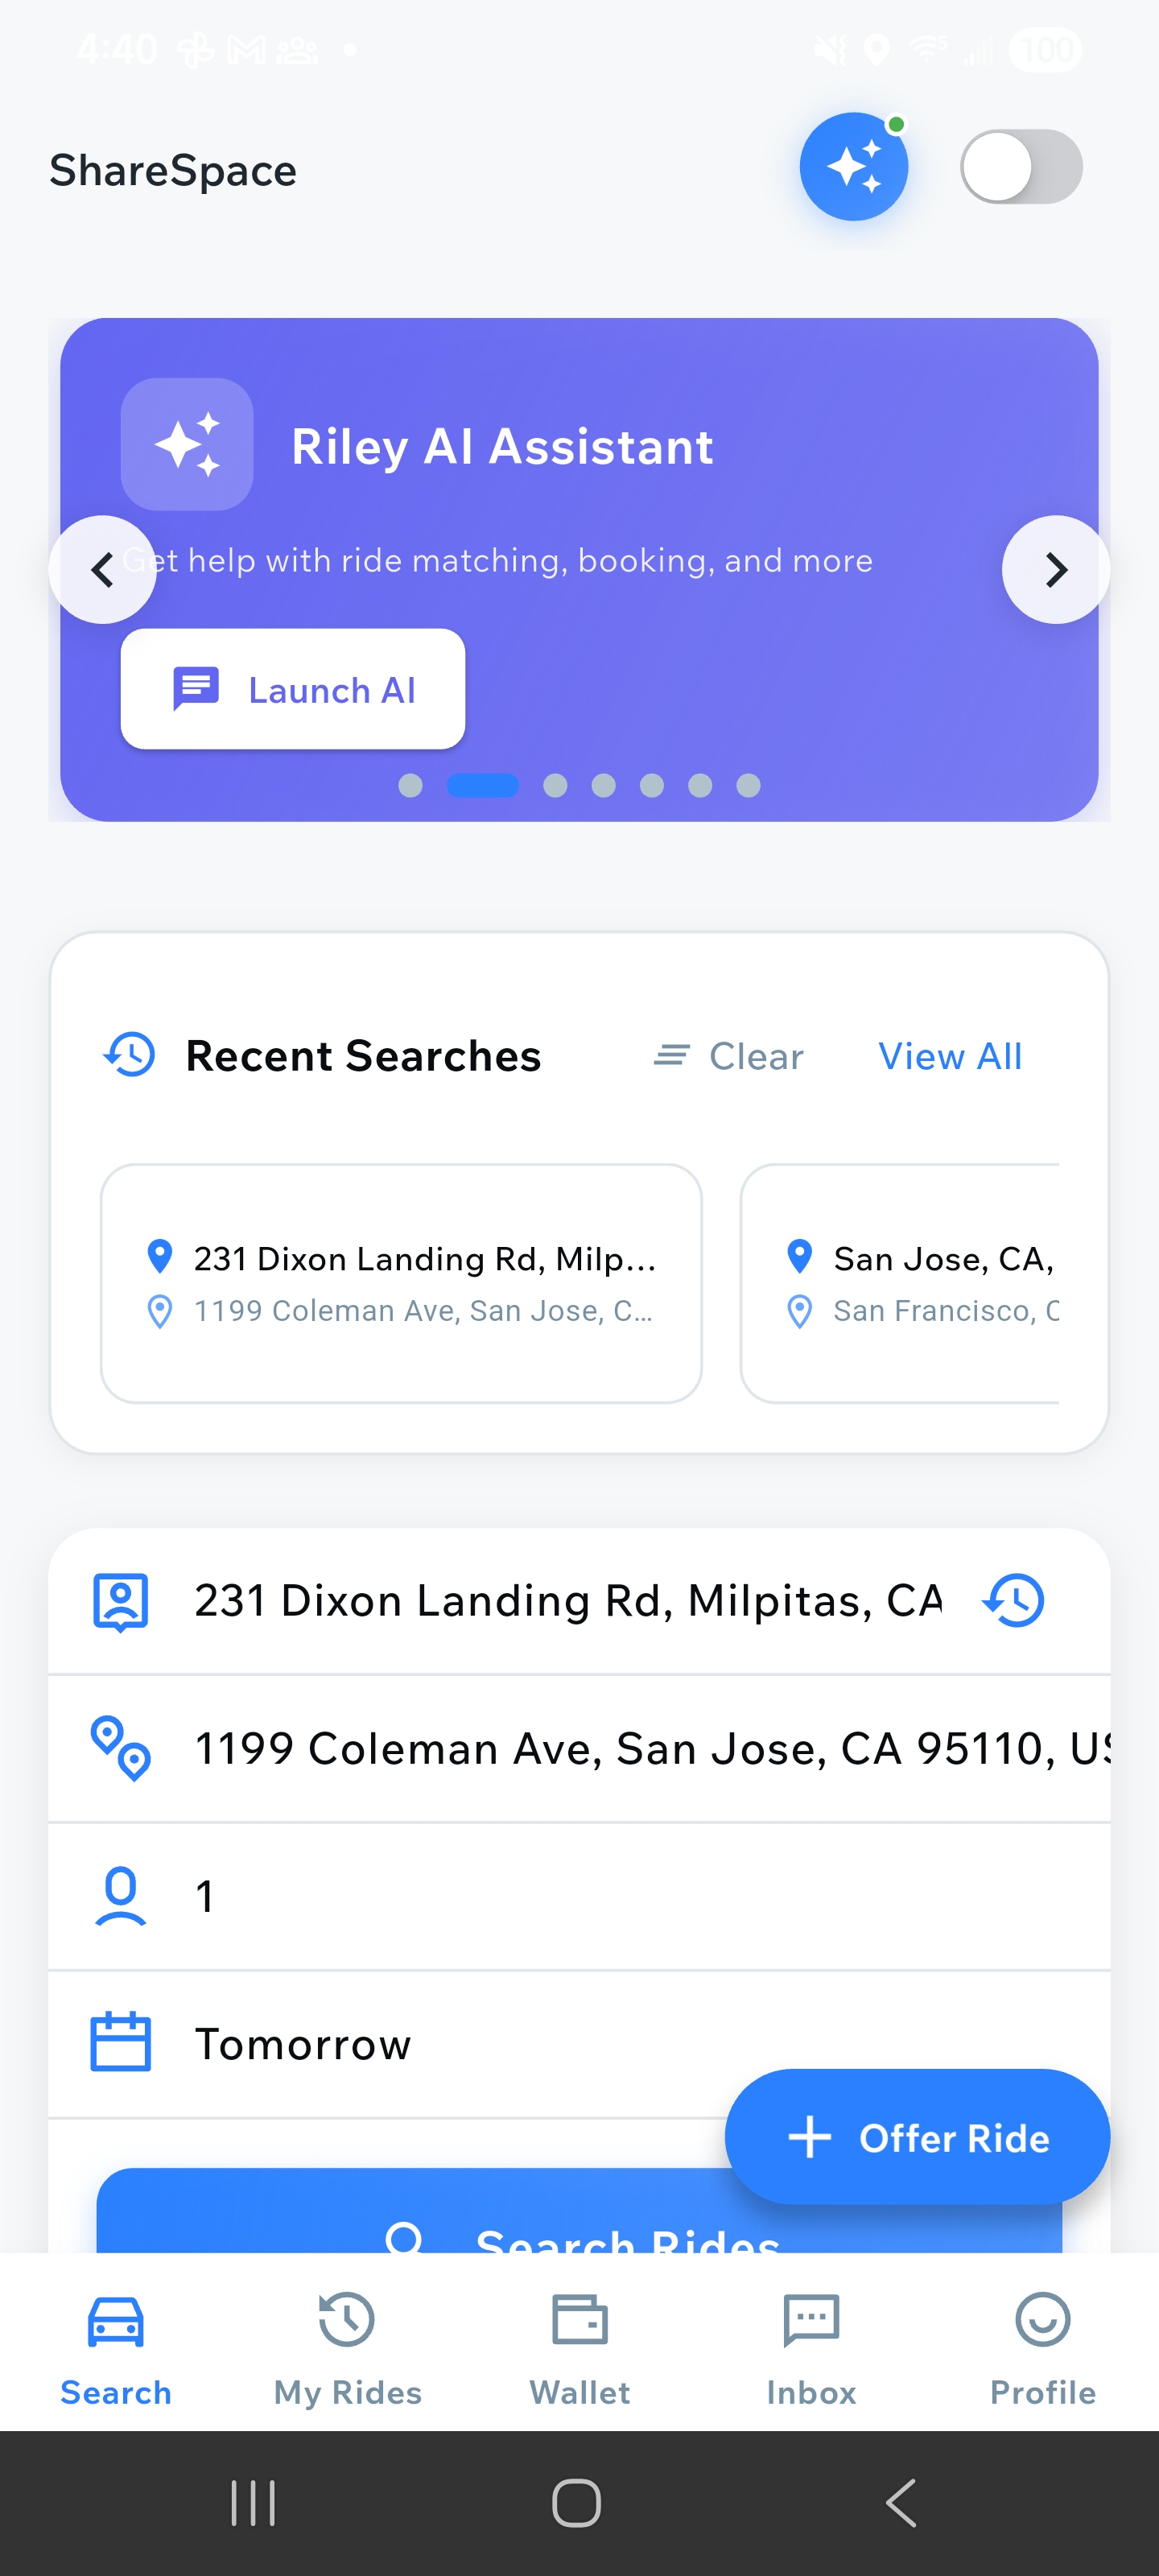
Navigate to Search Rides
After logging in, you'll see the main screen with "Welcome to Carpool" banner. Tap on the "Search Rides" button (blue button with magnifying glass icon) or navigate to the Search tab from the bottom menu.
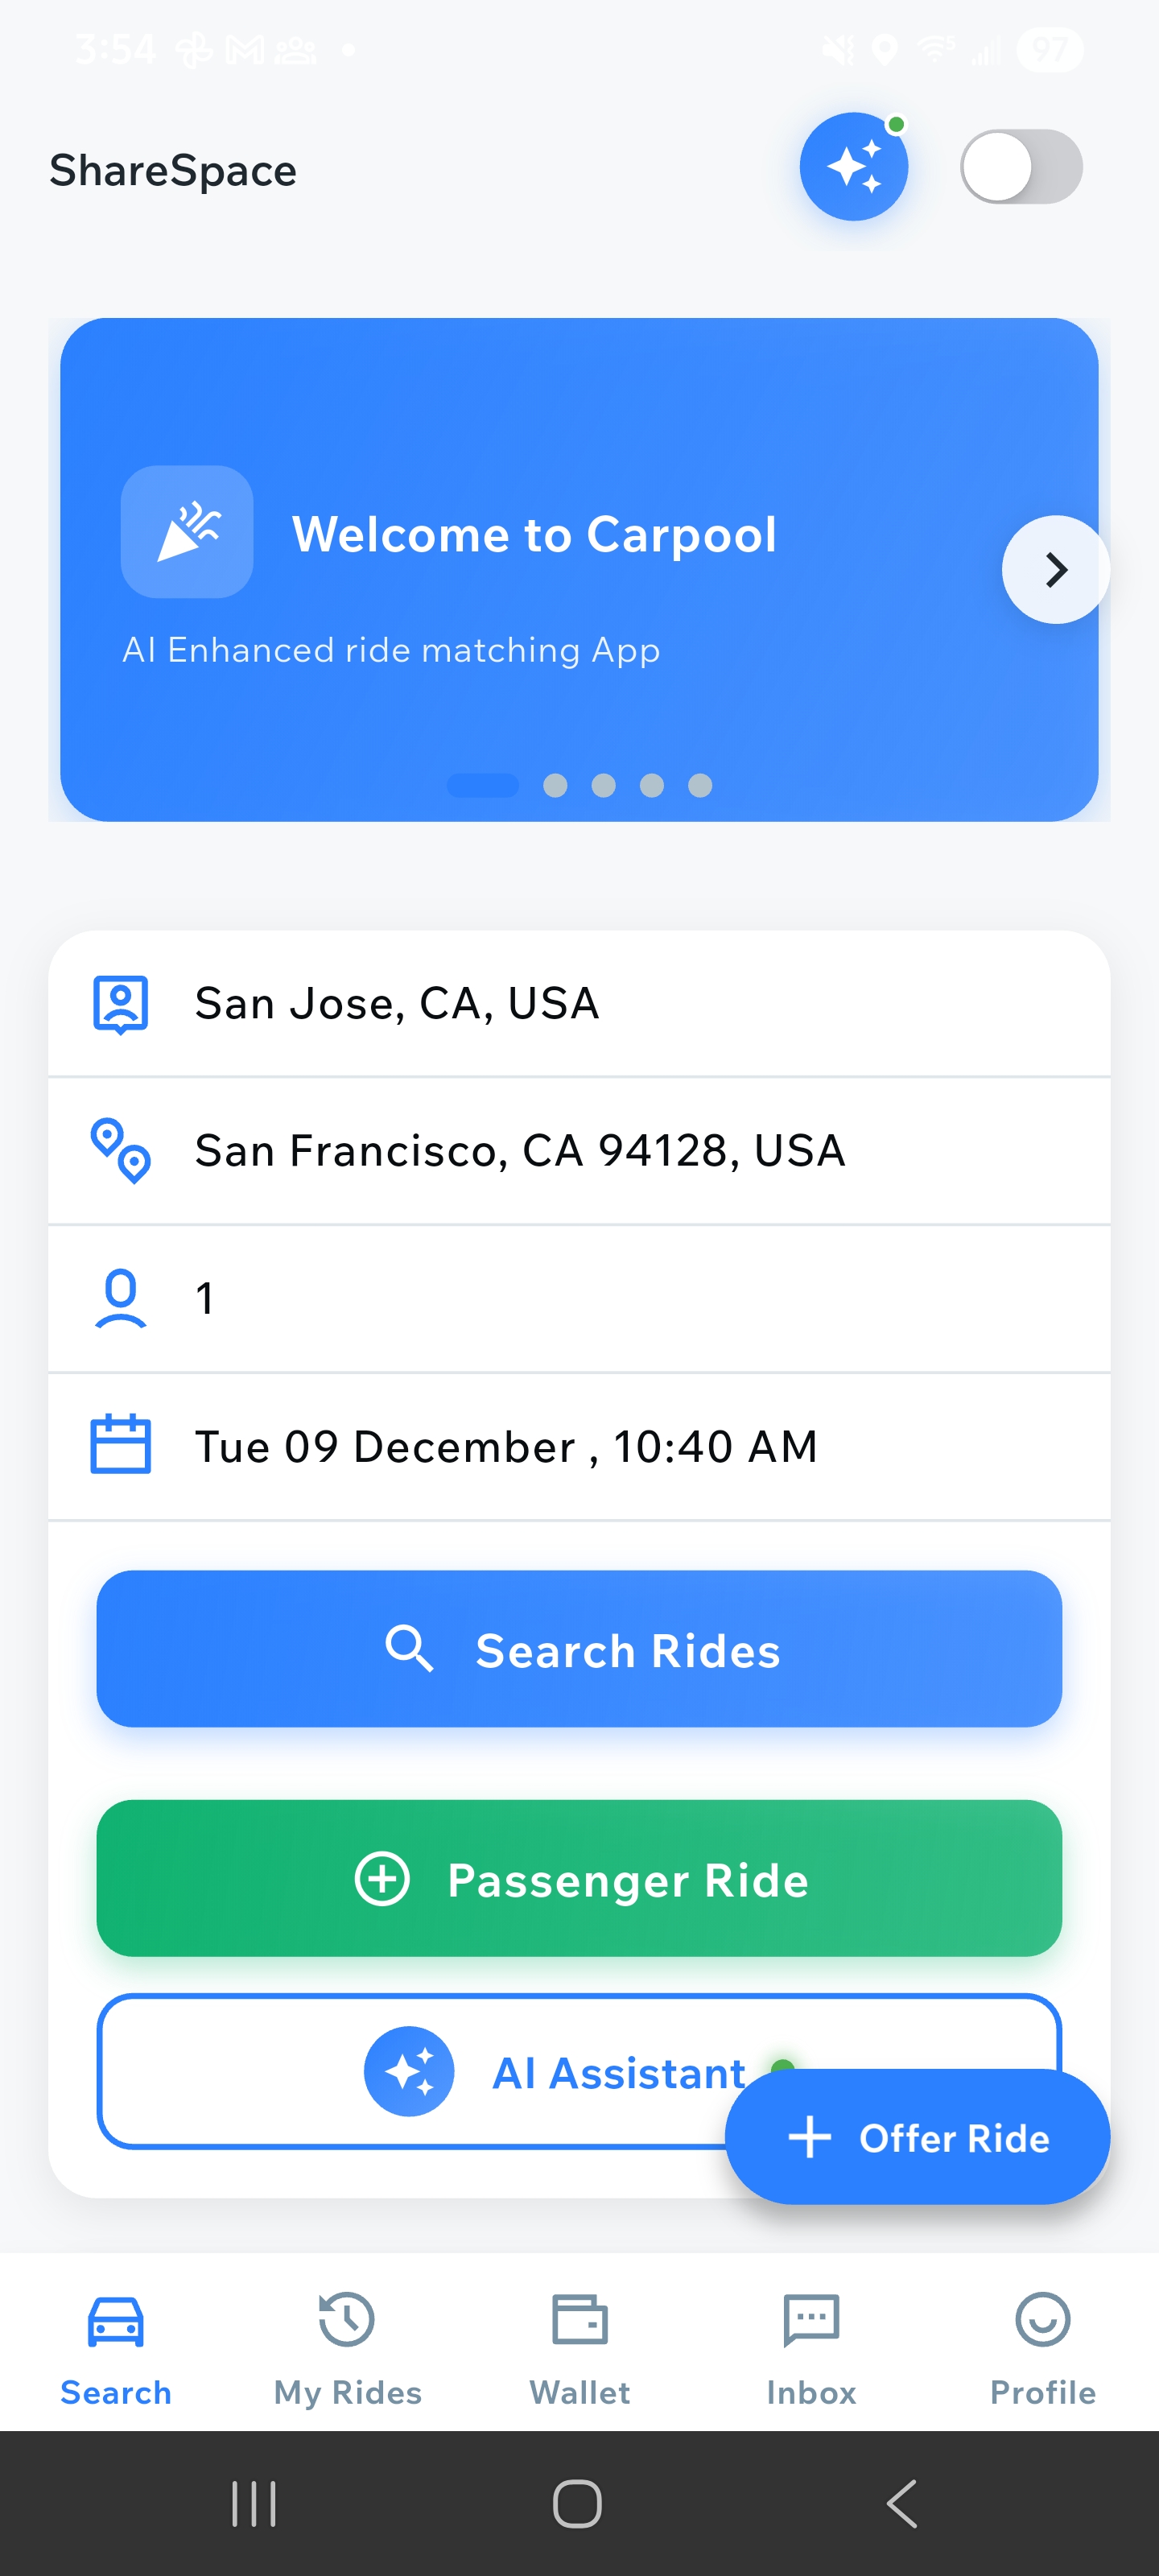
Main screen showing Search Rides button and ride input fields
Enter Your Ride Details
On the Search Rides screen, you'll see input fields for pickup location, destination, number of passengers, and date/time. Enter your details or use the calendar button to select a date. You can also use "Auto Passenger Ride" for AI-assisted matching.
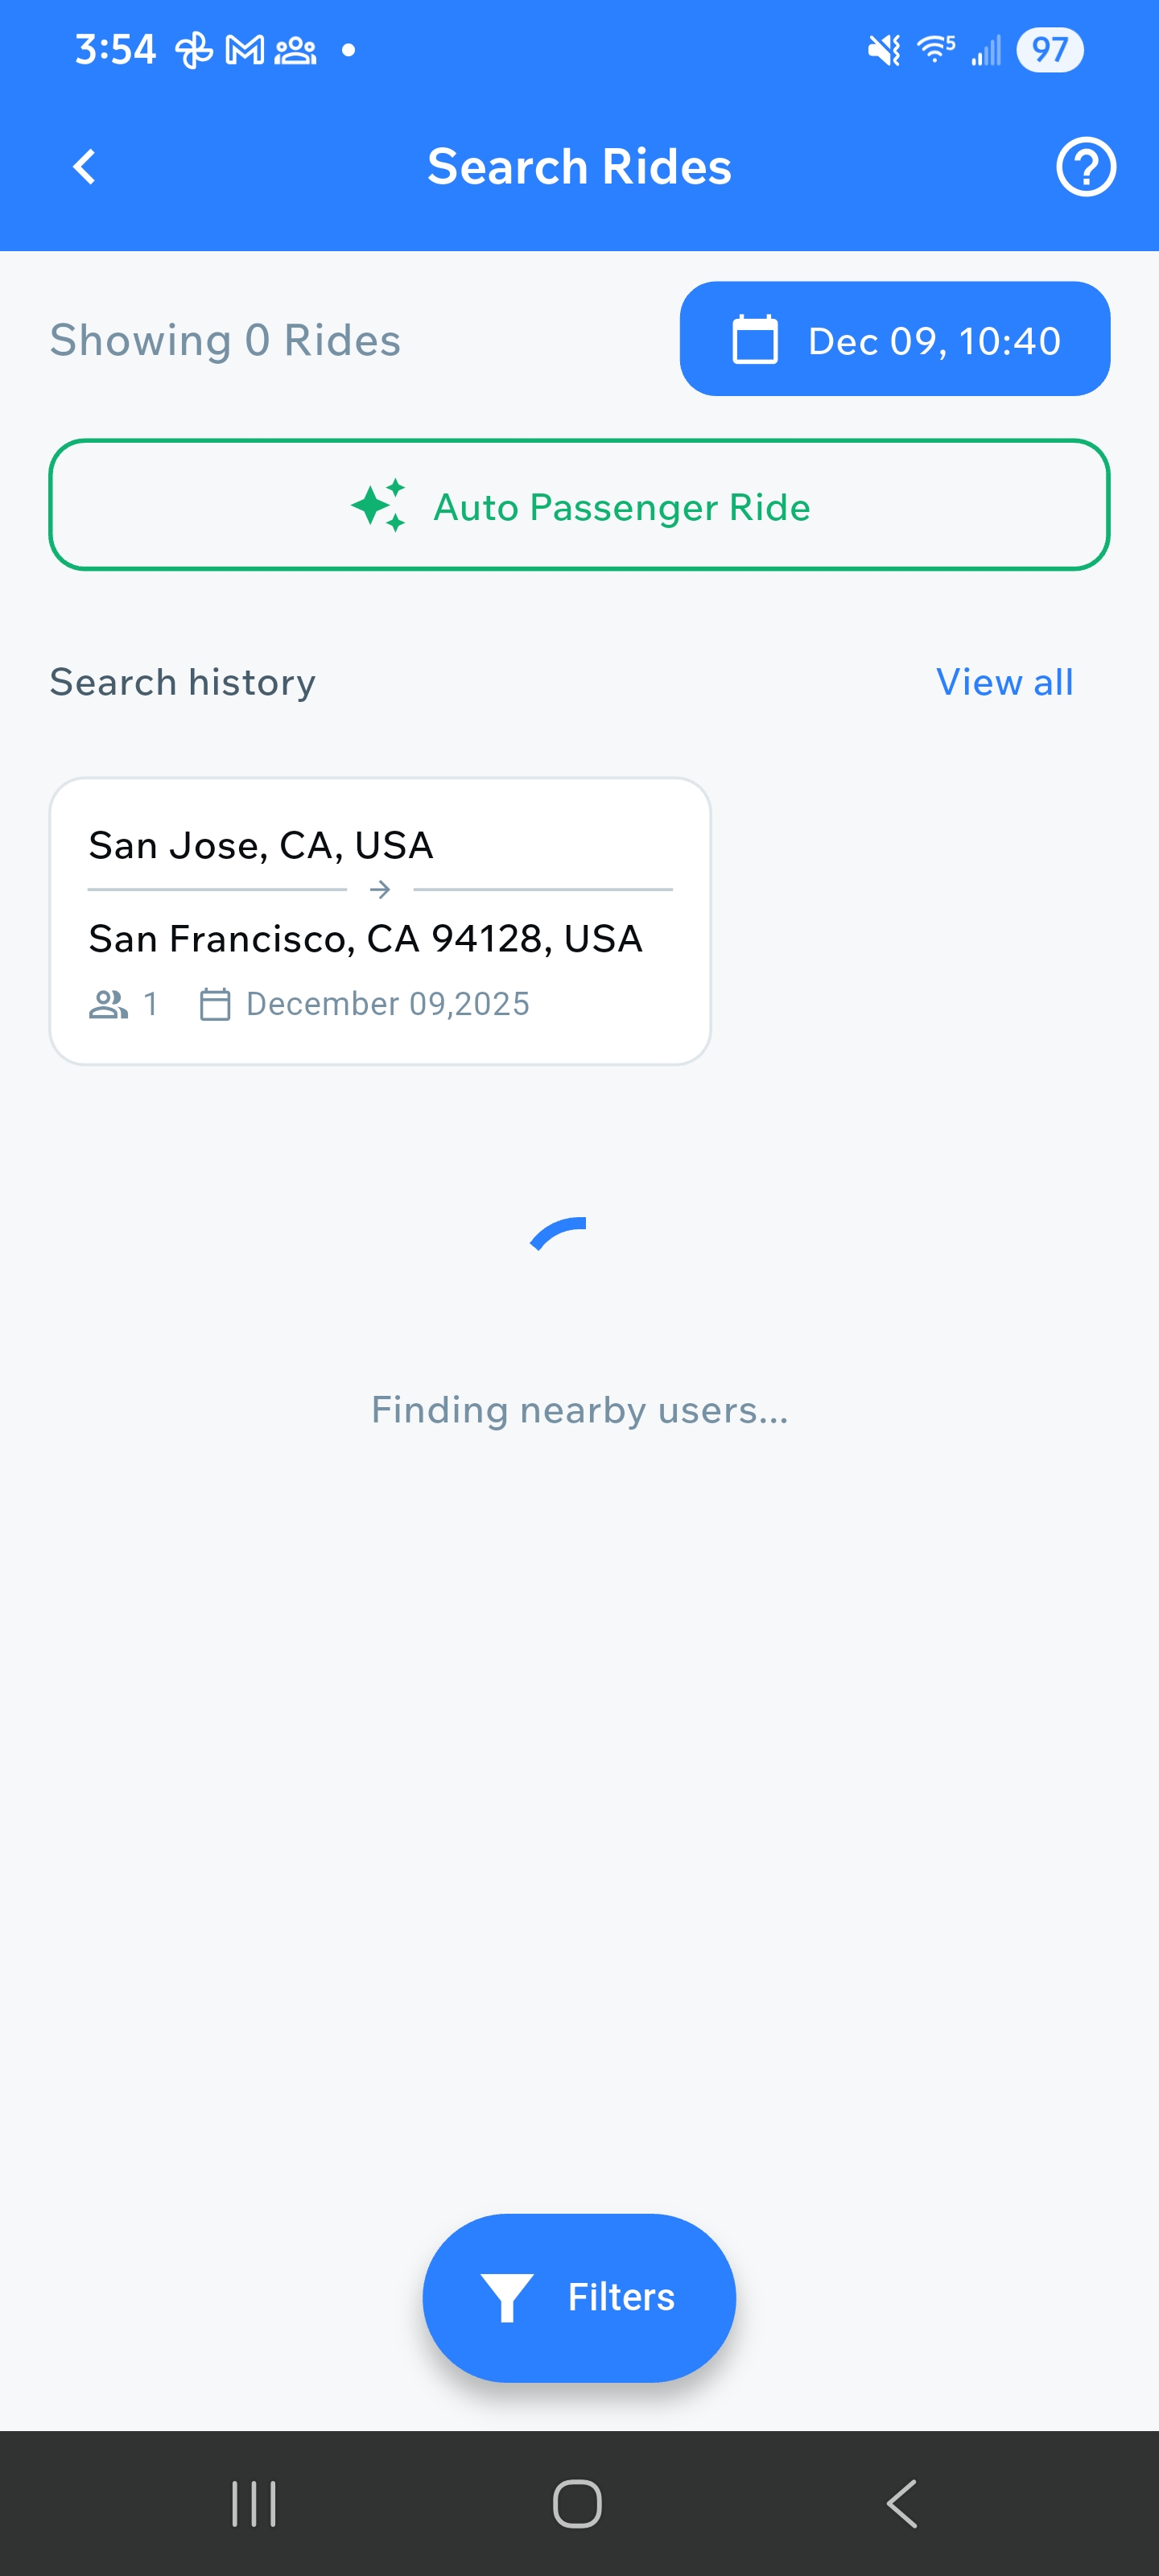
Search Rides screen with input fields and search history
Browse Available Rides
After entering your details, the app will show you available rides matching your criteria. You can see the route (pickup to destination), price per seat, date and time, driver information, ratings, and route details with walking distances.
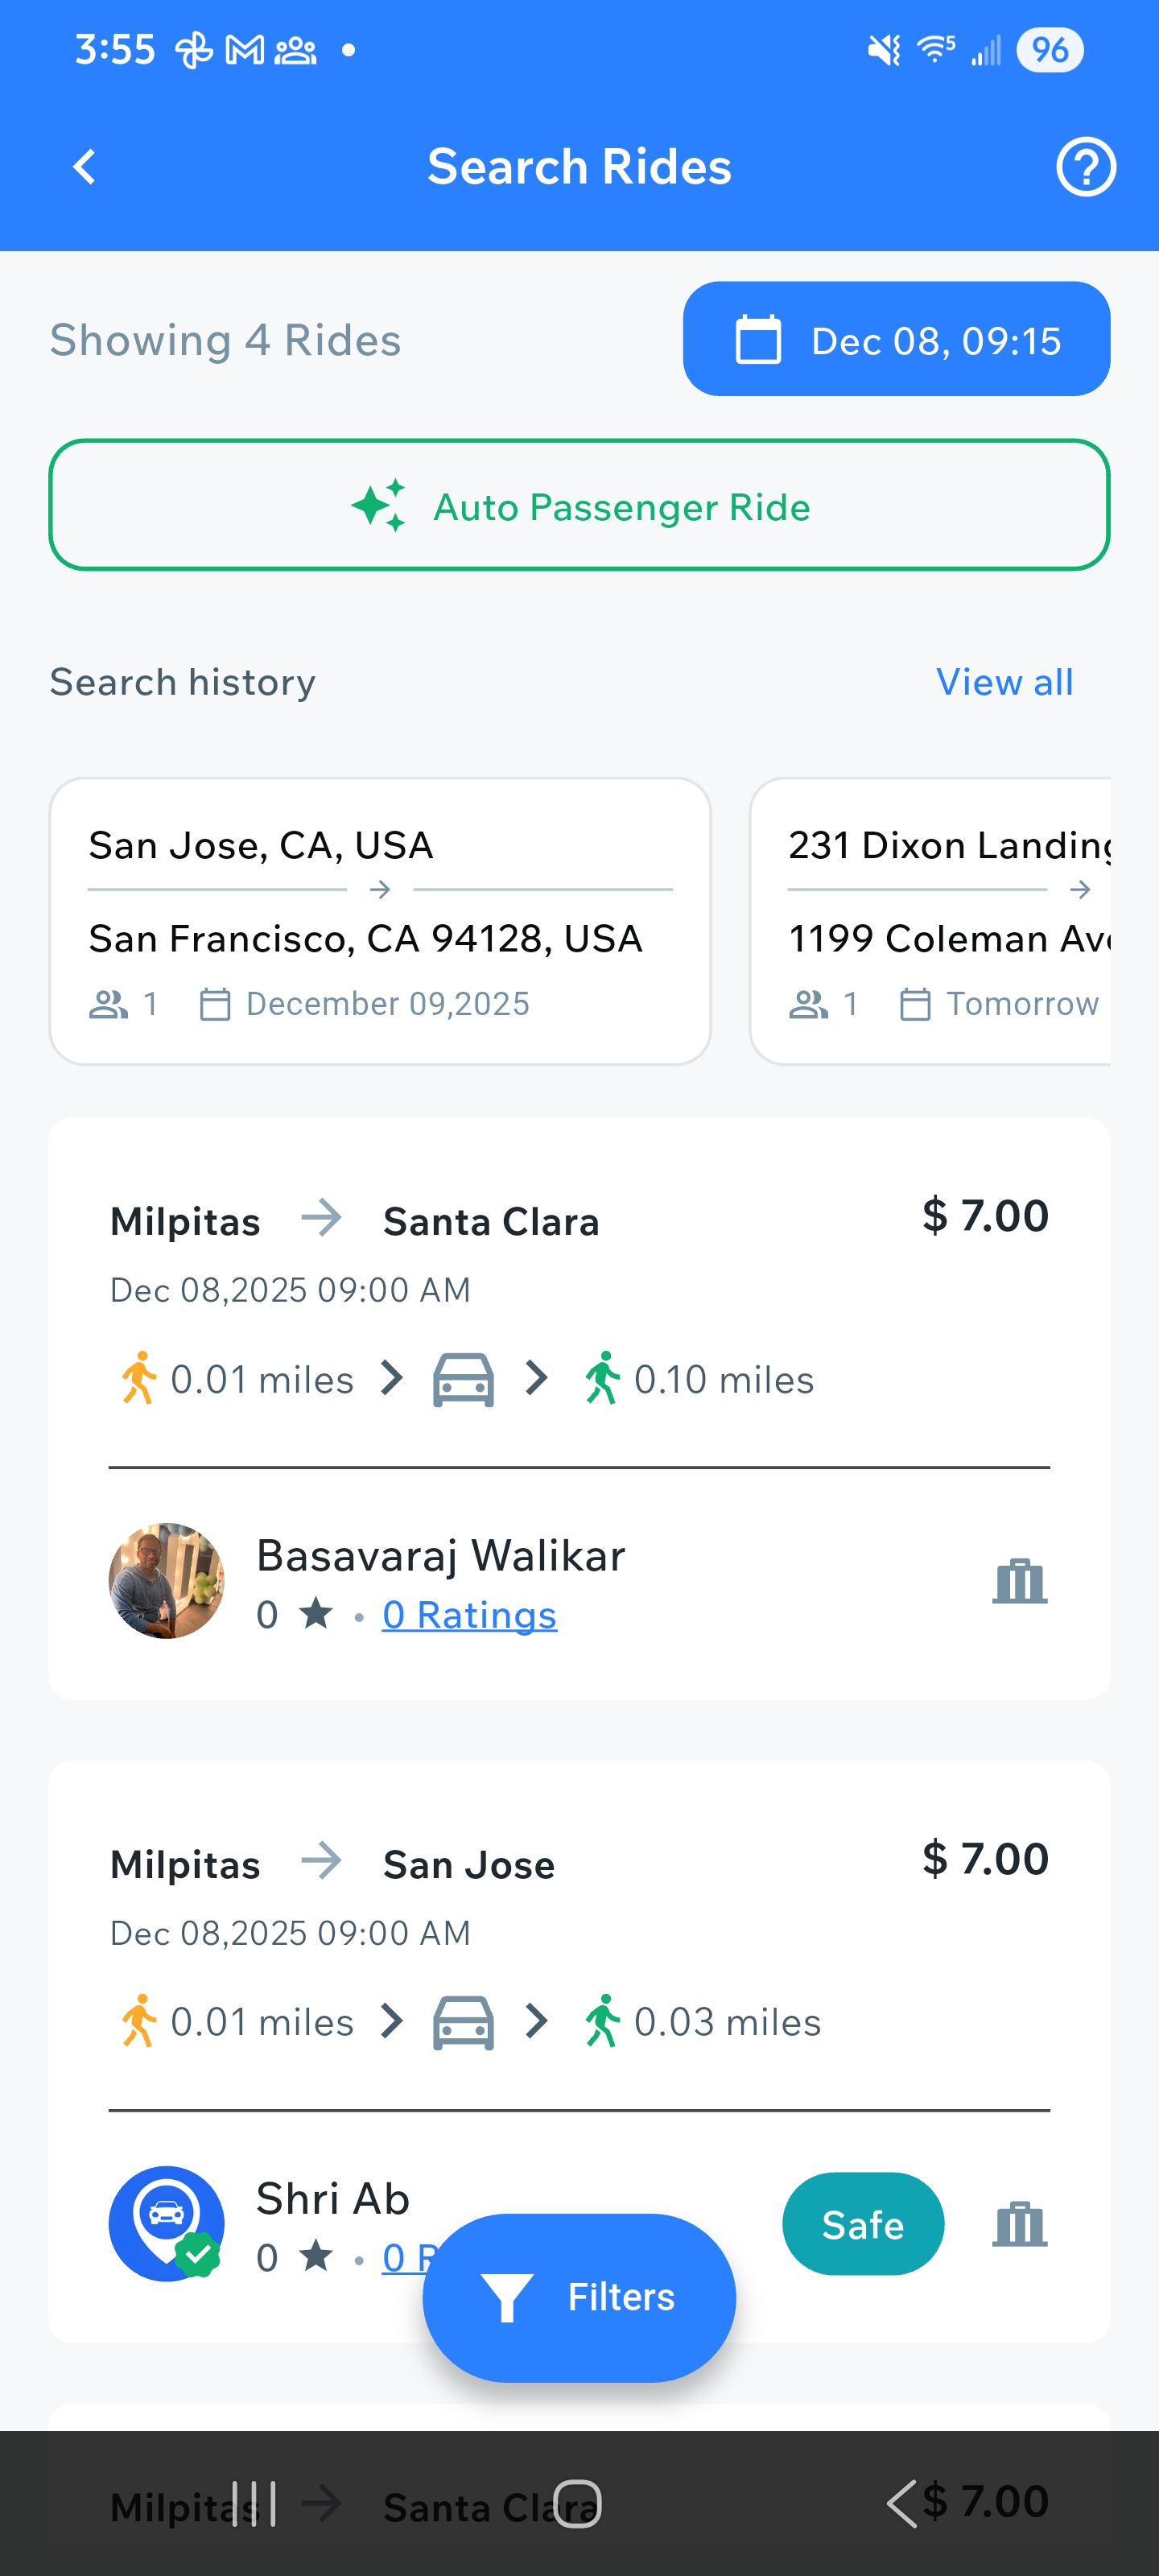
List of available rides with driver details and pricing
Select and Request a Ride
Tap on a ride card to view more details. You can see the driver's profile, ratings, and route information. Tap "Request Ride" or the booking button to send a request to the driver. The driver will be notified and can approve or reject your request.
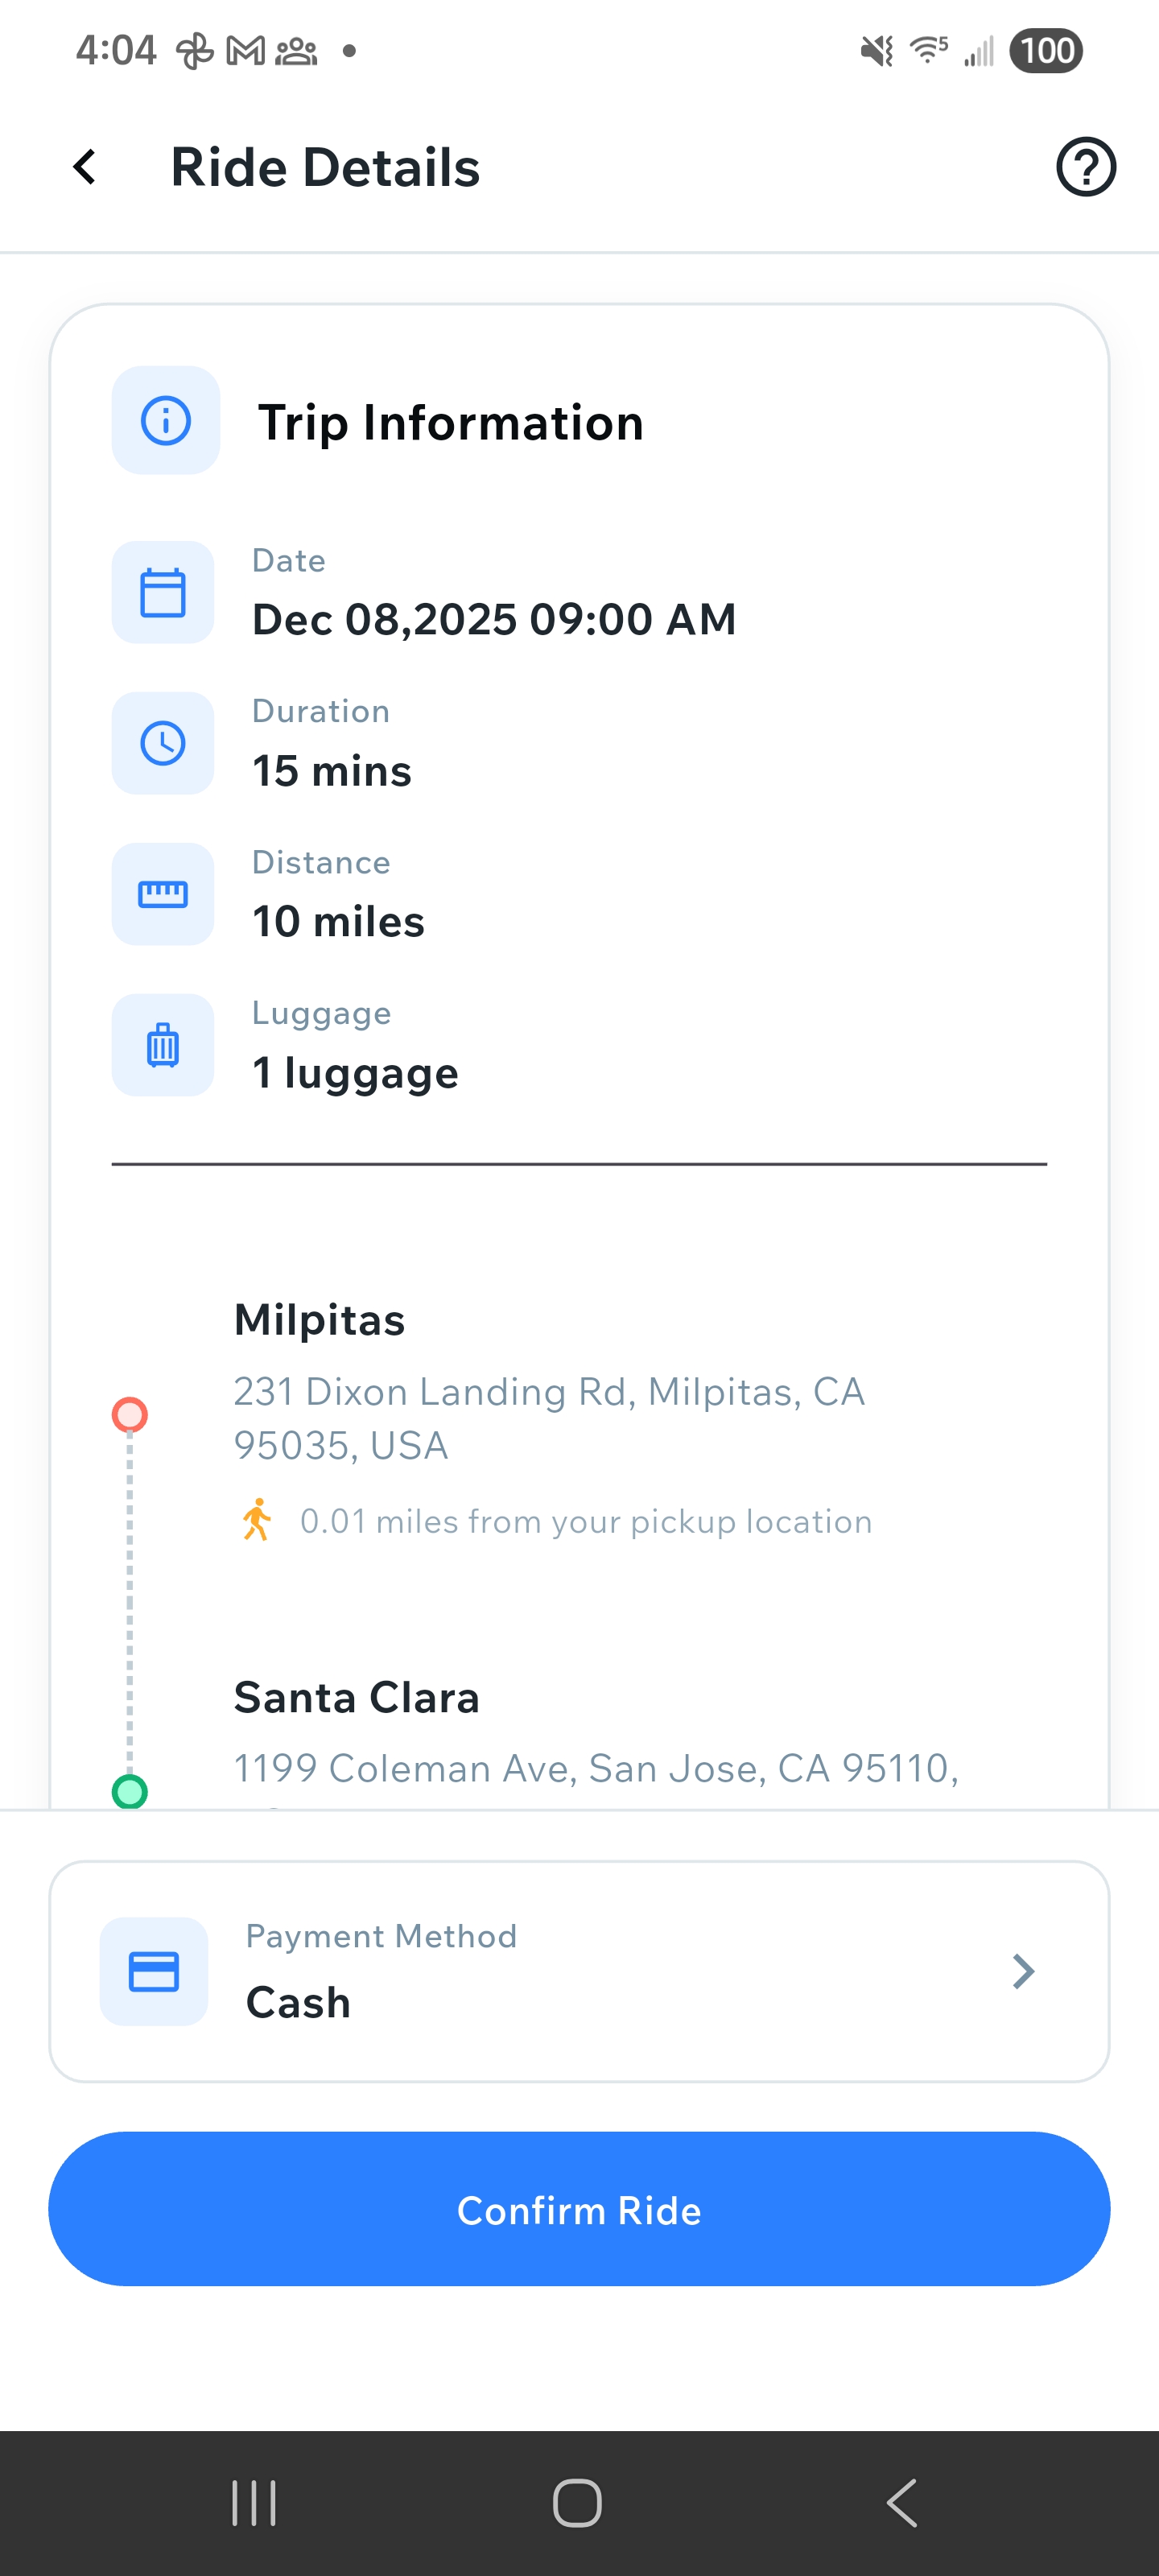
Detailed ride view with request option
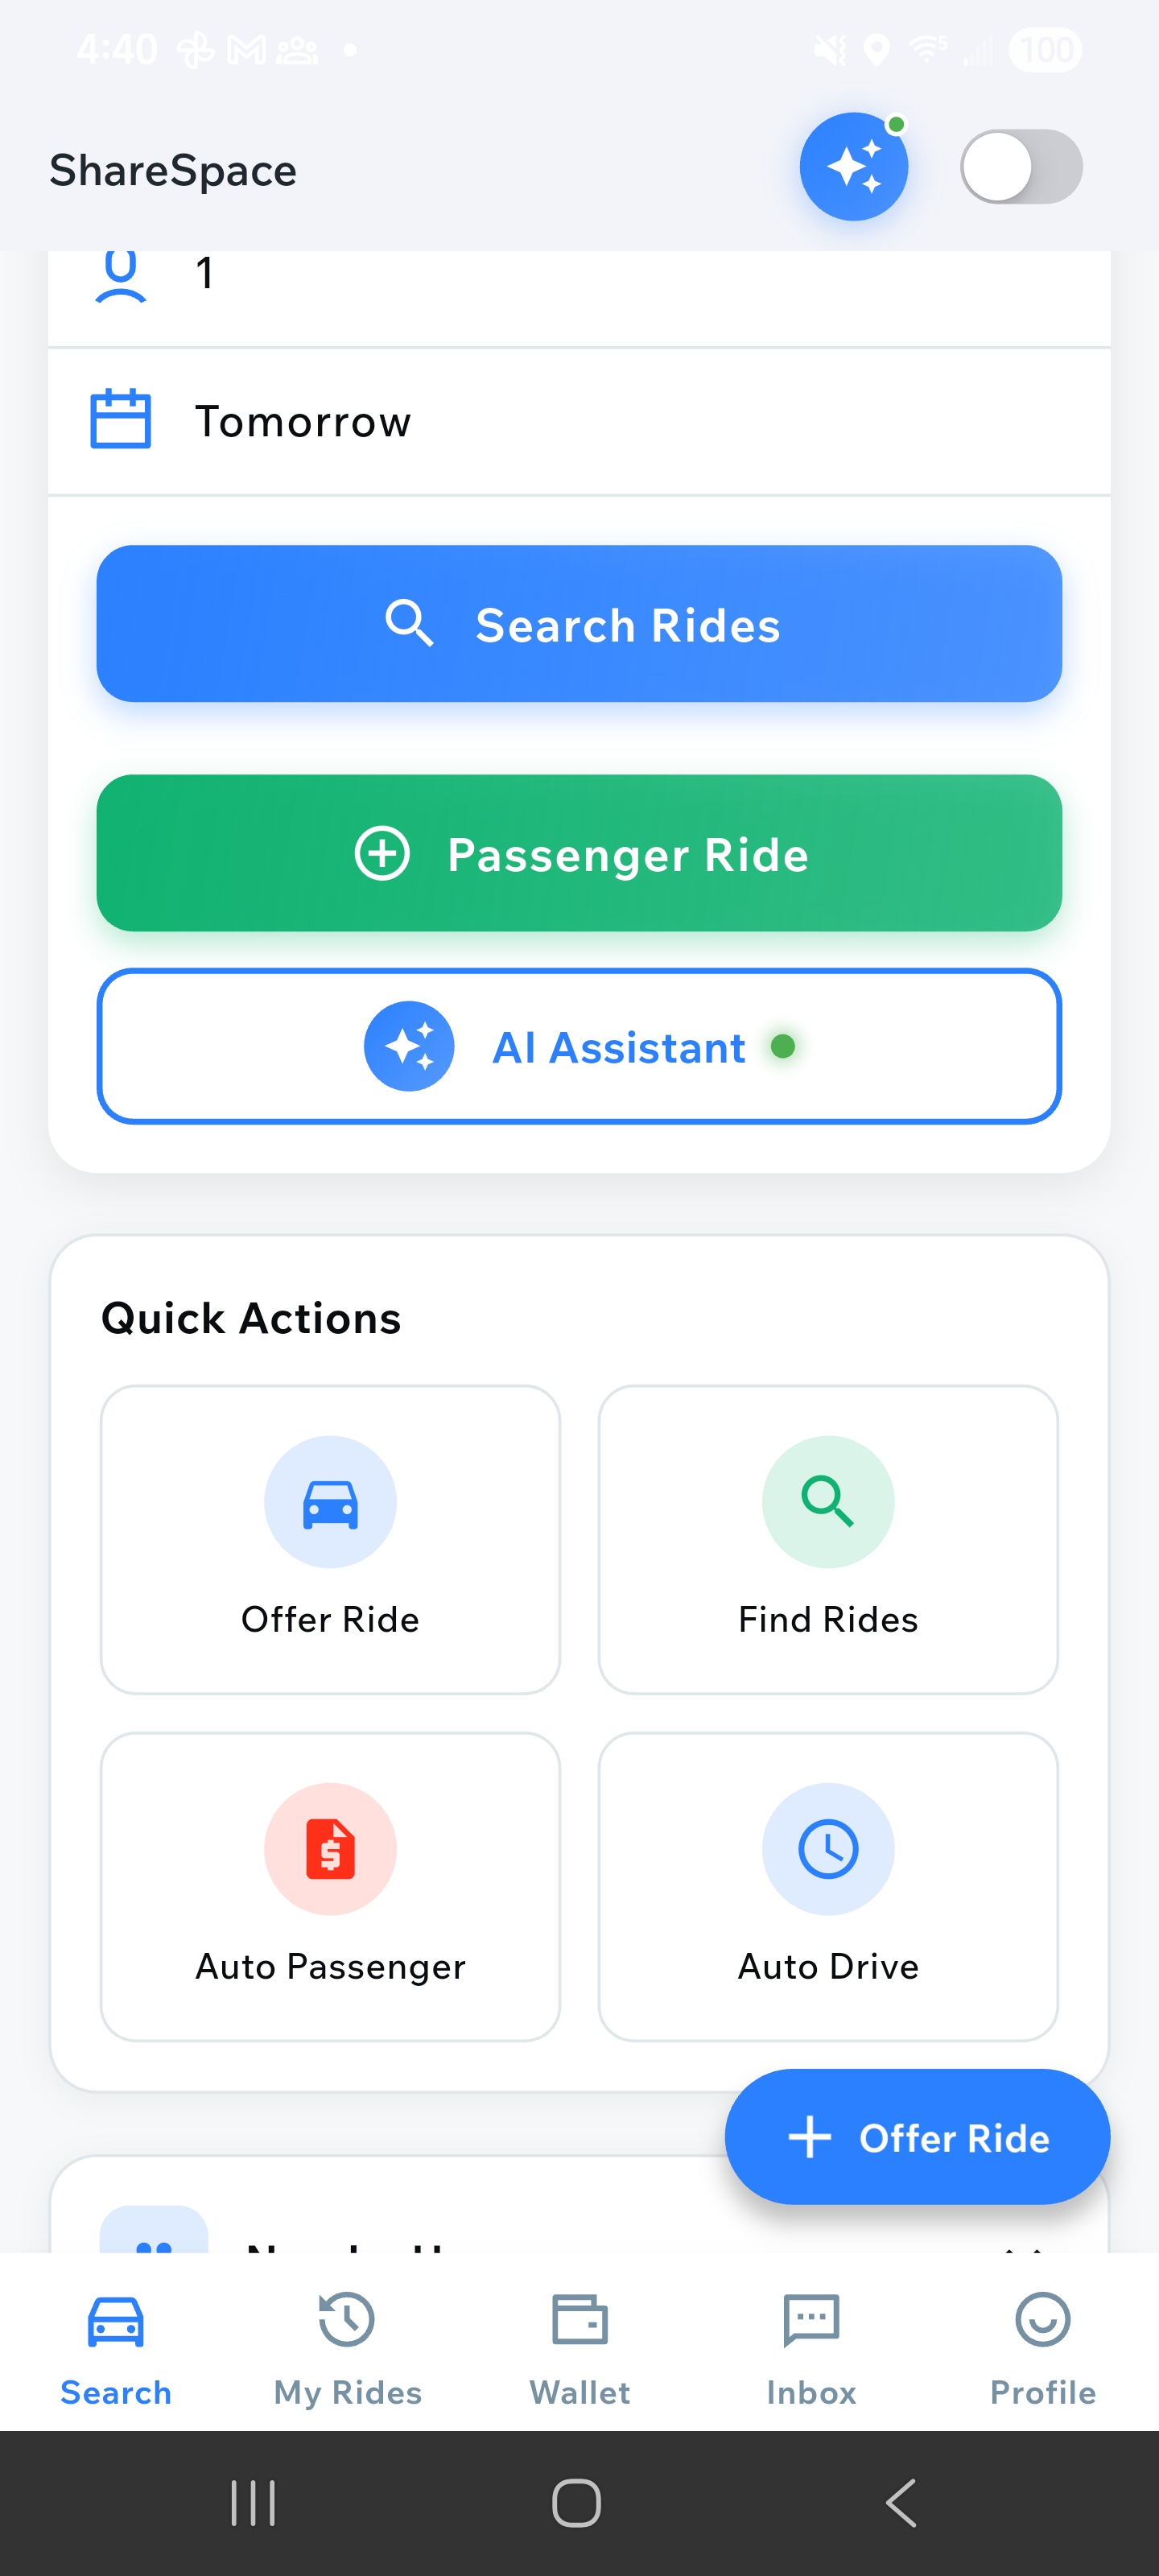
How to Offer a Ride
Navigate to Offer Ride
From the main screen, tap on the "+ Offer Ride" floating button or navigate to the "Offer Ride" option from the main menu. You can also access it from the bottom navigation bar.

Main screen showing Offer Ride button
Enter Route Details
On the "Offer a ride" screen, enter your pickup location and drop-off destination. You can use the "Swap" button to reverse the locations. The app will automatically calculate the distance, estimated time, and price.
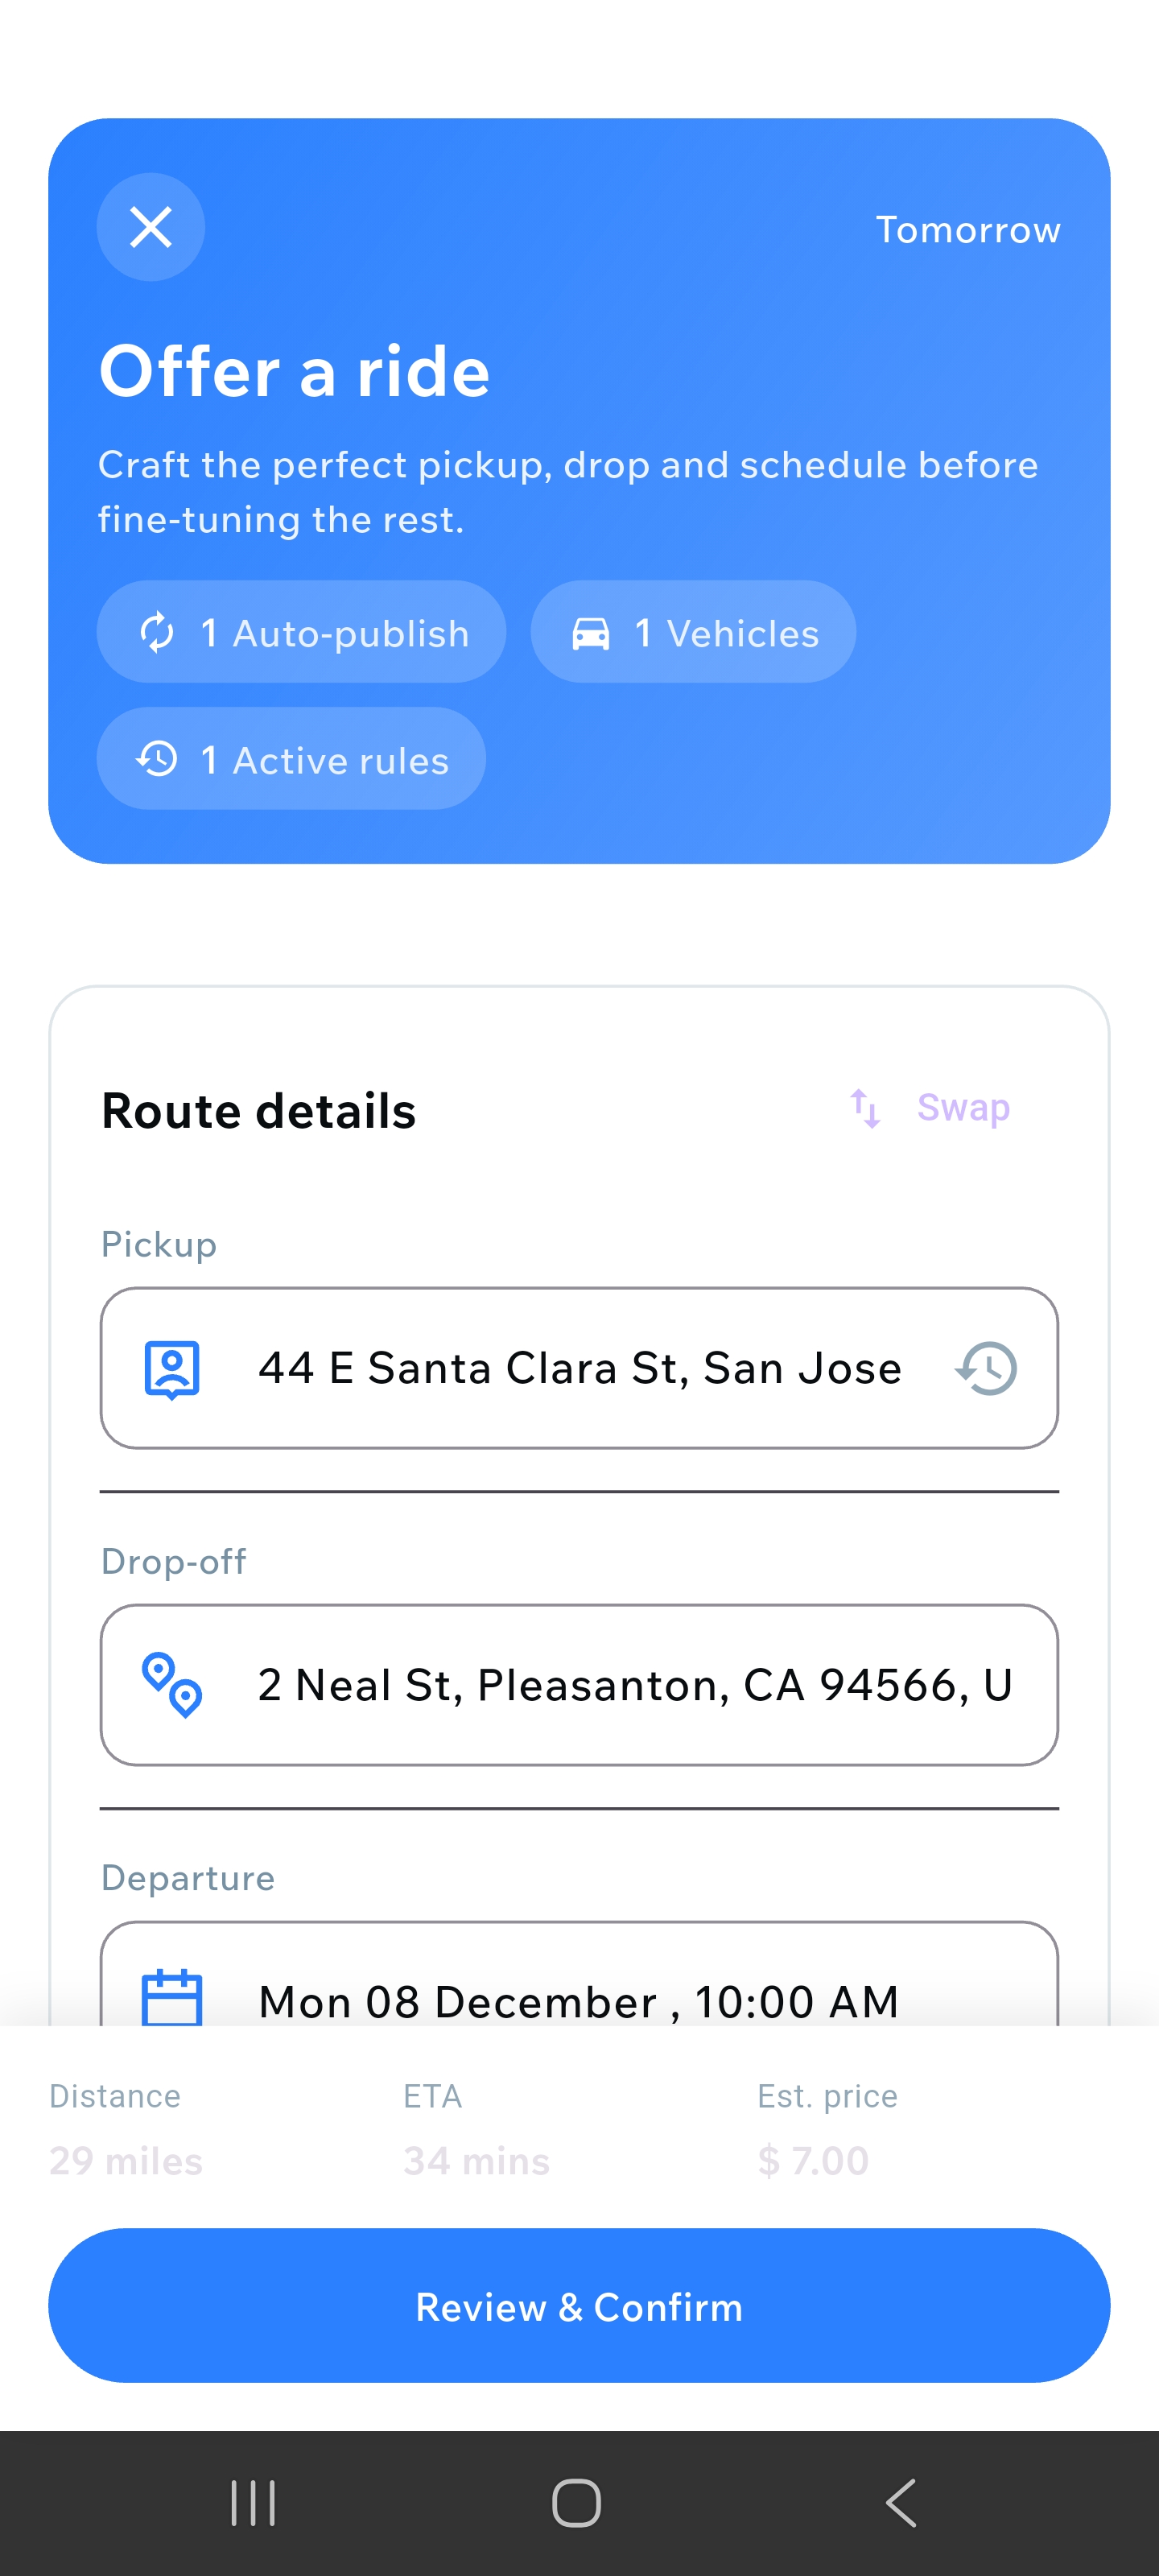
Route details screen with pickup, drop-off, and departure time
Set Departure Time
Select your departure date and time. You can choose "Tomorrow" or select a specific date from the calendar. The app will show you the estimated arrival time and distance.
Setting departure date and time
Review and Confirm
Review all the details including route, distance, ETA, and estimated price. Once everything looks correct, tap "Review & Confirm" to publish your ride.
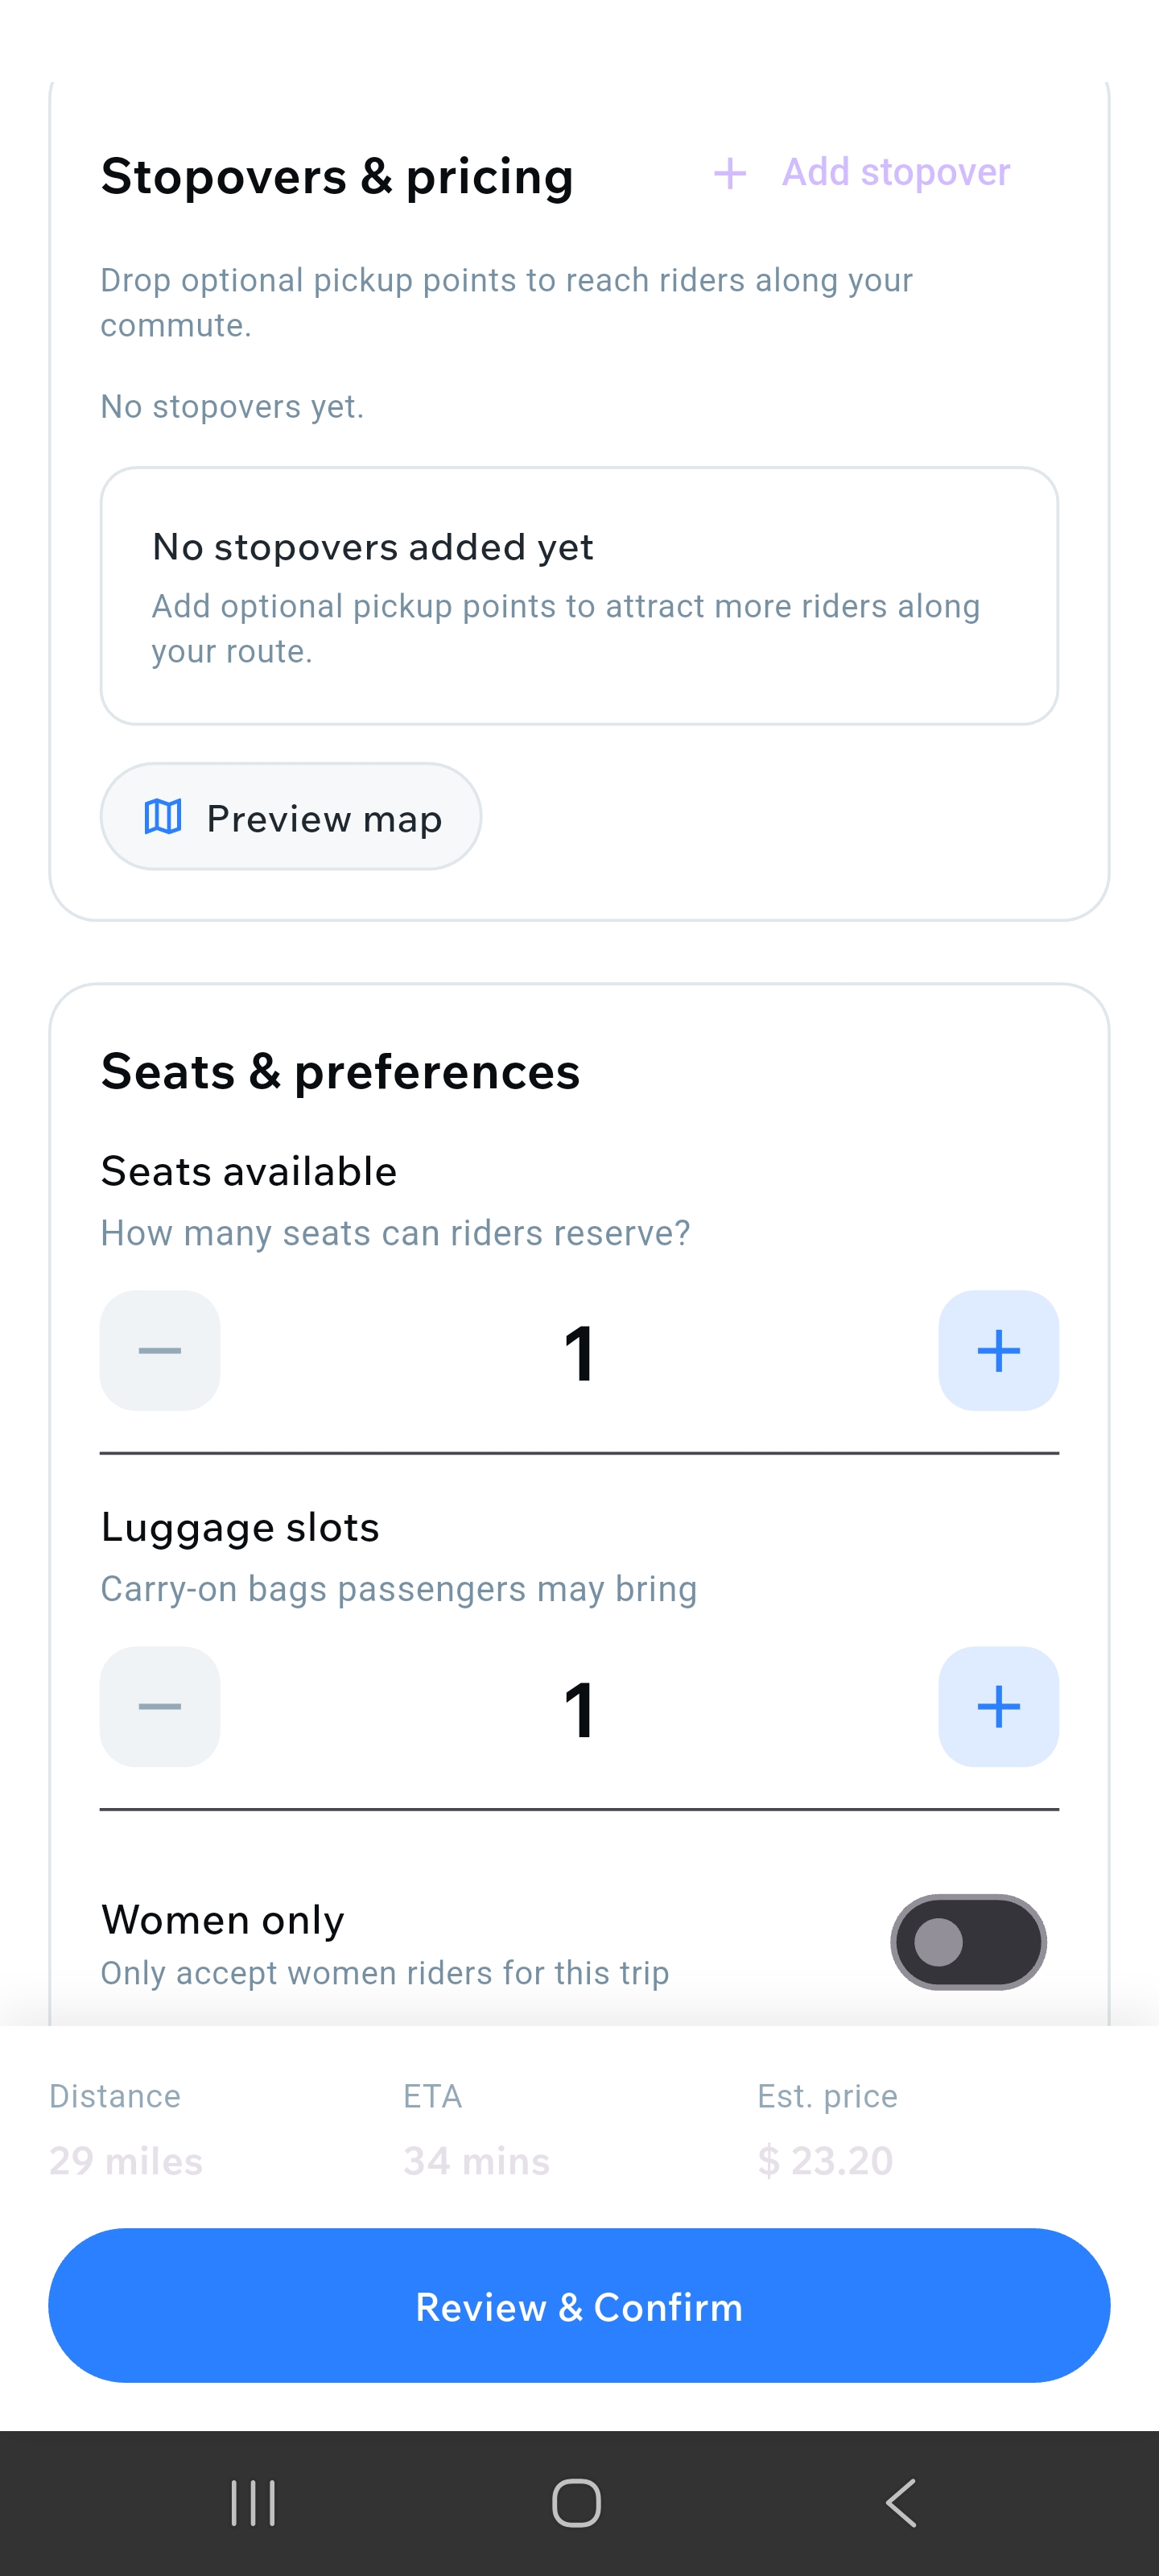
Review screen with summary and confirm button
View Your Published Rides
After publishing, you can view your offered rides in the "Your Trips" section under the "Offered" tab. Here you'll see all your published rides with their status, dates, and booking information.
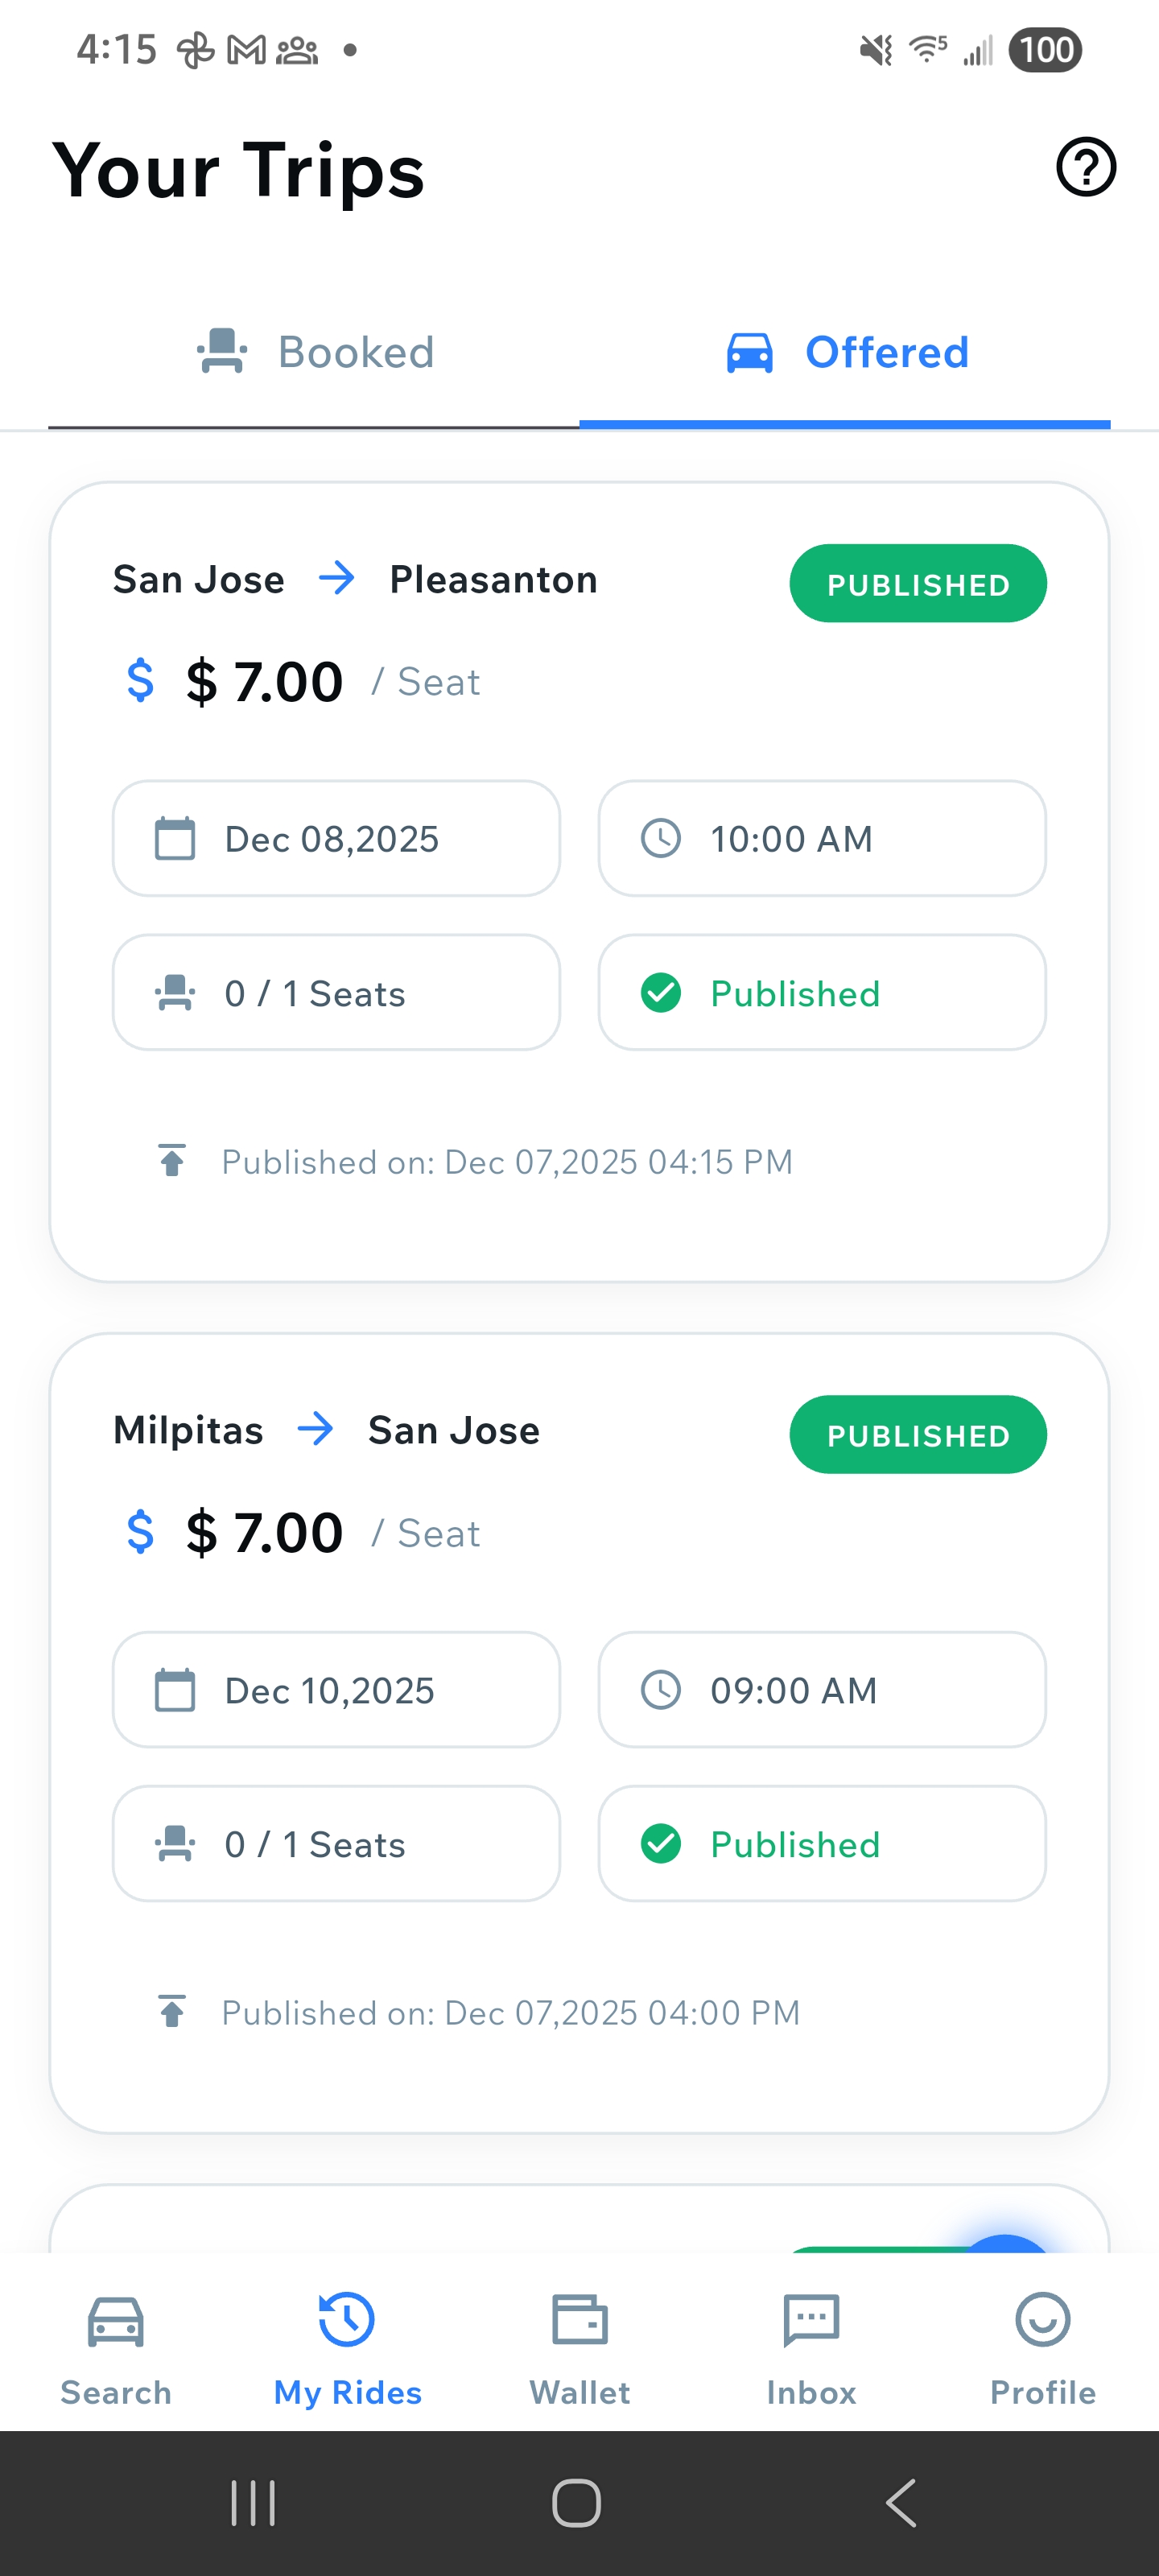
Your Trips screen showing published rides
How to Set Up Auto-Publish Ride
Access Auto-Publish Feature
You can access the Auto-Publish feature from multiple places in the app. This feature allows you to automatically publish rides on a daily schedule without manual intervention. Choose any of these access points:
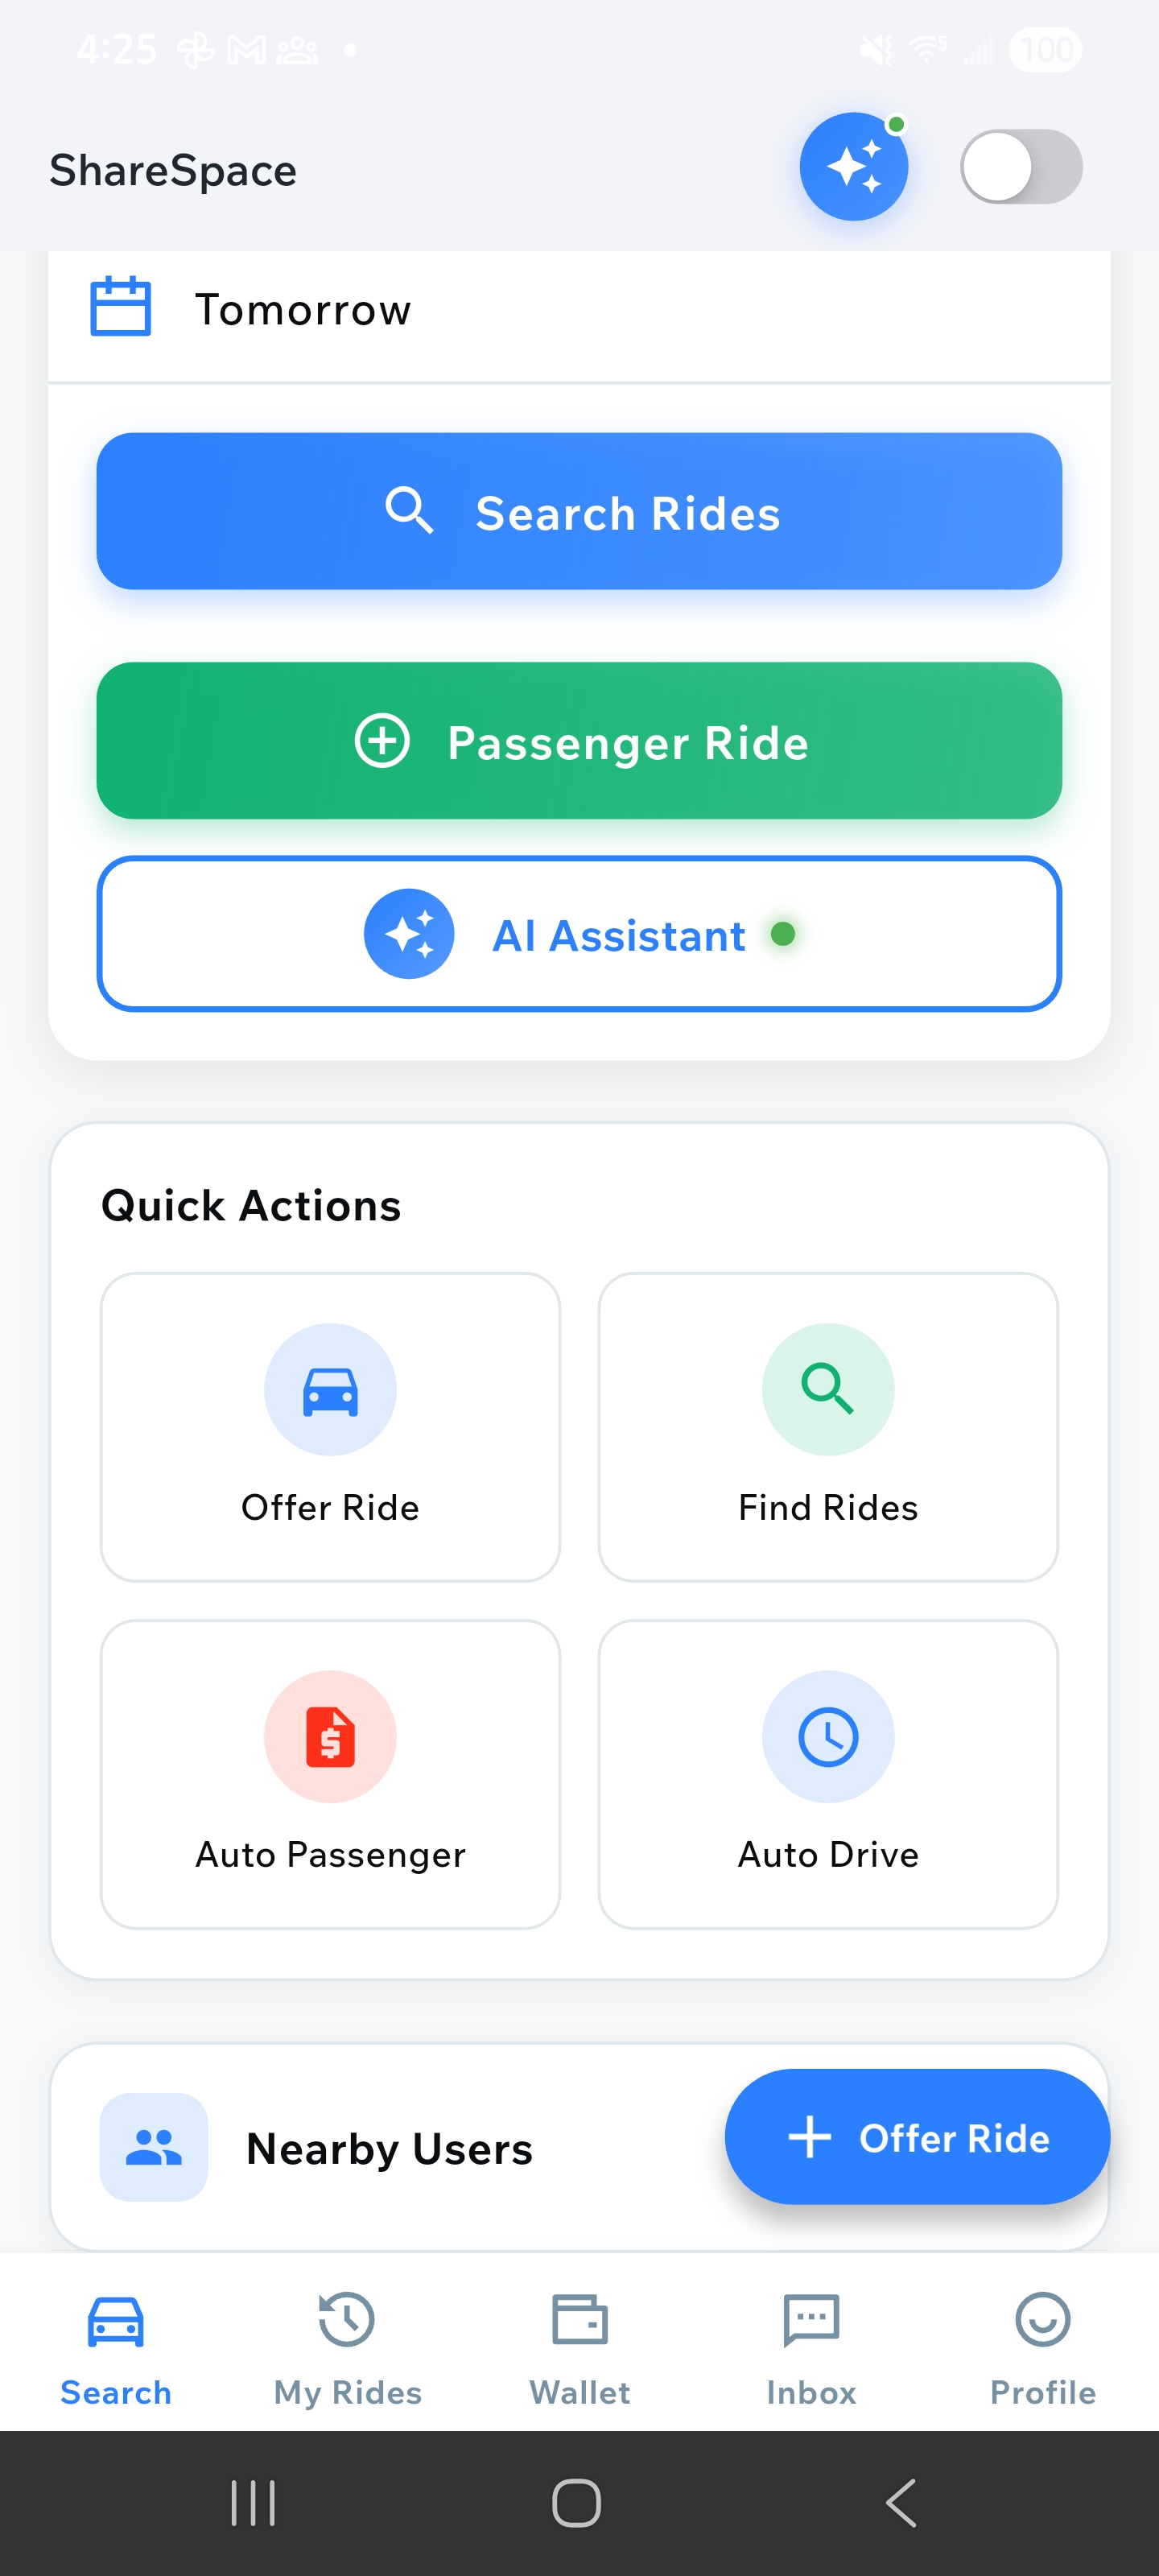
1. Home Page Quick Actions
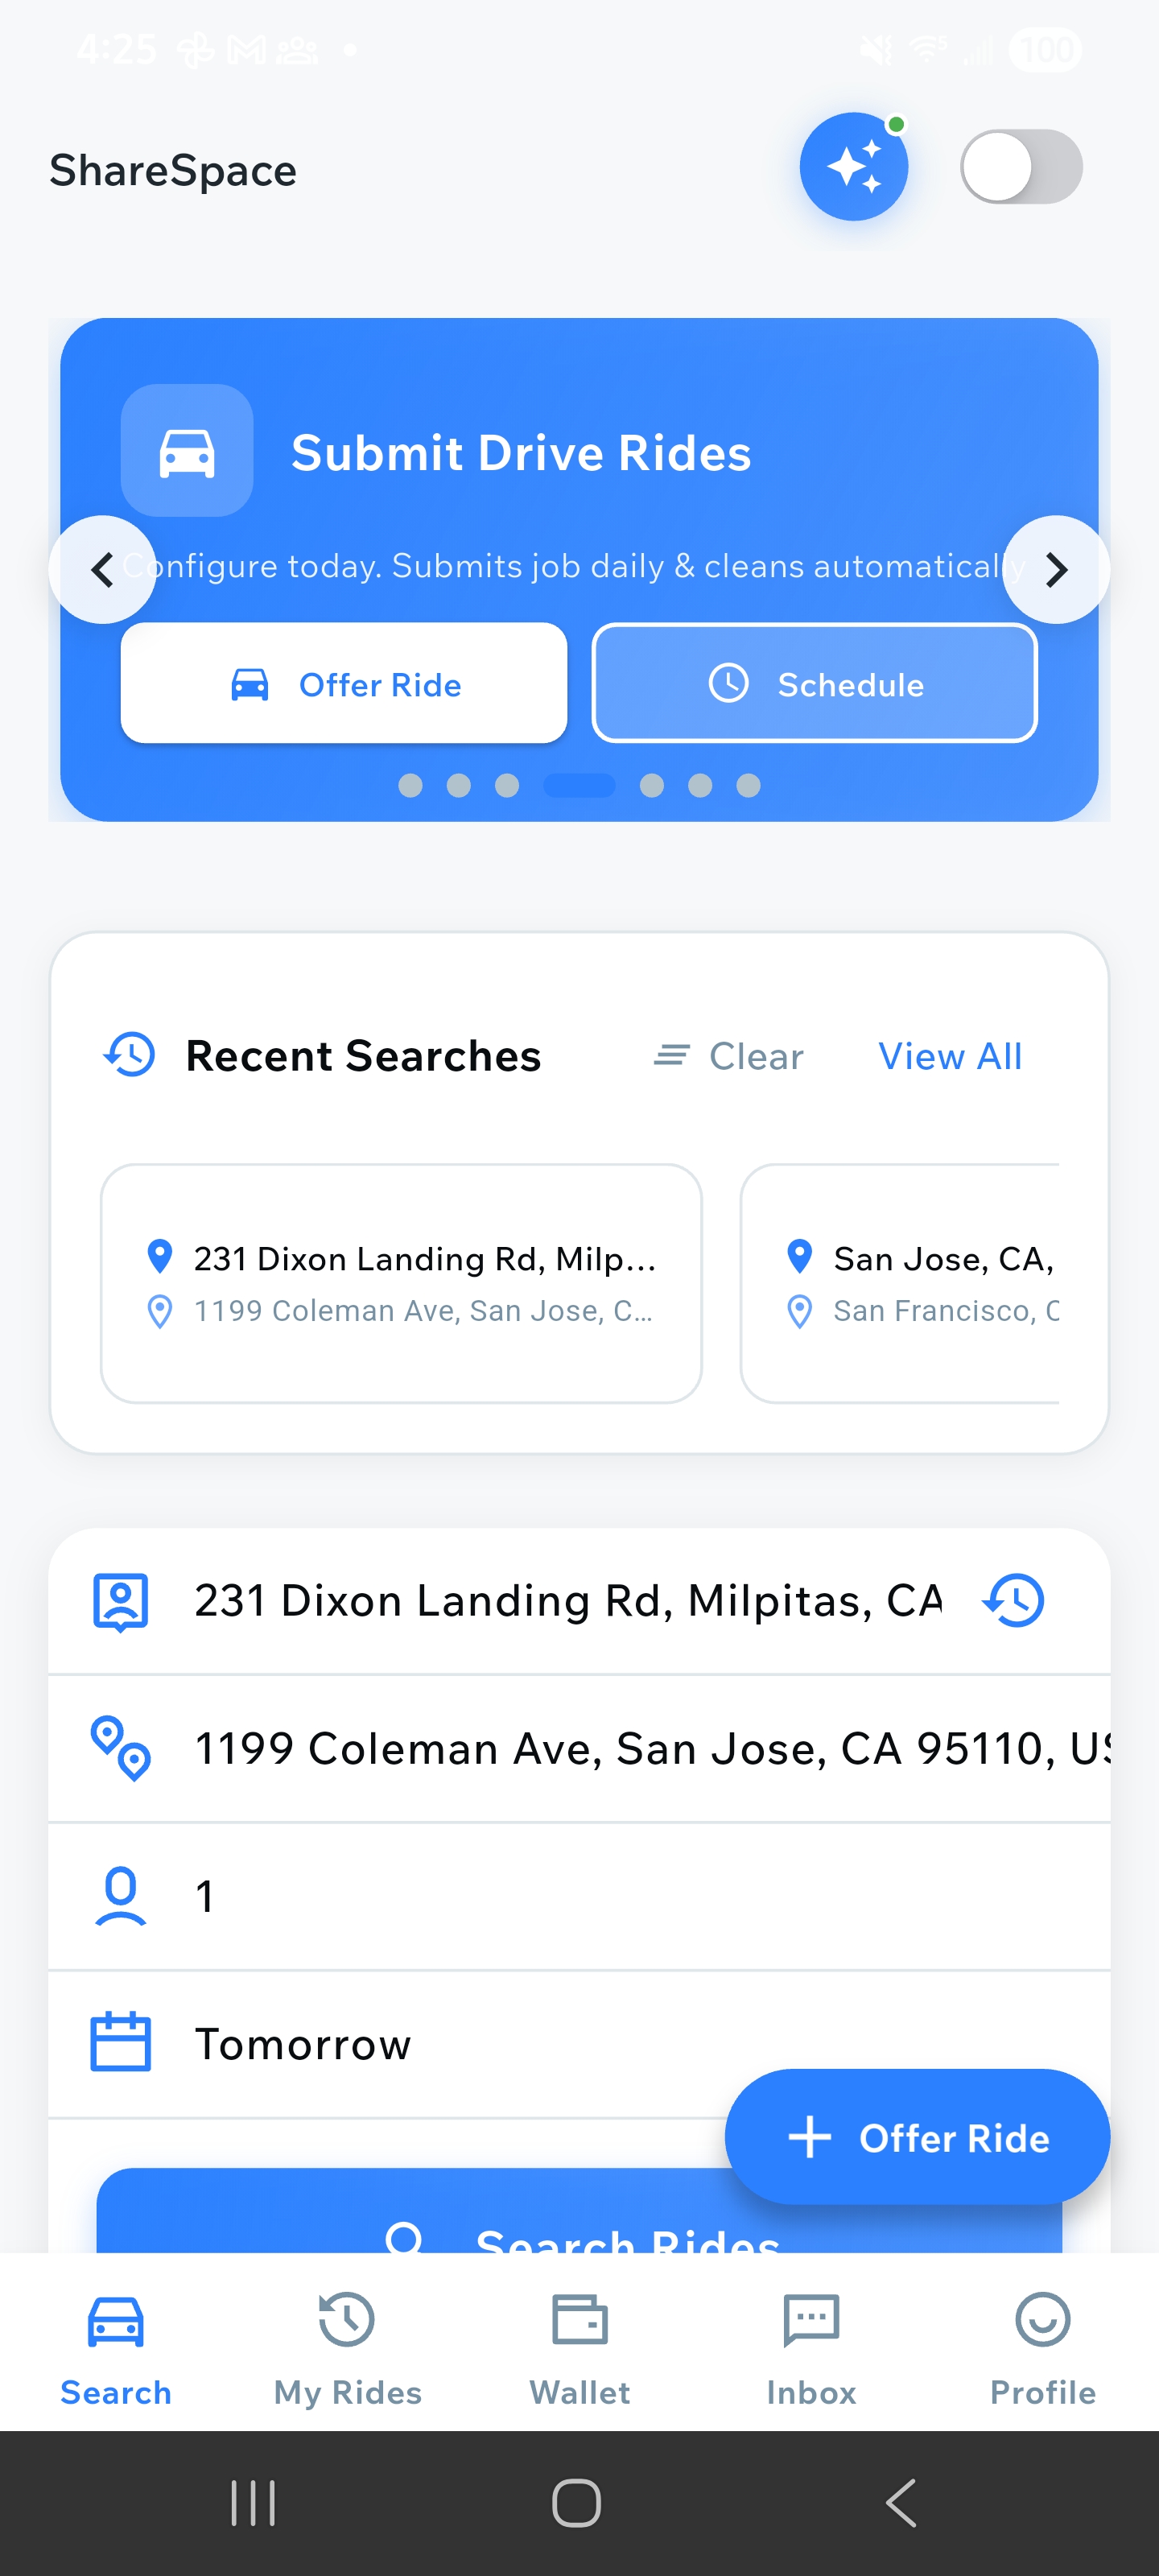
2. Home Page Top Slider → Schedule
3. Offer Ride Page Bottom

4. Profile → Auto-Publish Drive Rides
Create Auto-Publish Ride
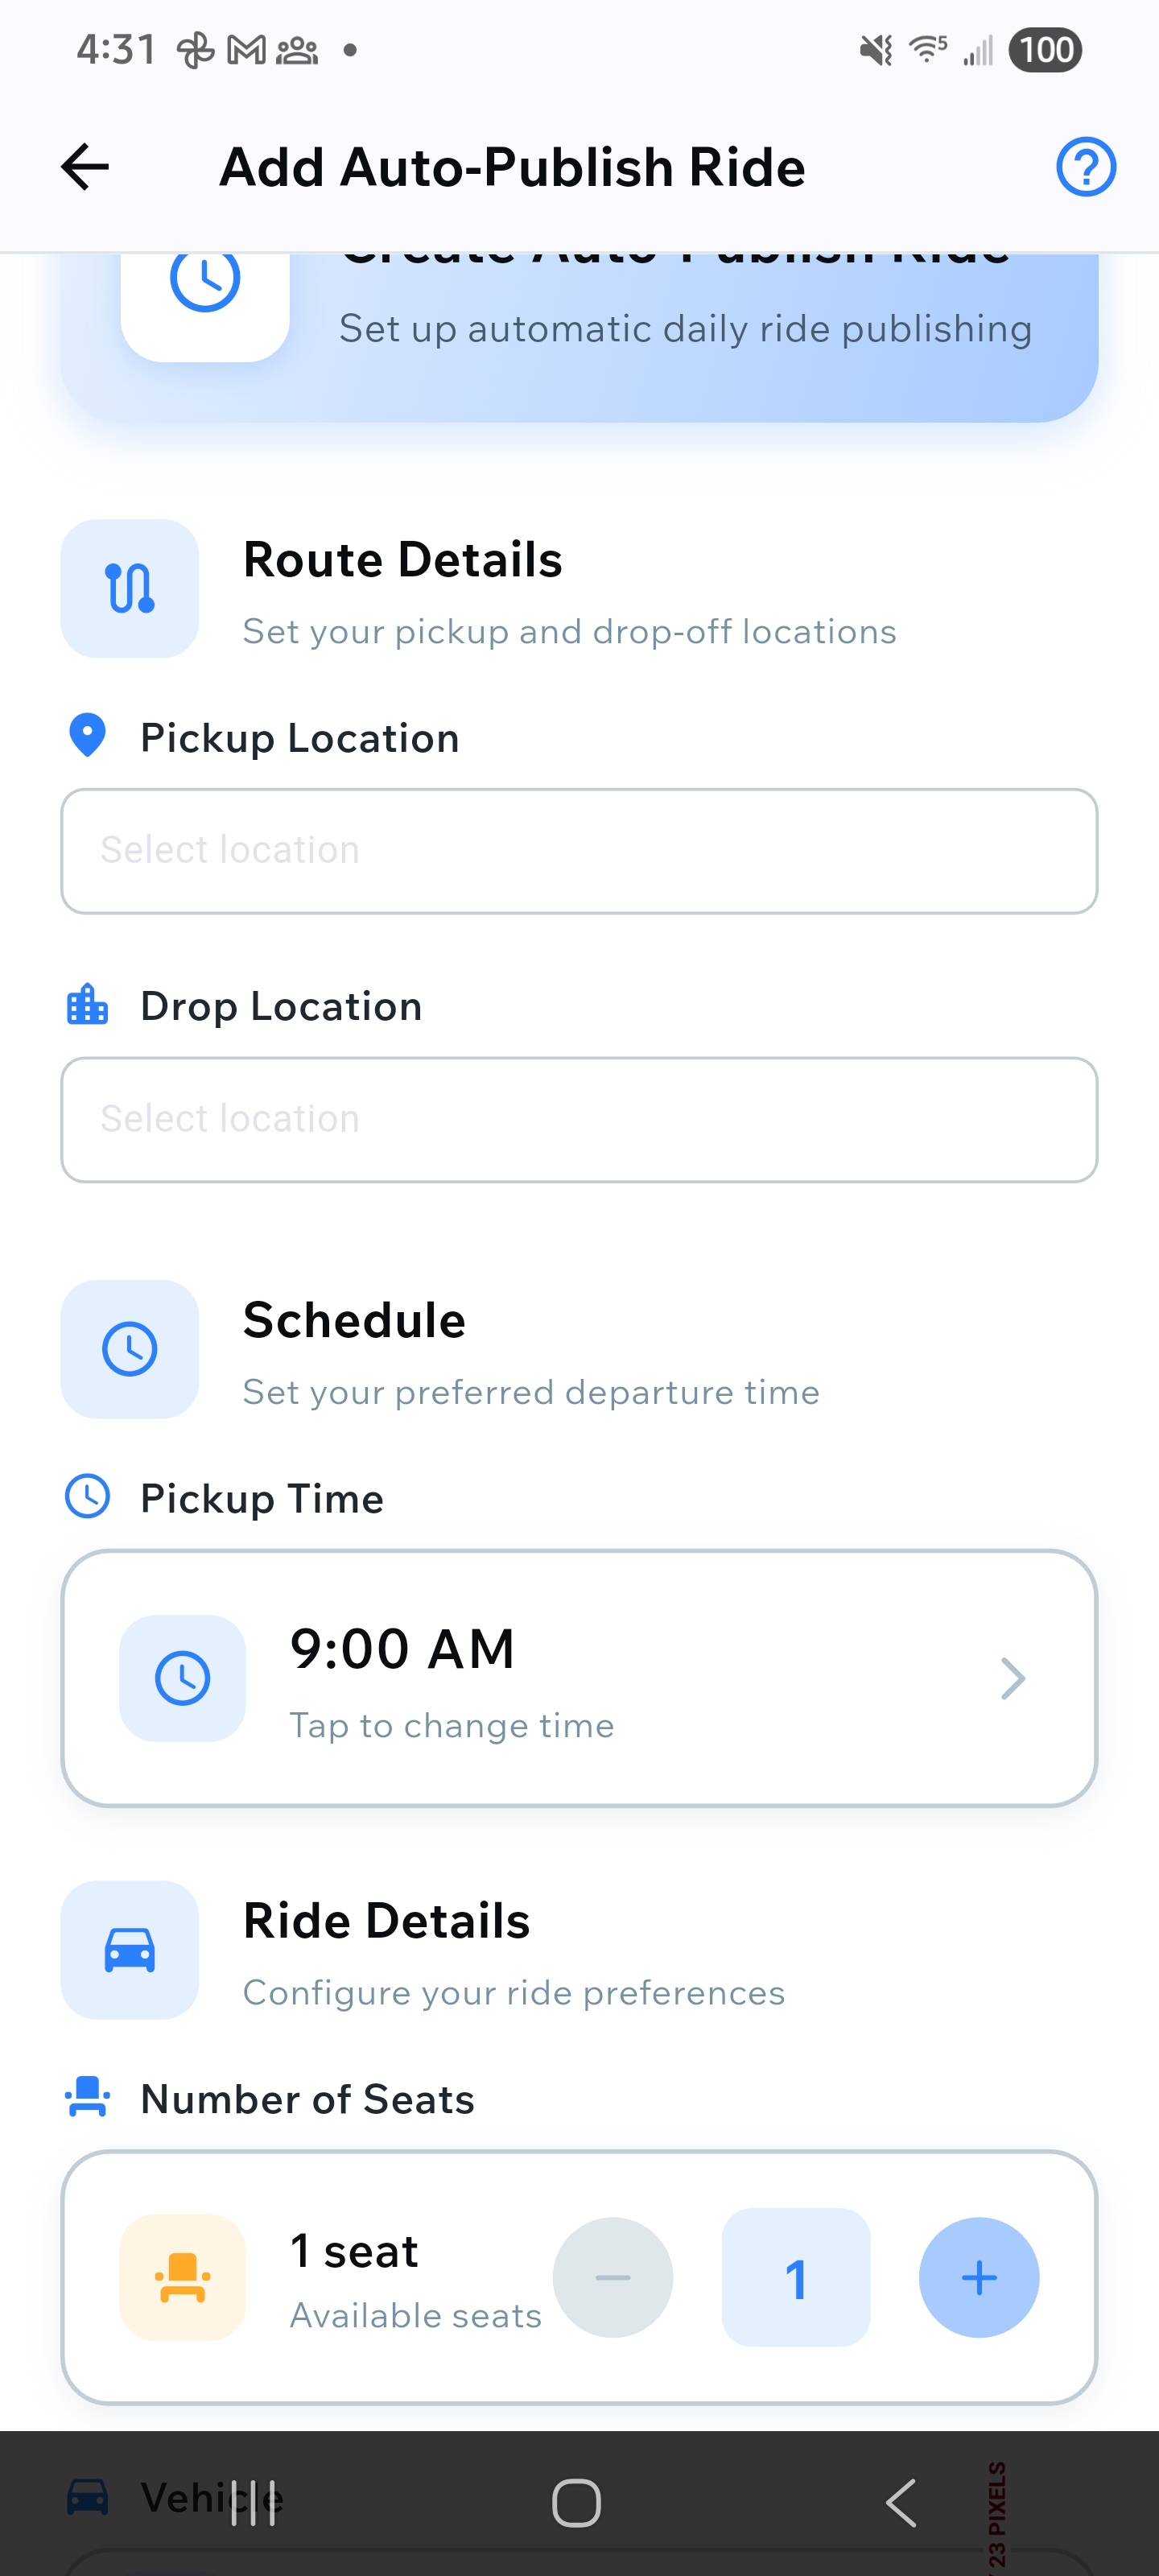
Tap on "Add Auto-Publish Ride" or the "+" button to create a new auto-publish ride. You'll see a card explaining that this will set up automatic daily ride publishing.
Add Auto-Publish Ride screen
Set Route Details
Enter your pickup location and drop-off location. These will be the same for all automatically published rides. You can use the location search to find addresses or select from recent locations.

Route details section with pickup and drop locations
Configure Schedule
Set your preferred pickup time. This time will be used for all automatically published rides. You can tap on the time field to change it. The system will publish rides daily at this time.

Schedule section with pickup time selection
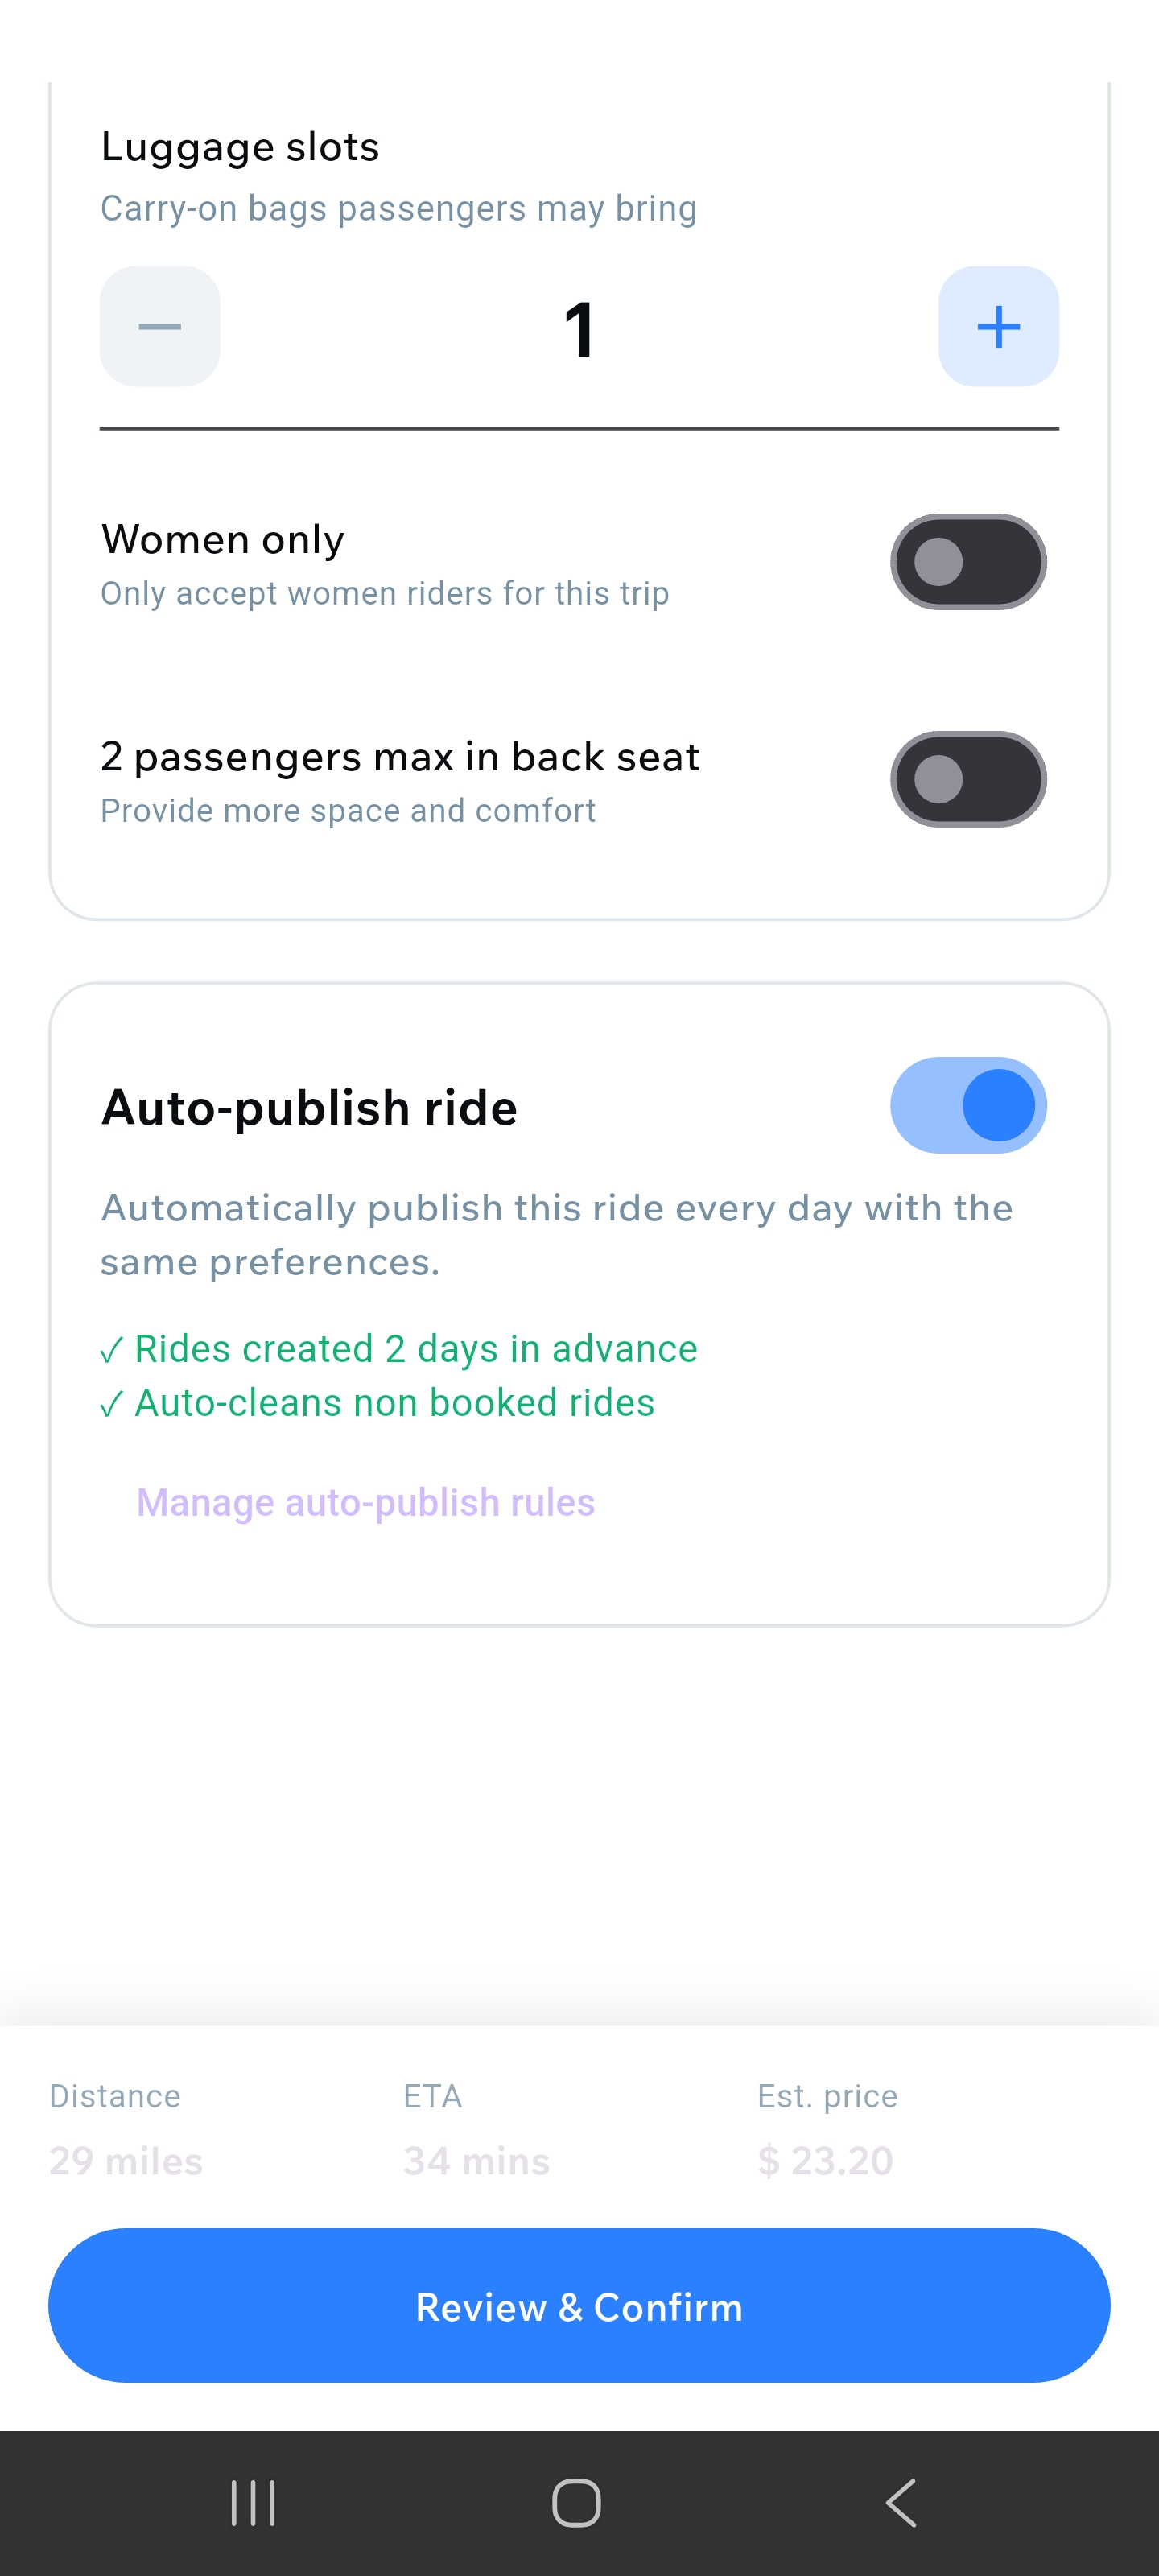
Set Ride Details
Configure the number of available seats for your auto-published rides. You can adjust this using the seat selector. This setting will apply to all automatically published rides.
Ride details section with seat selection
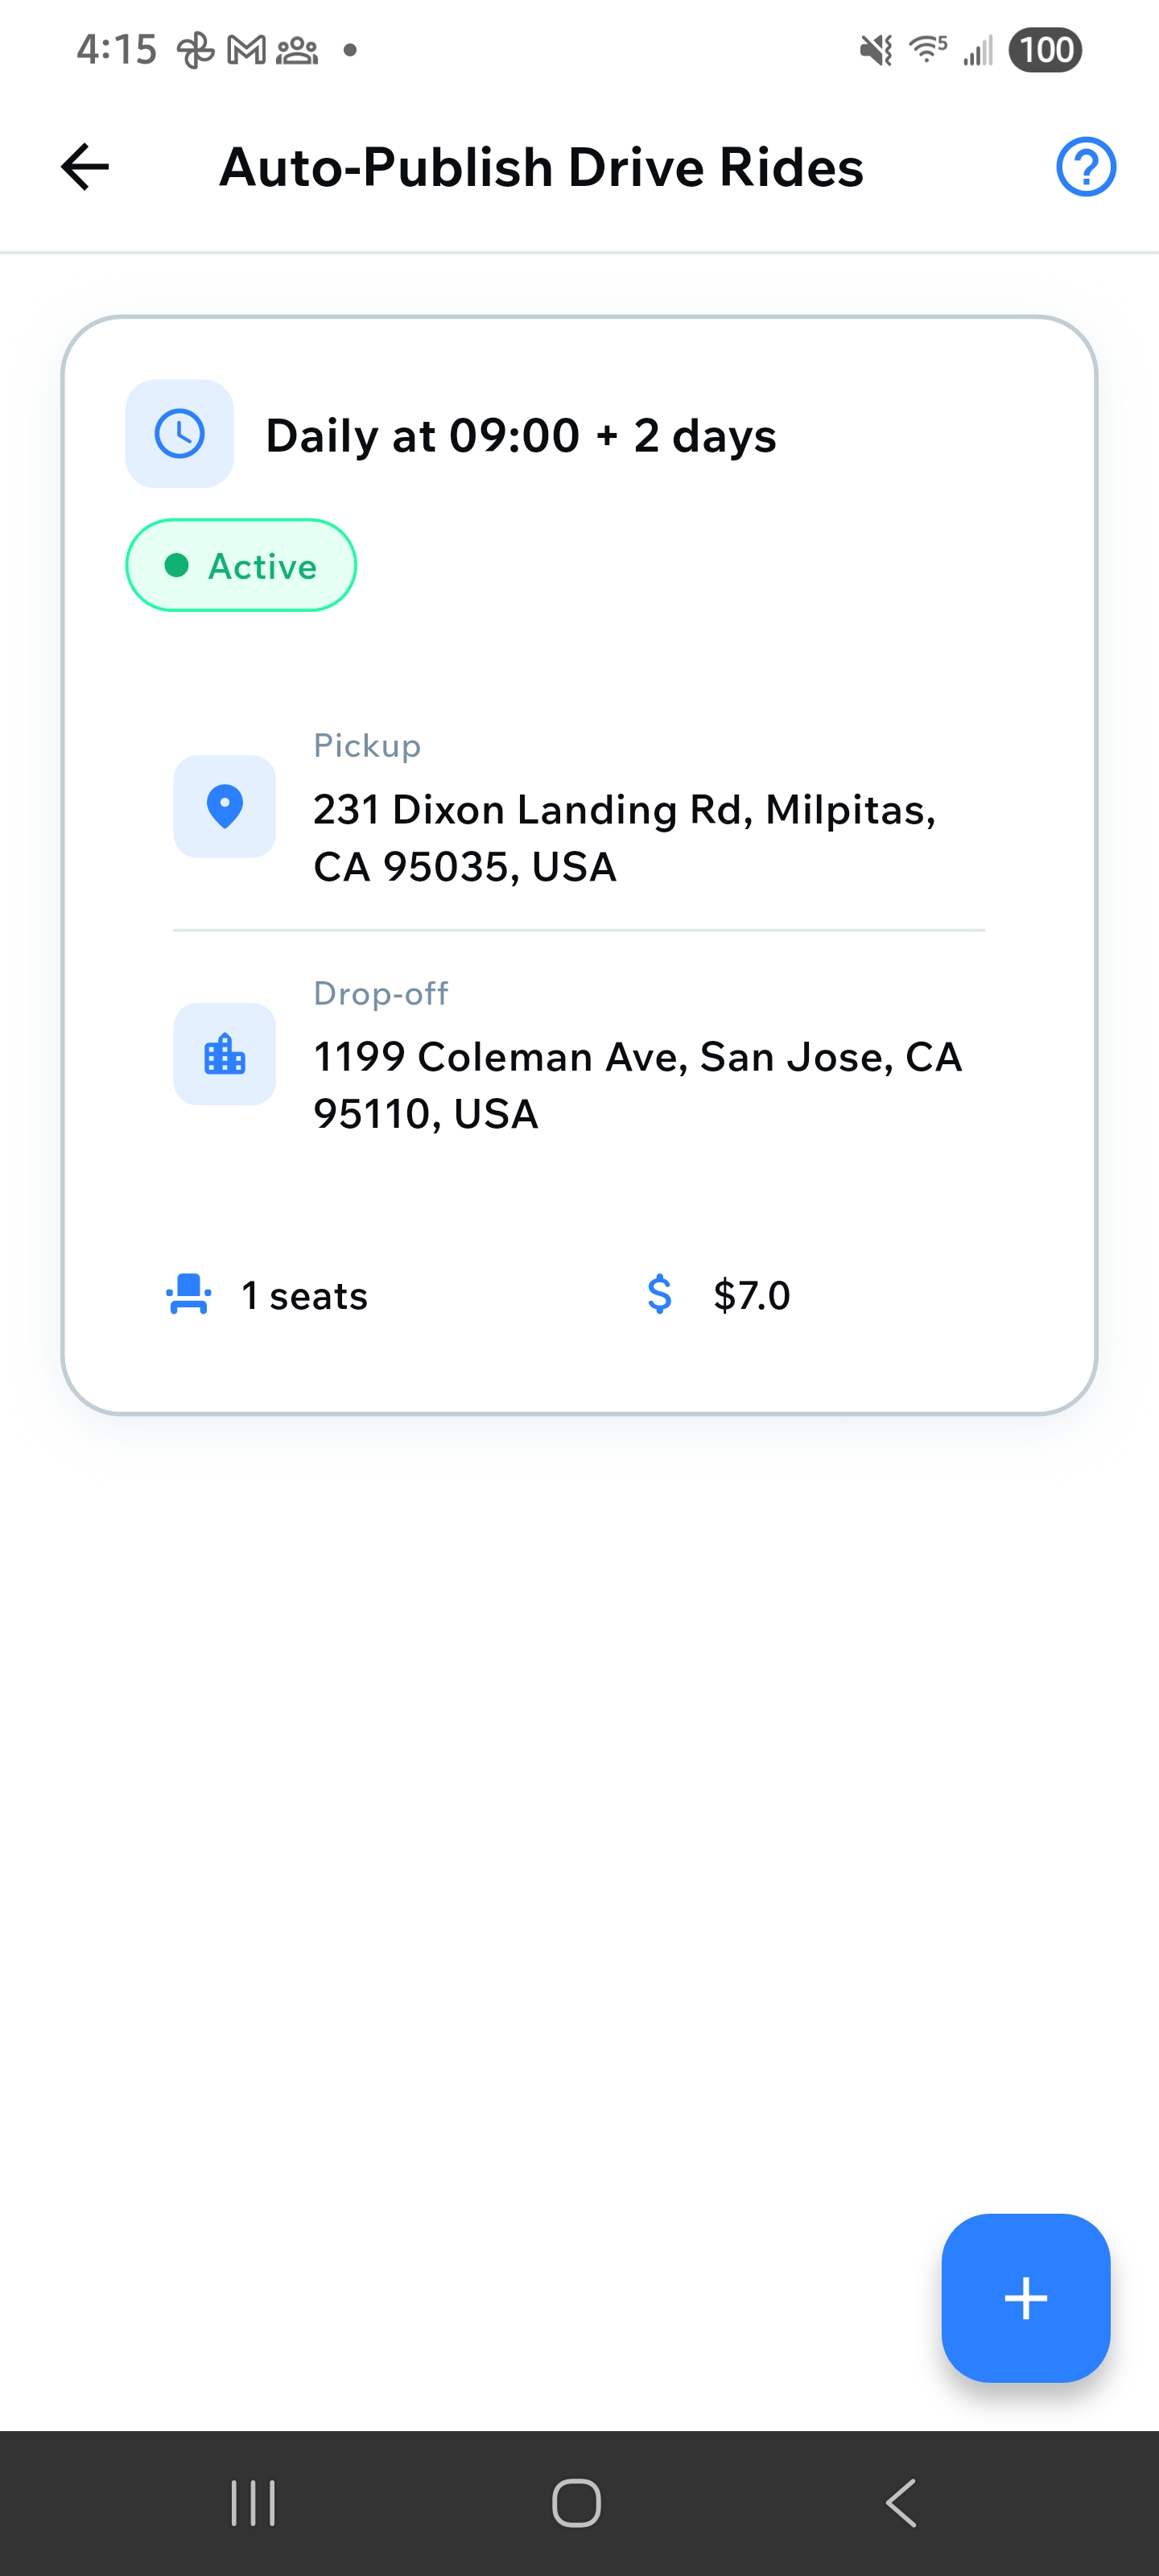
Activate Auto-Publish
After setting all details, save your auto-publish ride. It will show as "Active" with a green badge. The system will automatically publish your ride every day at the scheduled time. You can view and manage all your auto-publish rides from the "Auto-Publish Drive Rides" screen.
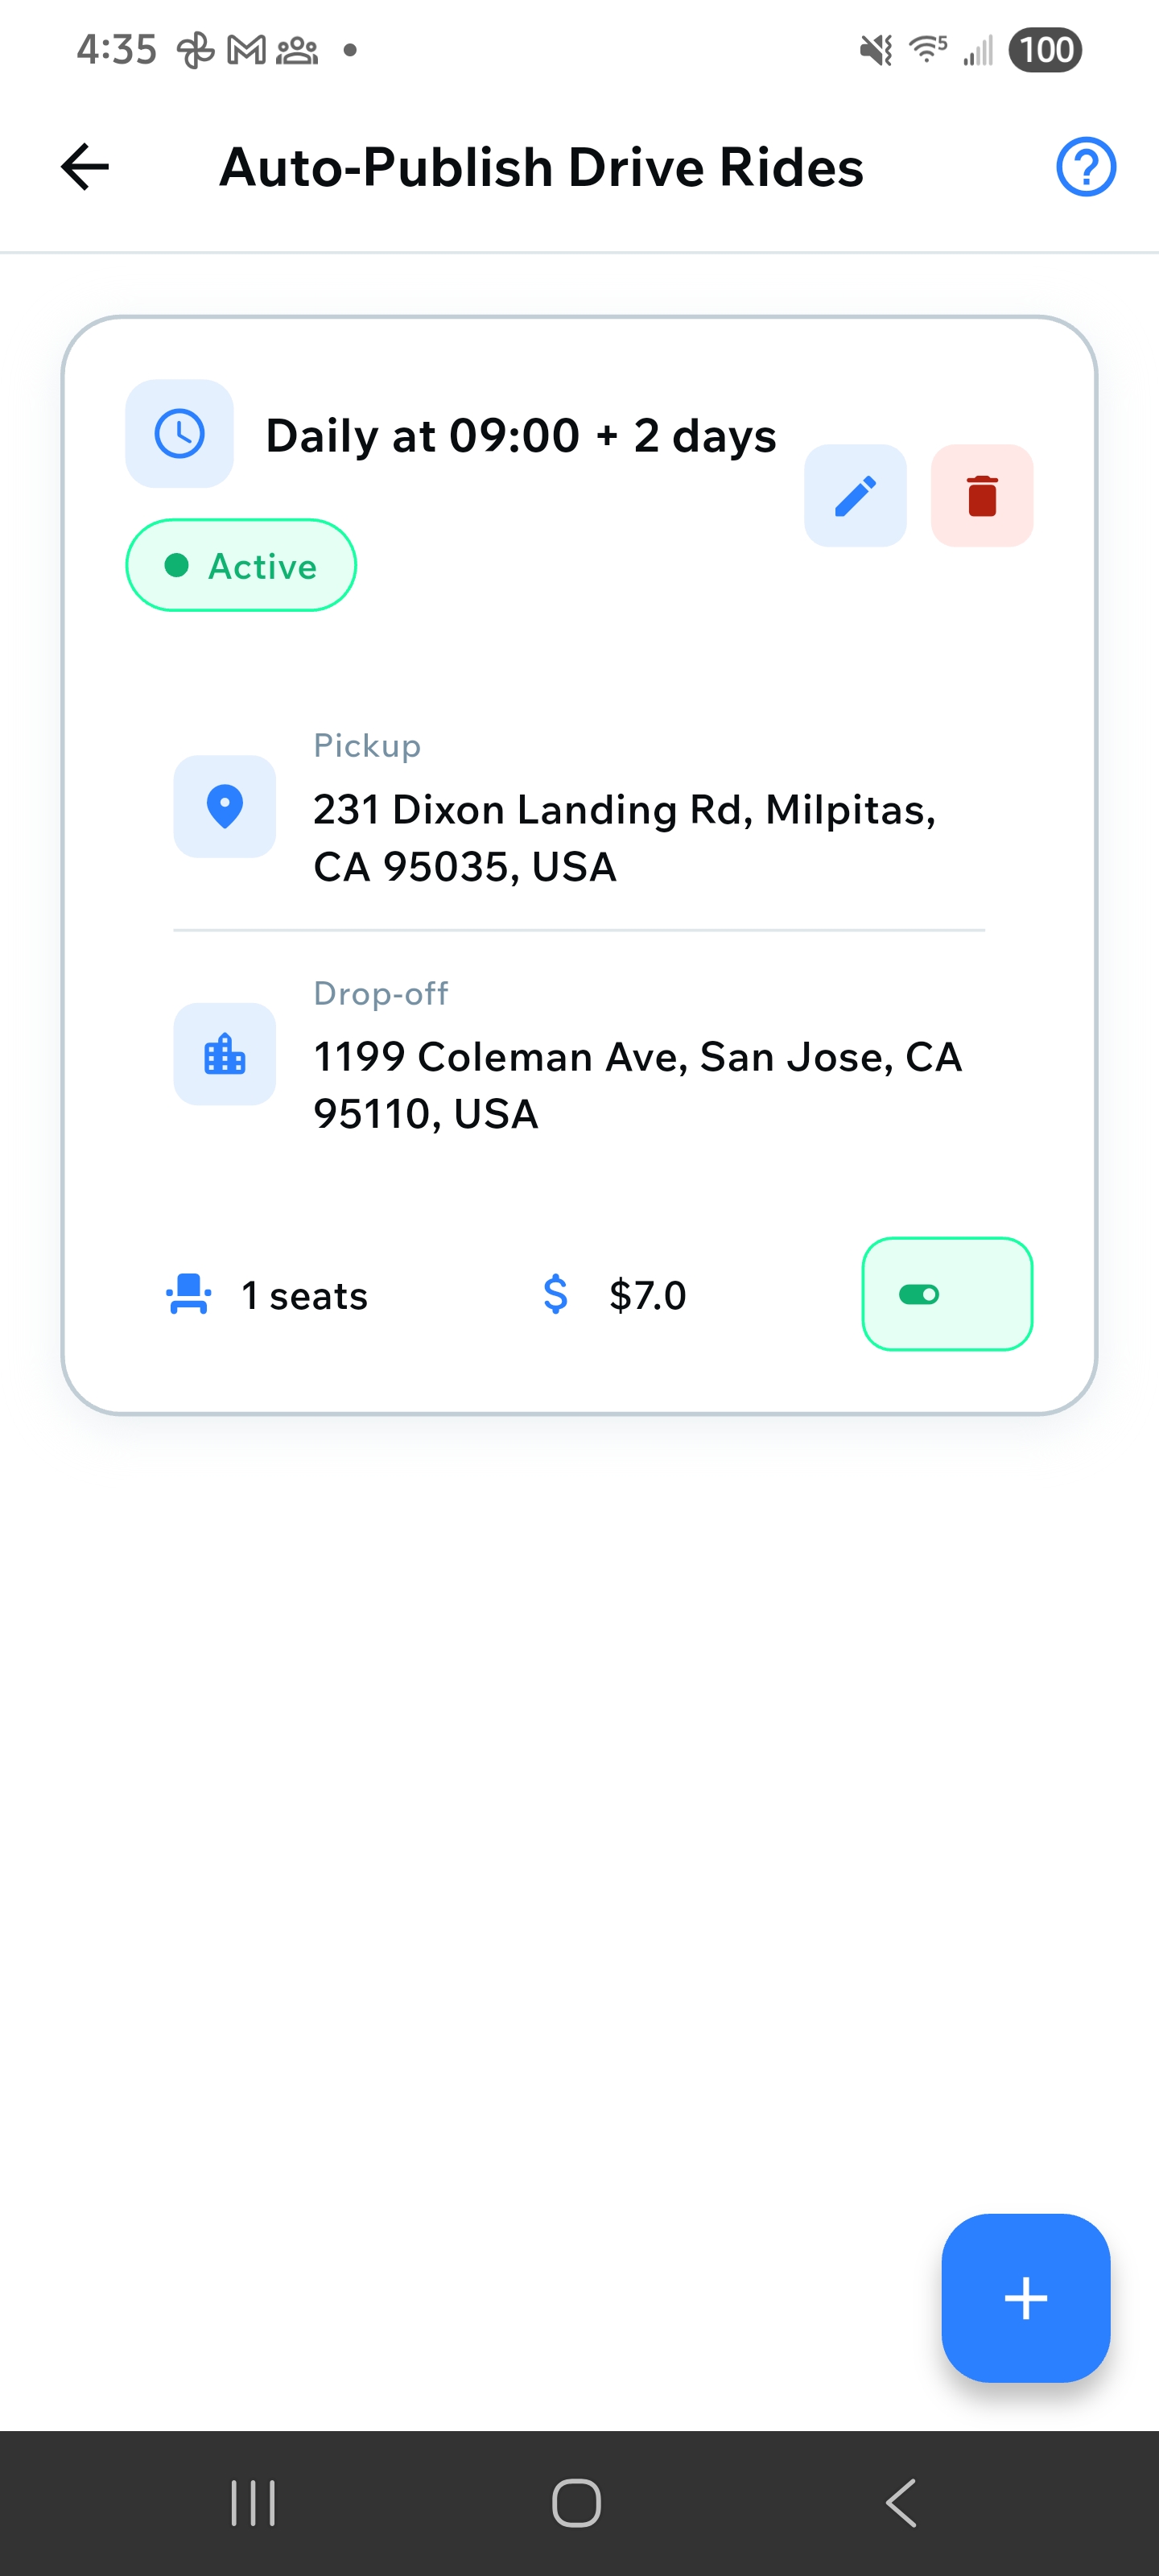
Active auto-publish ride with daily schedule
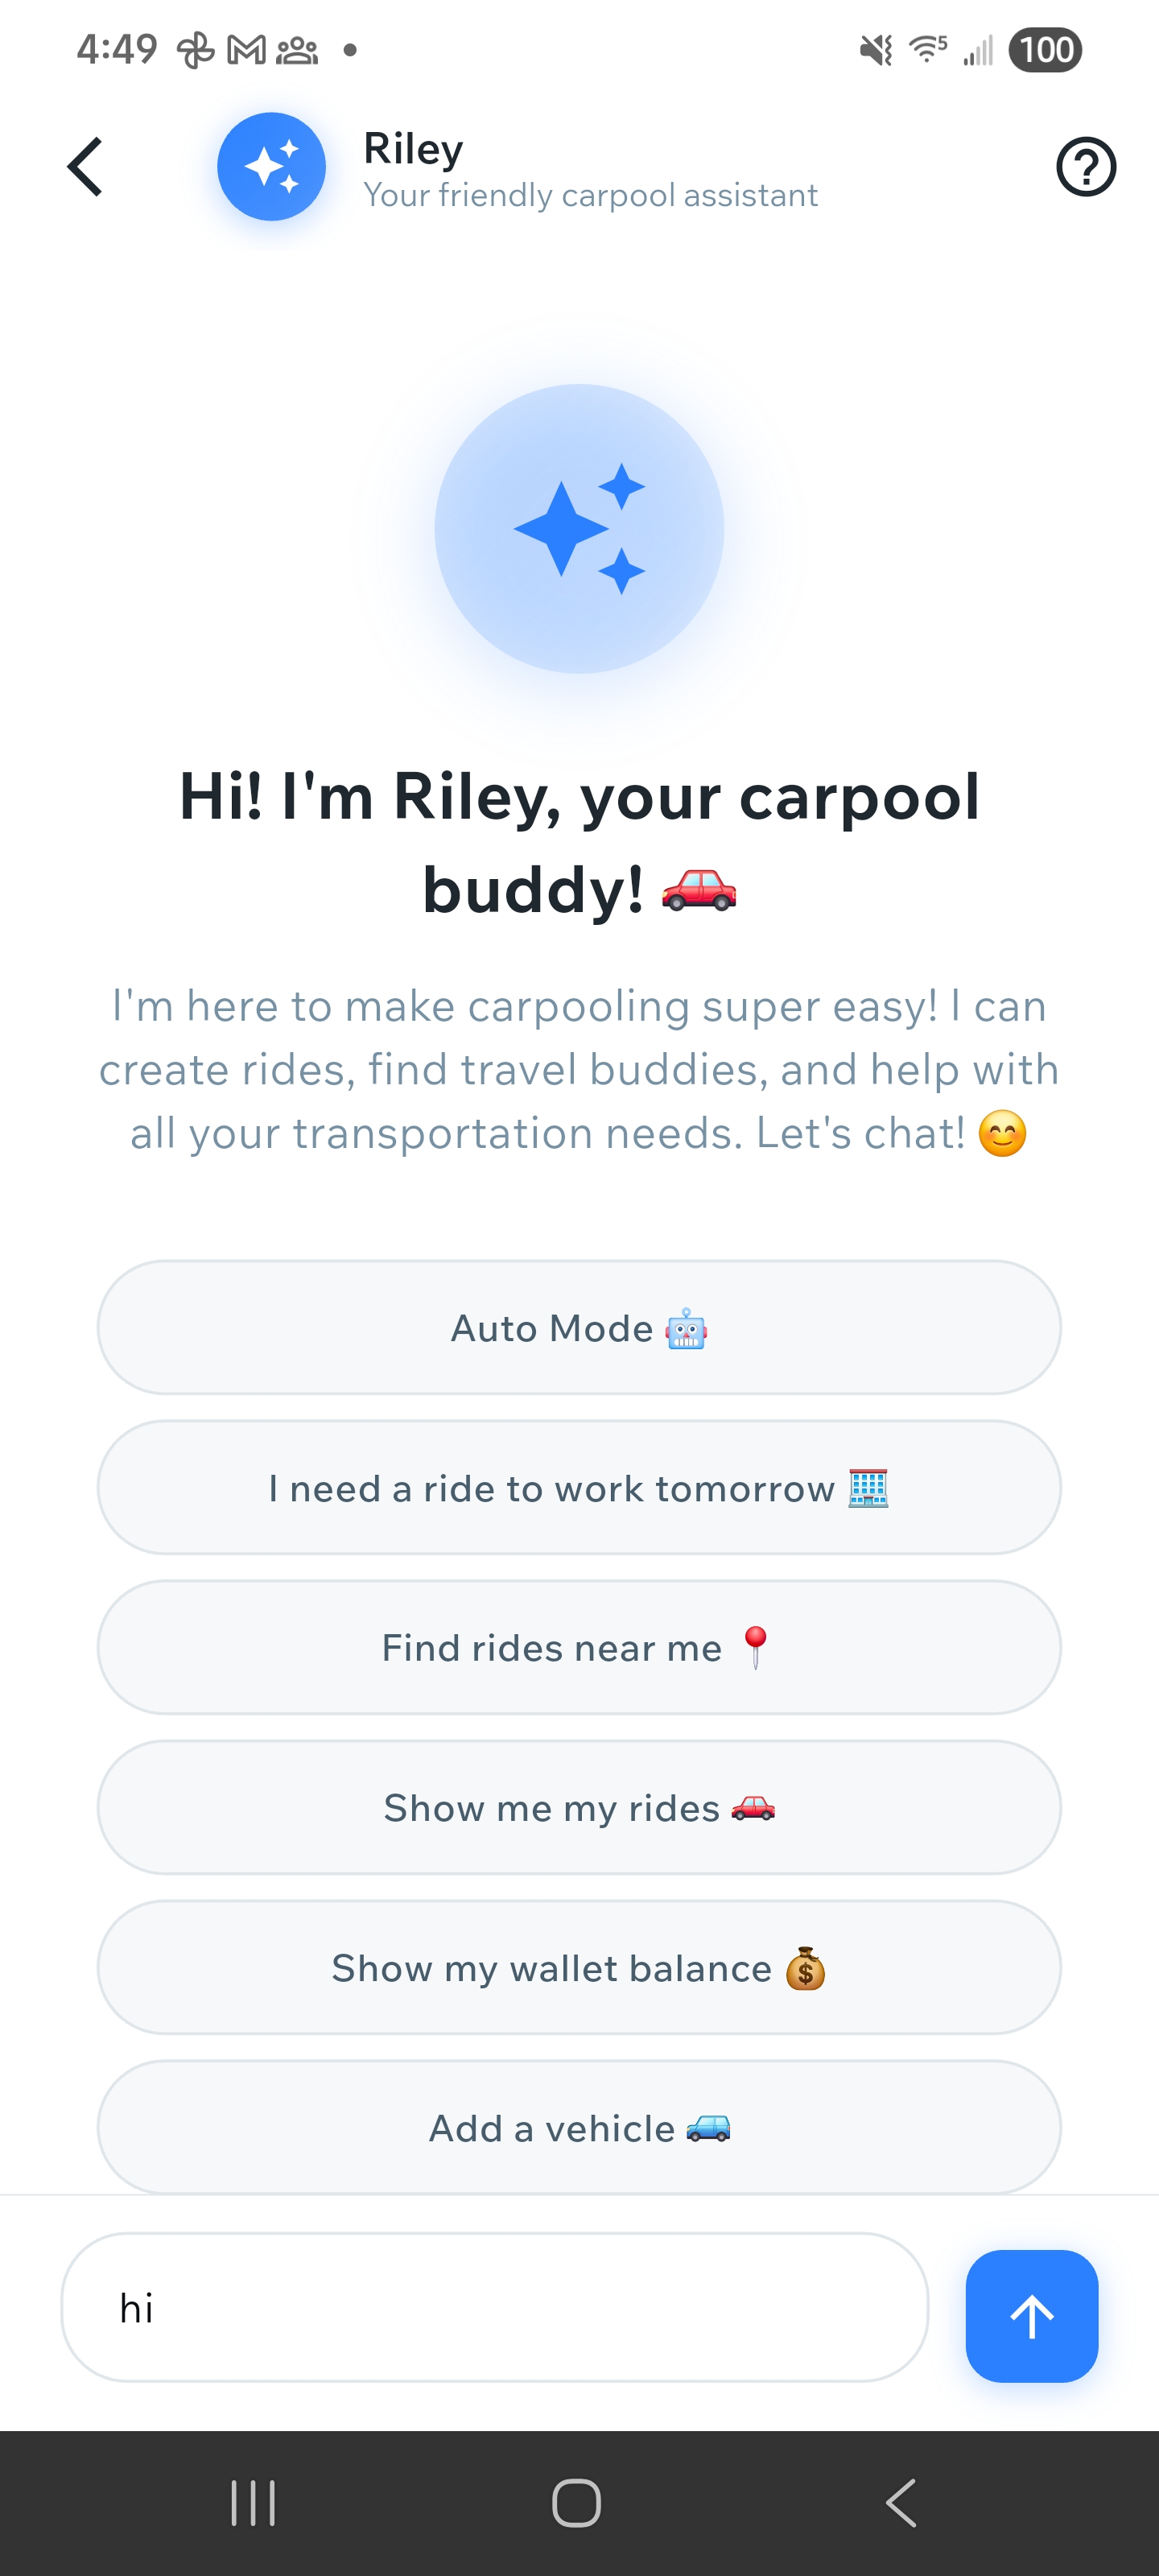
How to Use Riley AI Assistant
Access Riley AI Assistant
You can access Riley AI Assistant from multiple places on the home screen. Riley is your friendly carpool assistant that can help with ride matching, booking, and more. Choose any of these access points:
1. Home Page Top Slider
2. AI Assistant Button Below Passenger Ride
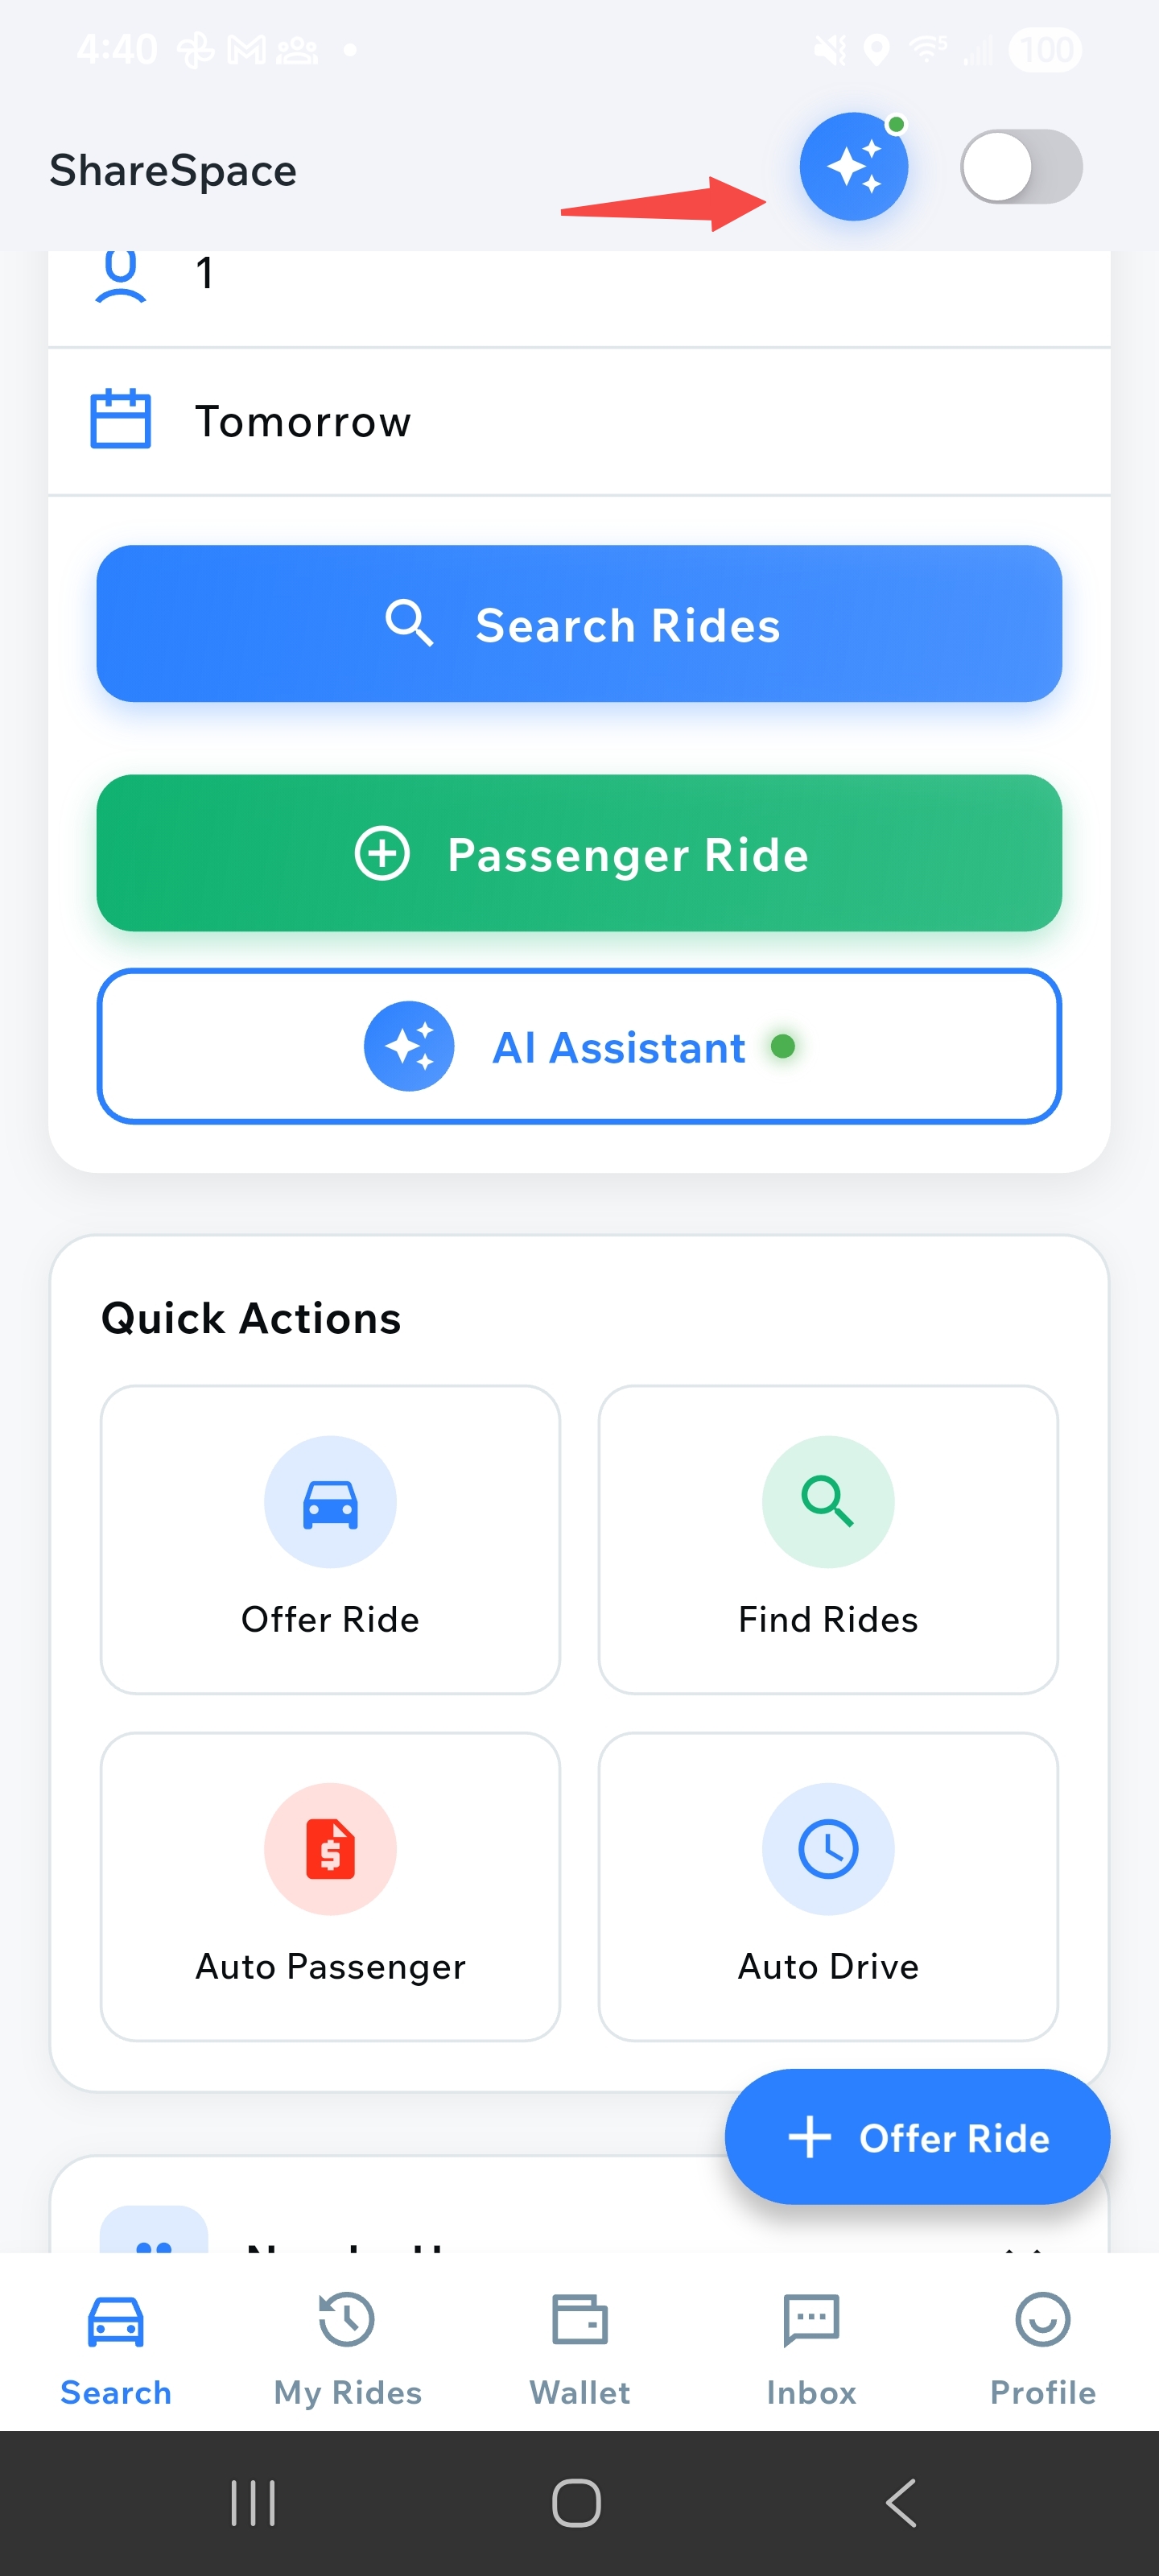
3. AI Assistant Button Top Right
Riley's Quick Actions
When you open Riley, you'll see a welcome screen with quick action buttons that let you instantly access common tasks. Riley can help you with:
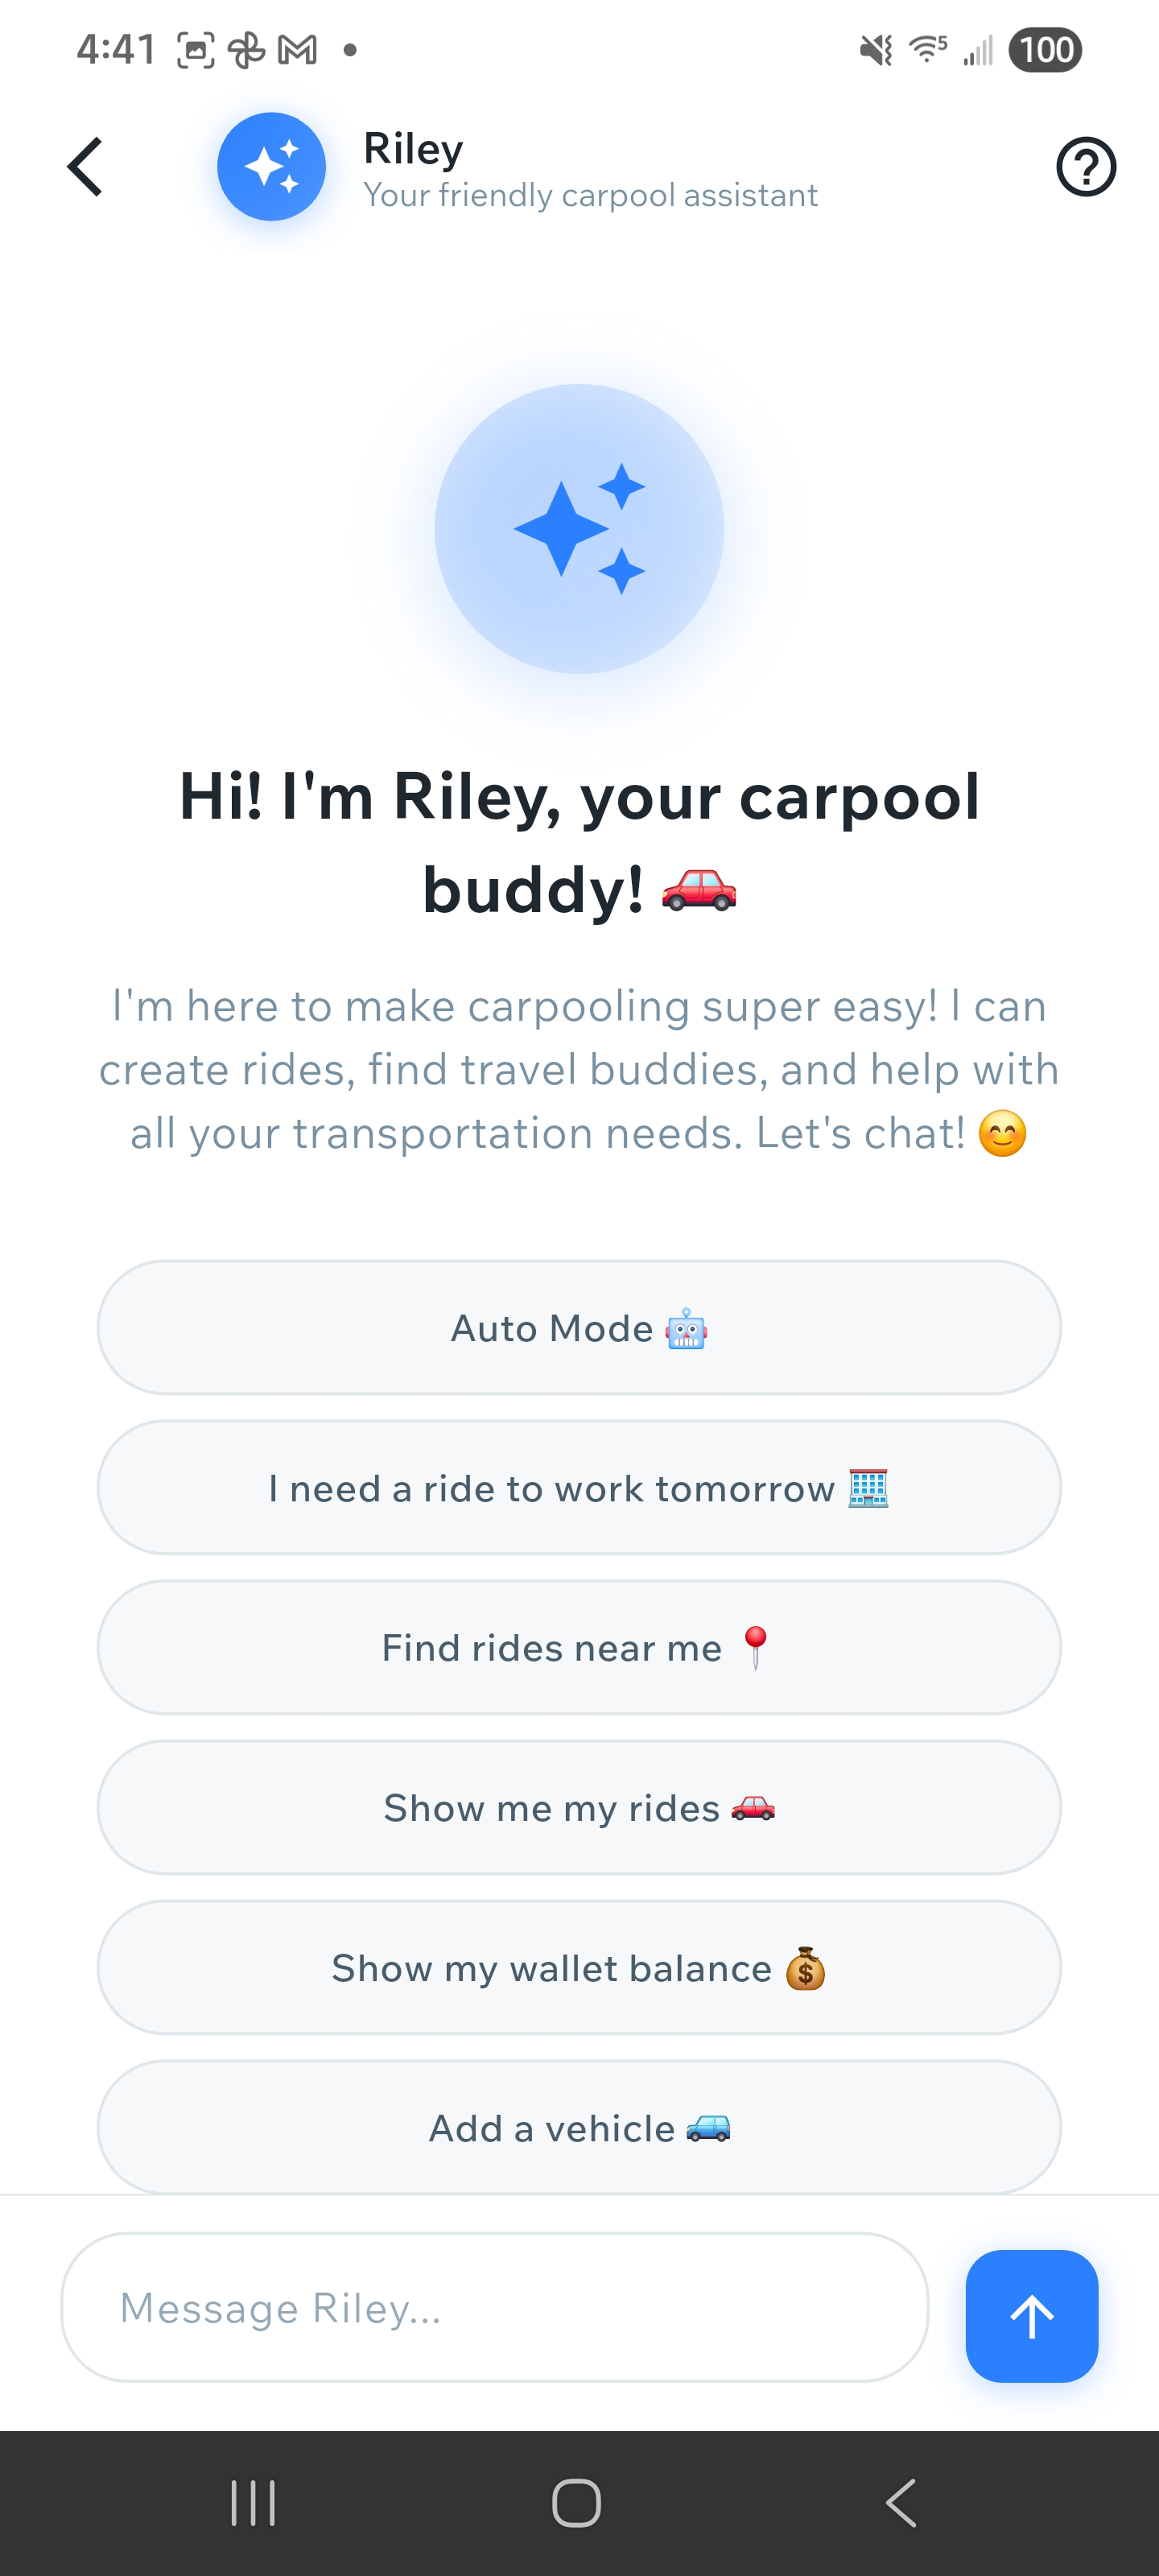
Riley AI Assistant screen with quick action buttons
- Auto Mode 🤖 - Enable automated ride publishing and management
- I need a ride to work tomorrow 🗓️ - Find rides for specific dates
- Find rides near me 📍 - Discover rides in your area
- Show me my rides 🚗 - View all your offered and booked rides
- Show my wallet balance 💰 - Check your account balance
- Add a vehicle 🚙 - Register a new vehicle to your profile
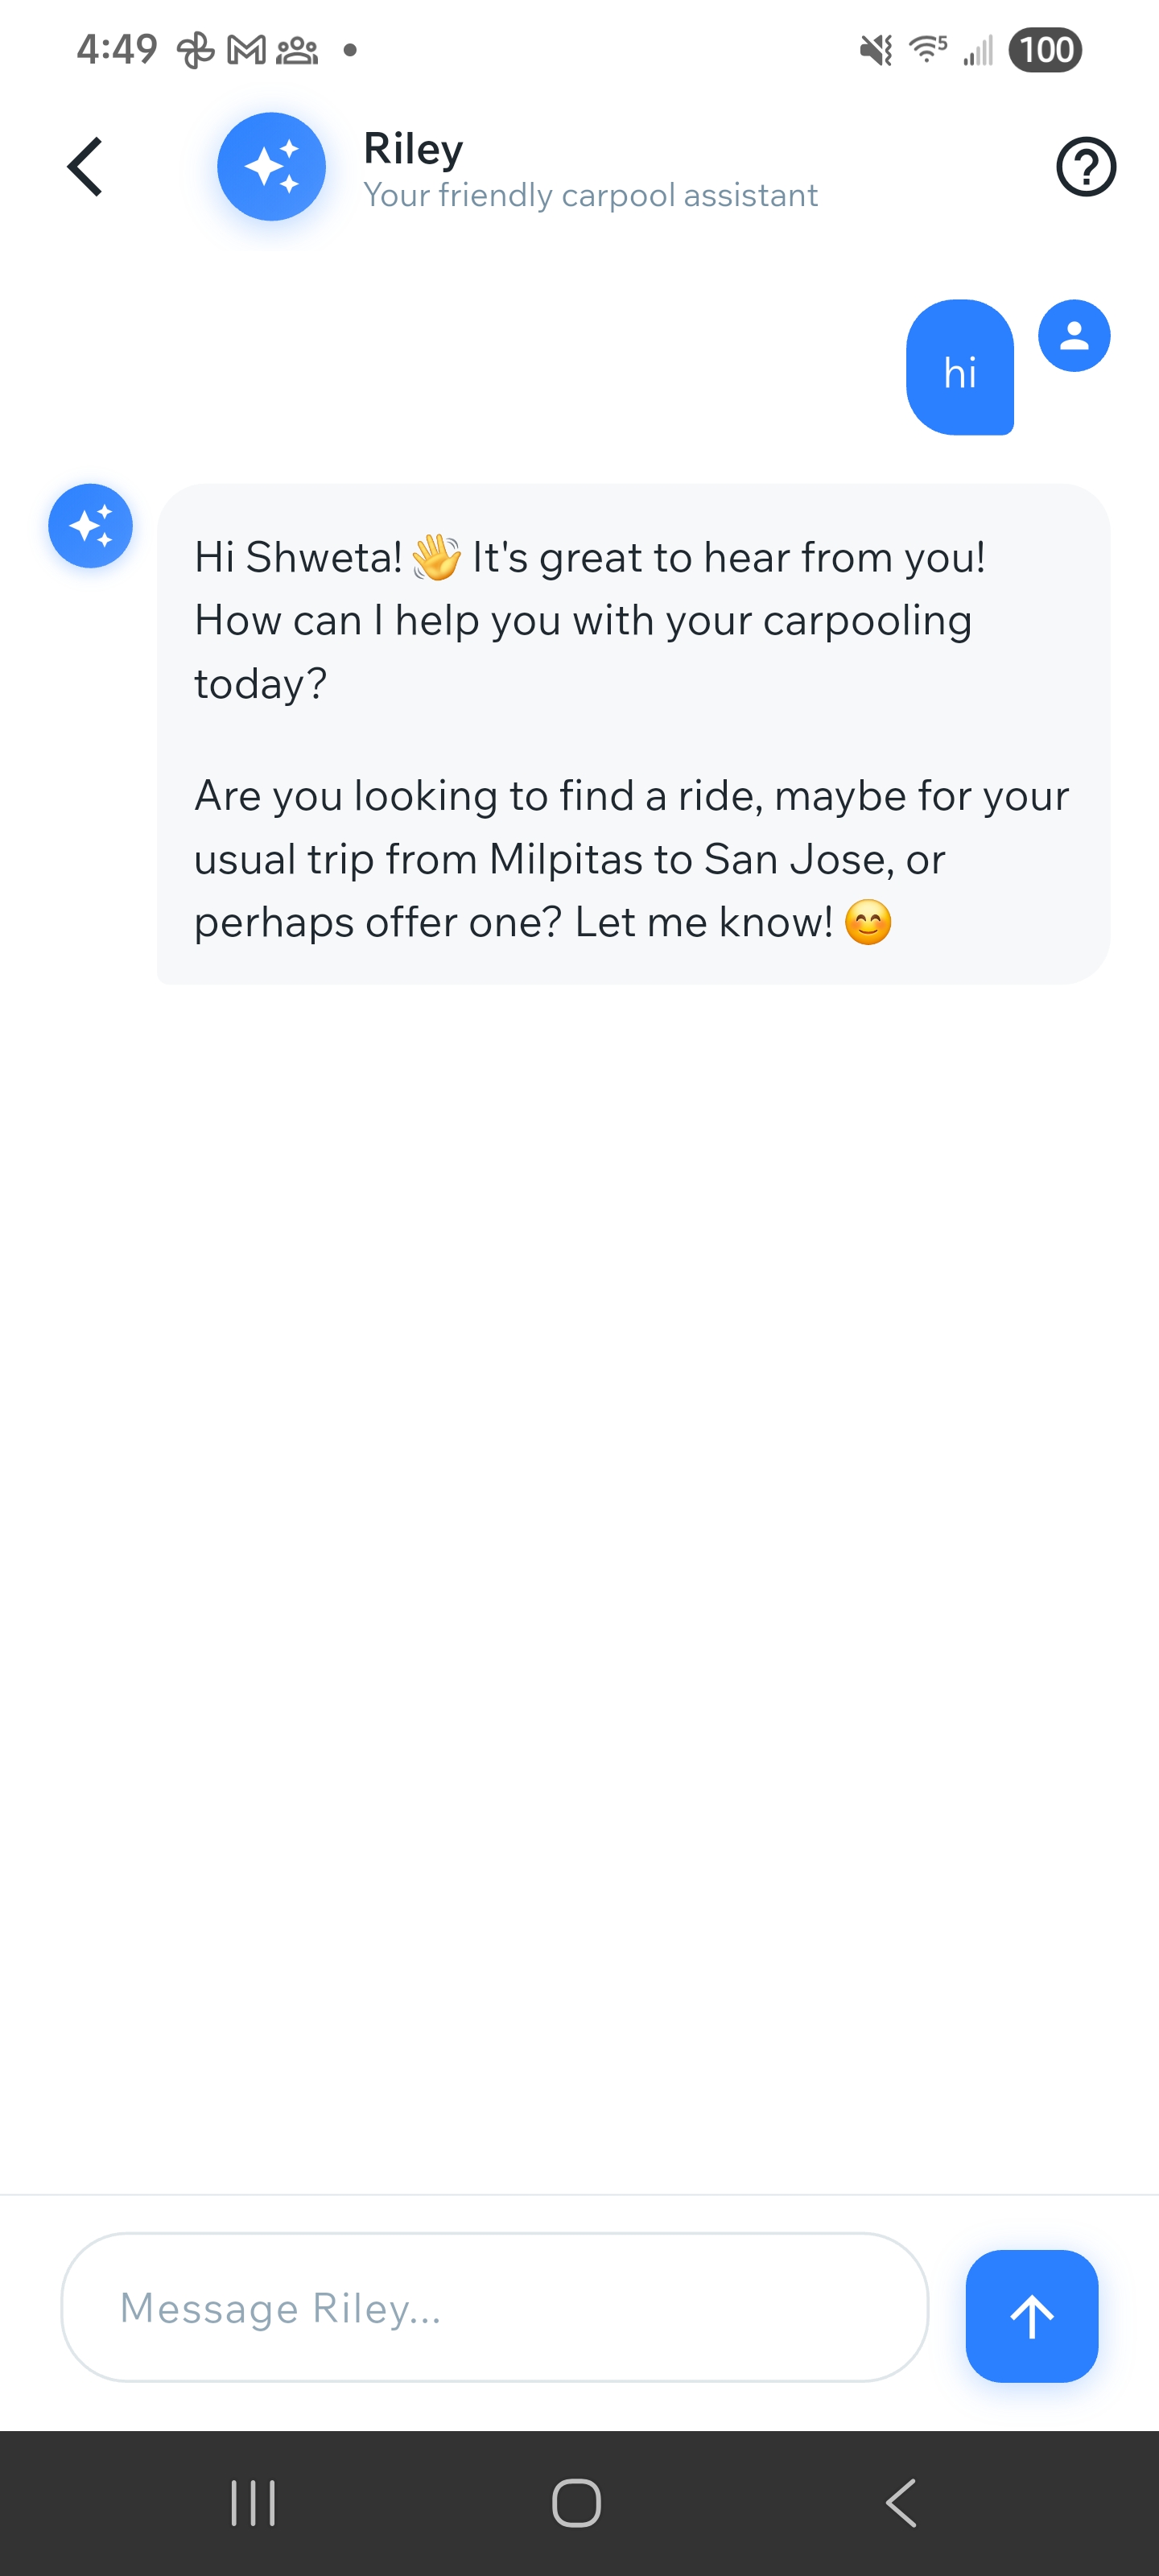
Start a Conversation
You can either tap on a quick action button or type your request in natural language in the message field at the bottom. For example: "Find me a ride to work tomorrow at 8am" or "I want to offer a ride from downtown to the airport". Riley understands natural language and will help you complete your request.
Chatting with Riley using natural language
Riley Processes Your Request
Riley will understand your request and automatically extract details like location, time, and preferences. Riley can create rides, find travel buddies, and help with all your transportation needs without you having to fill out forms manually.
Riley extracting and processing ride details
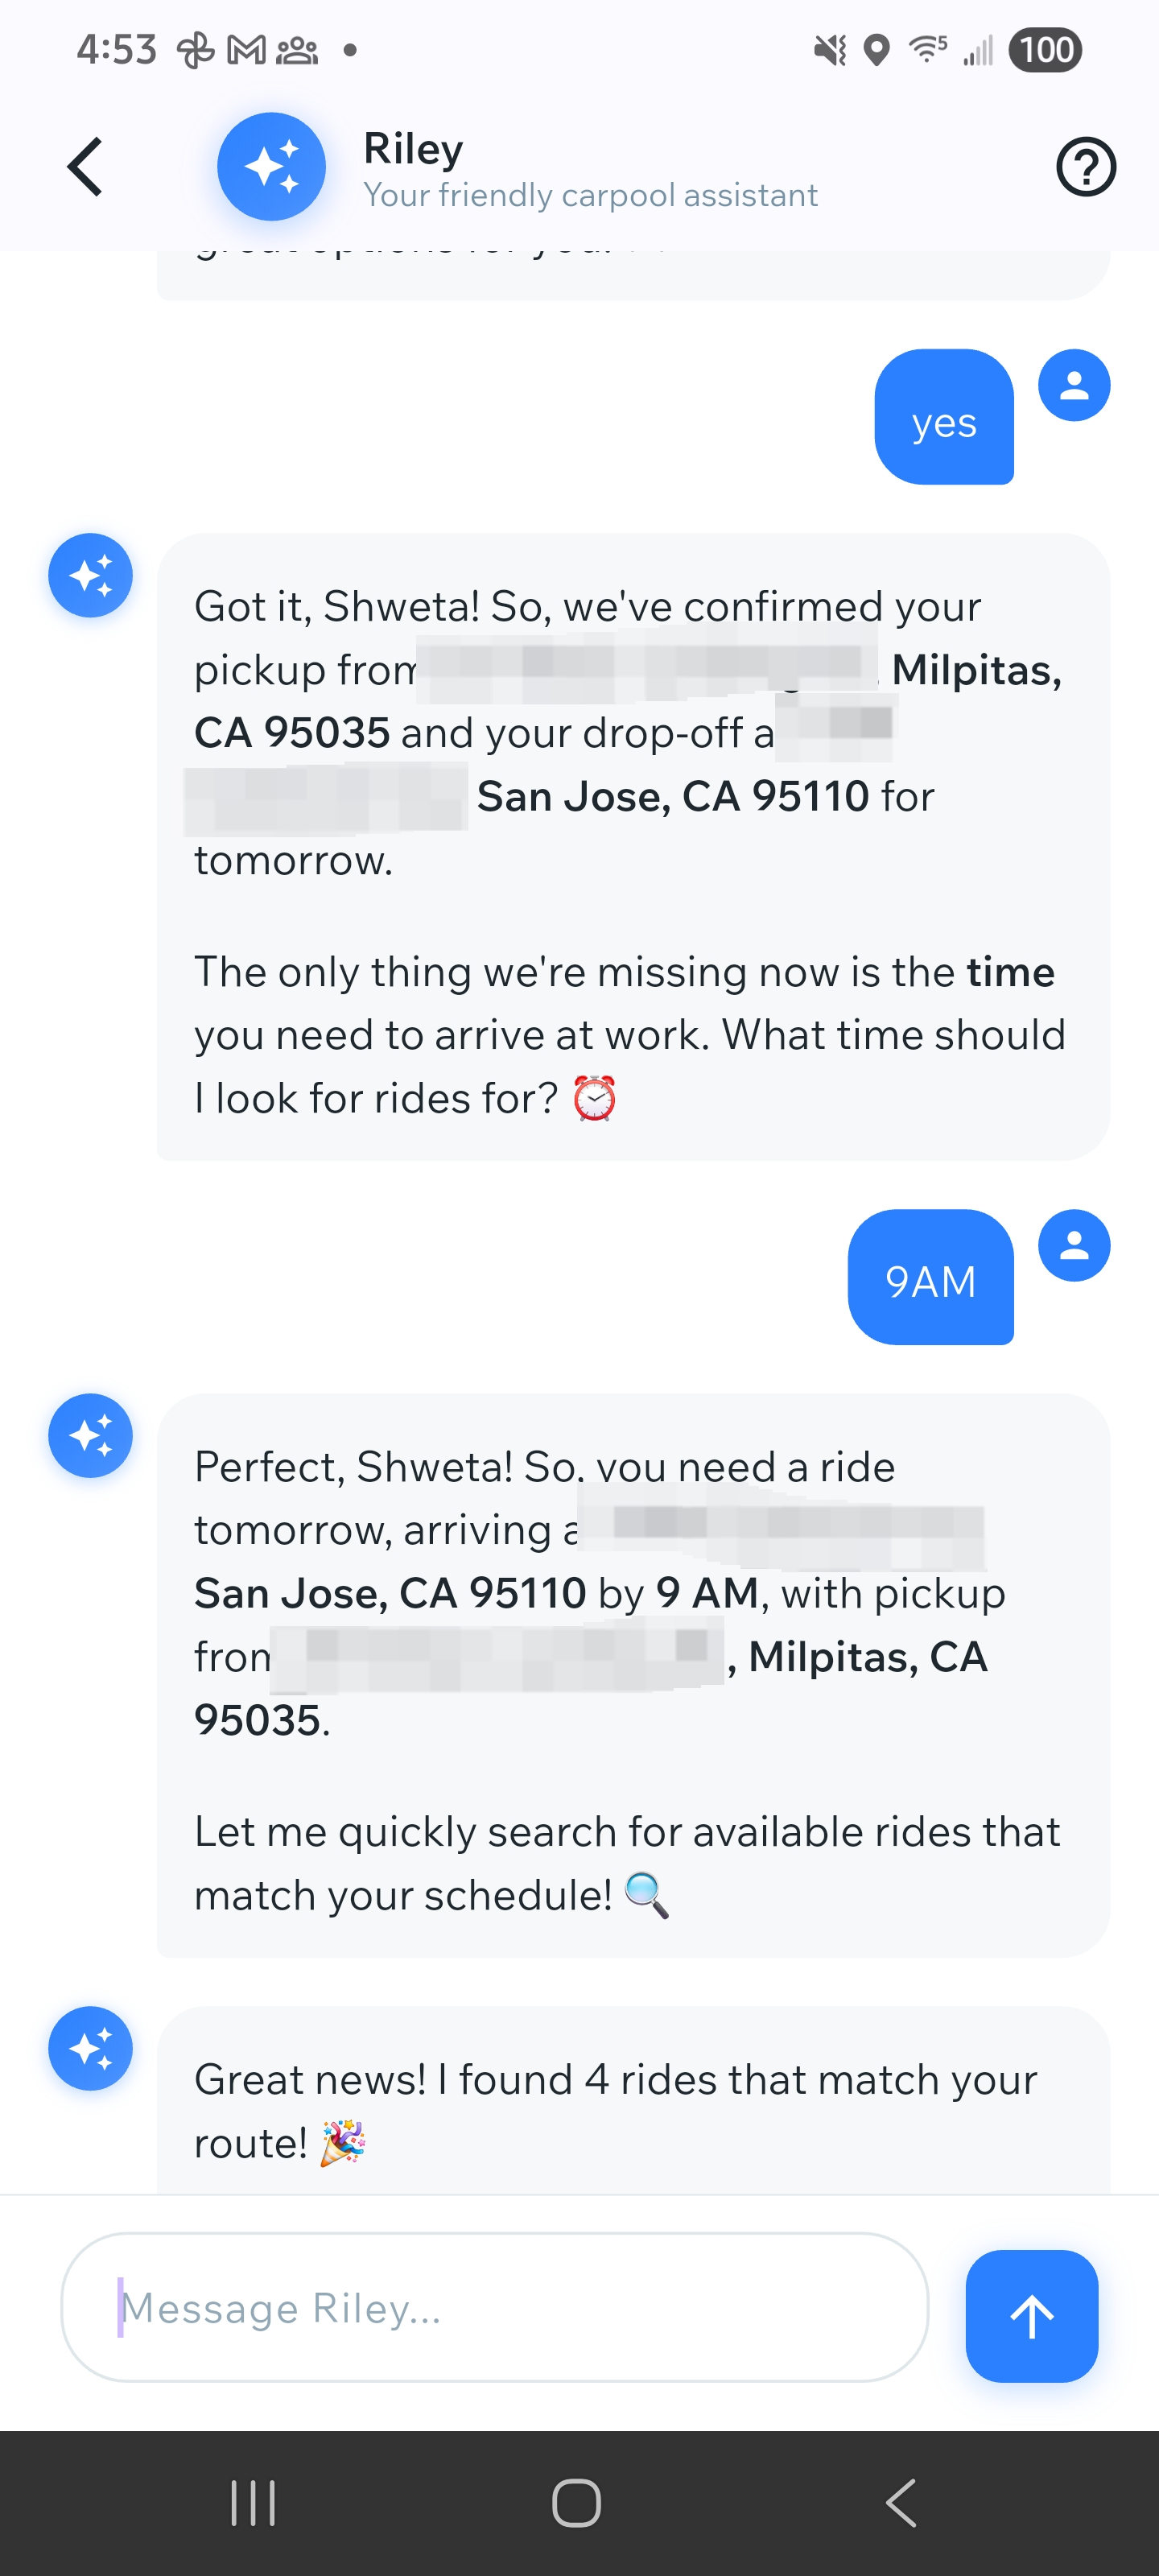
Review and Confirm
Riley will show you the extracted information in a clear format. Review and confirm if everything is correct, or ask Riley to make changes. You can have a conversation with Riley to refine your request until it's perfect.
Reviewing extracted information before confirmation
Ride is Created Automatically
Once confirmed, Riley will automatically create your ride, publish it, or find matching rides for you - no manual entry needed! Riley makes carpooling super easy by handling all the details for you.

Ride successfully created or matched by Riley
How to Find Nearby Users
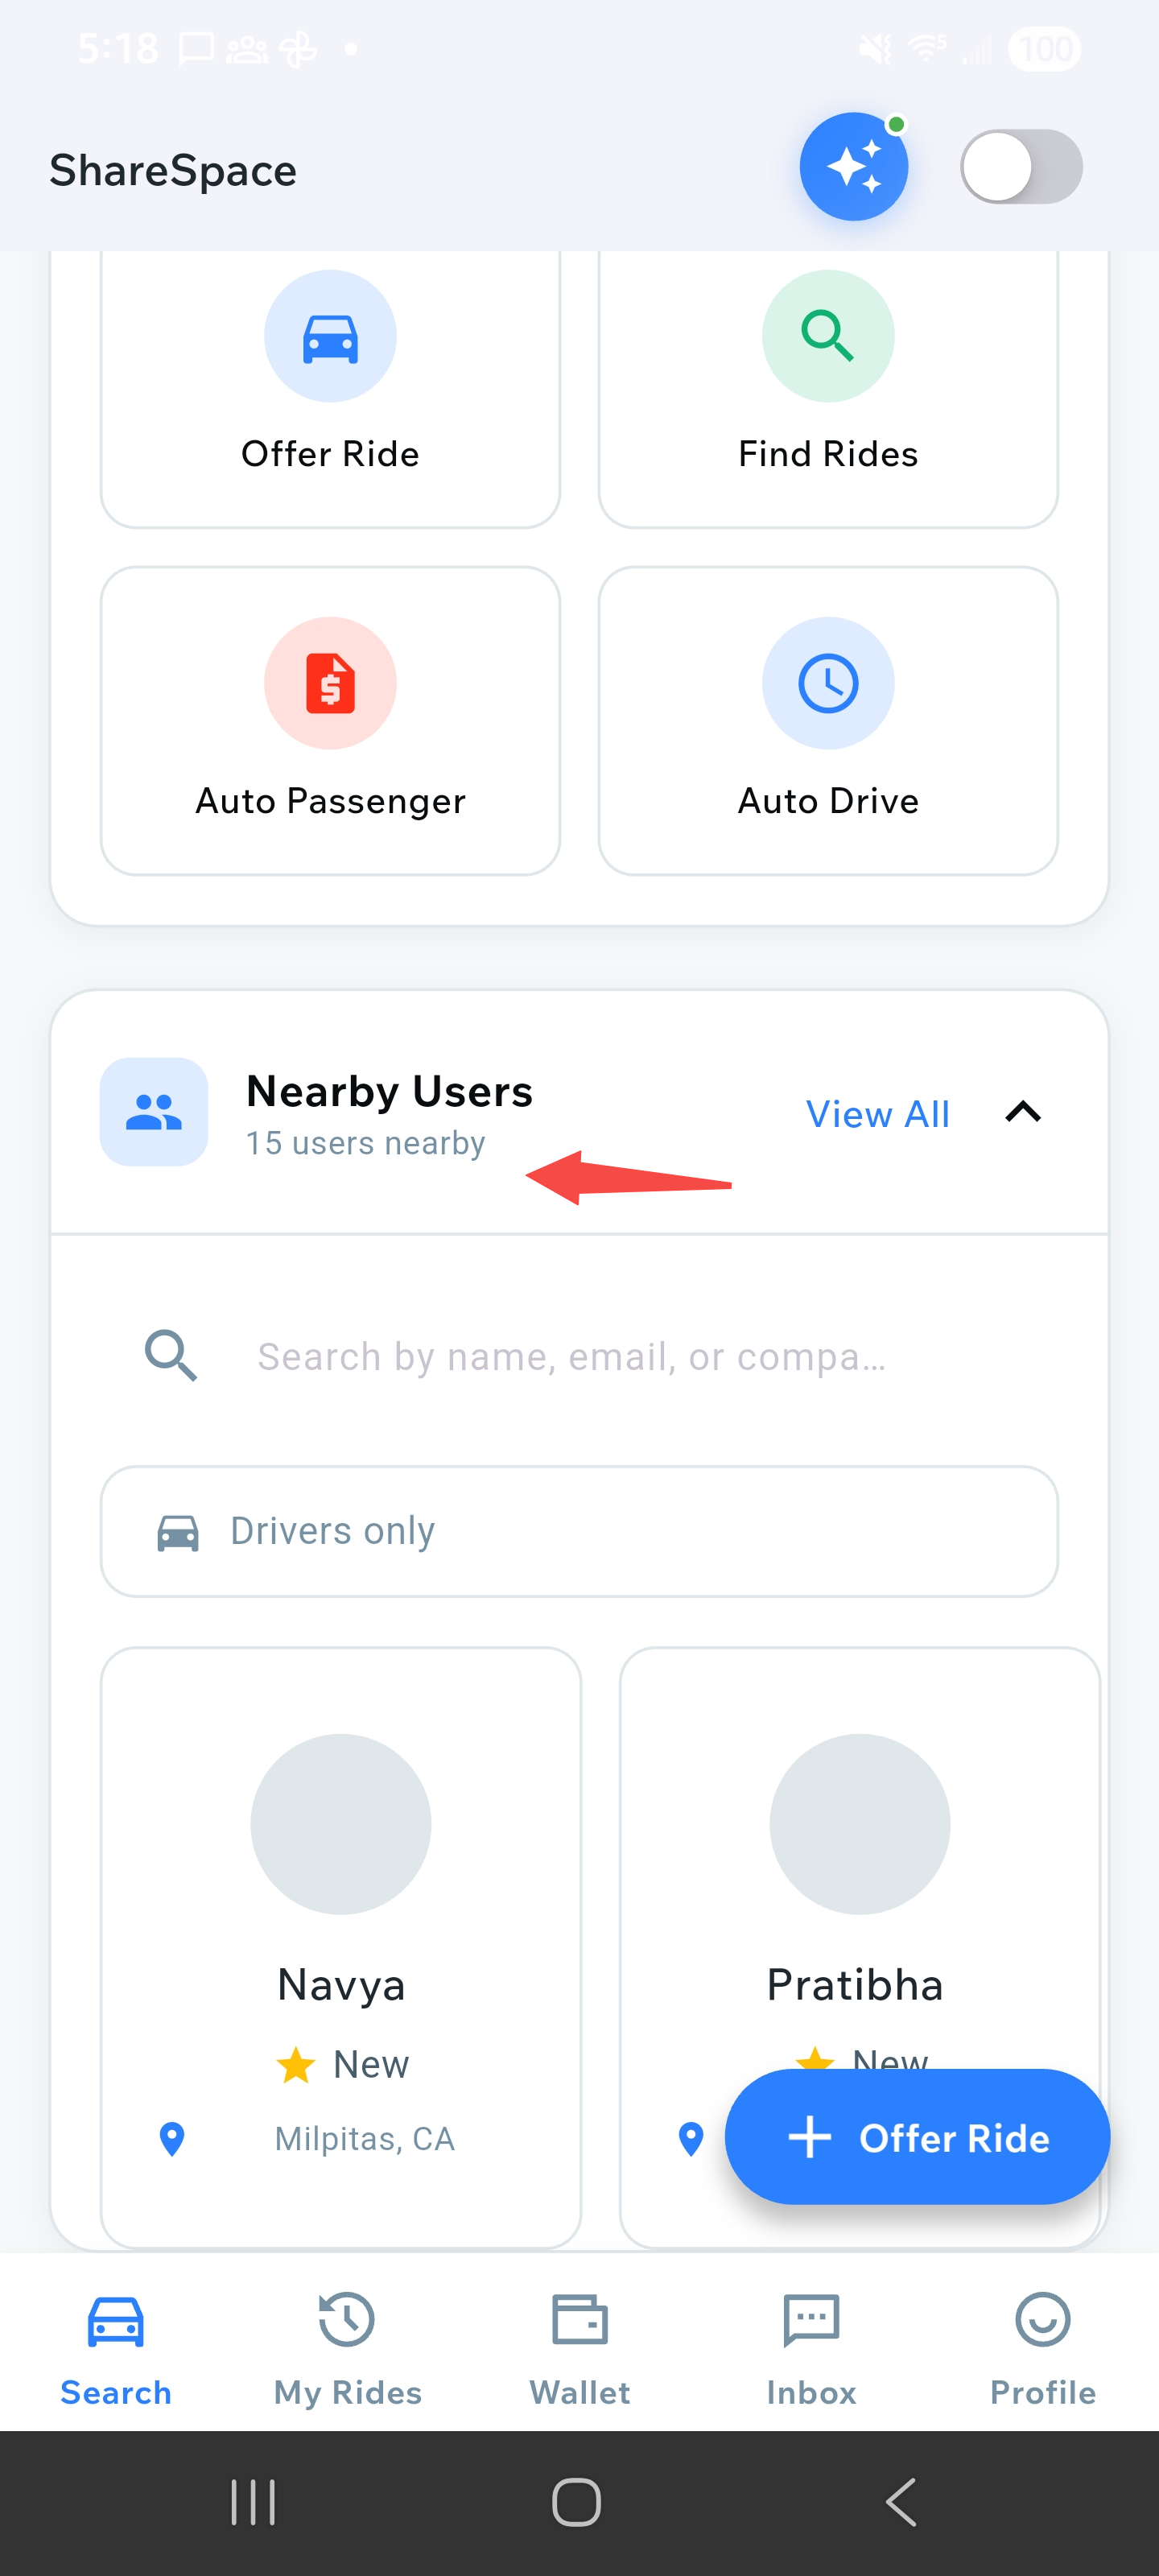
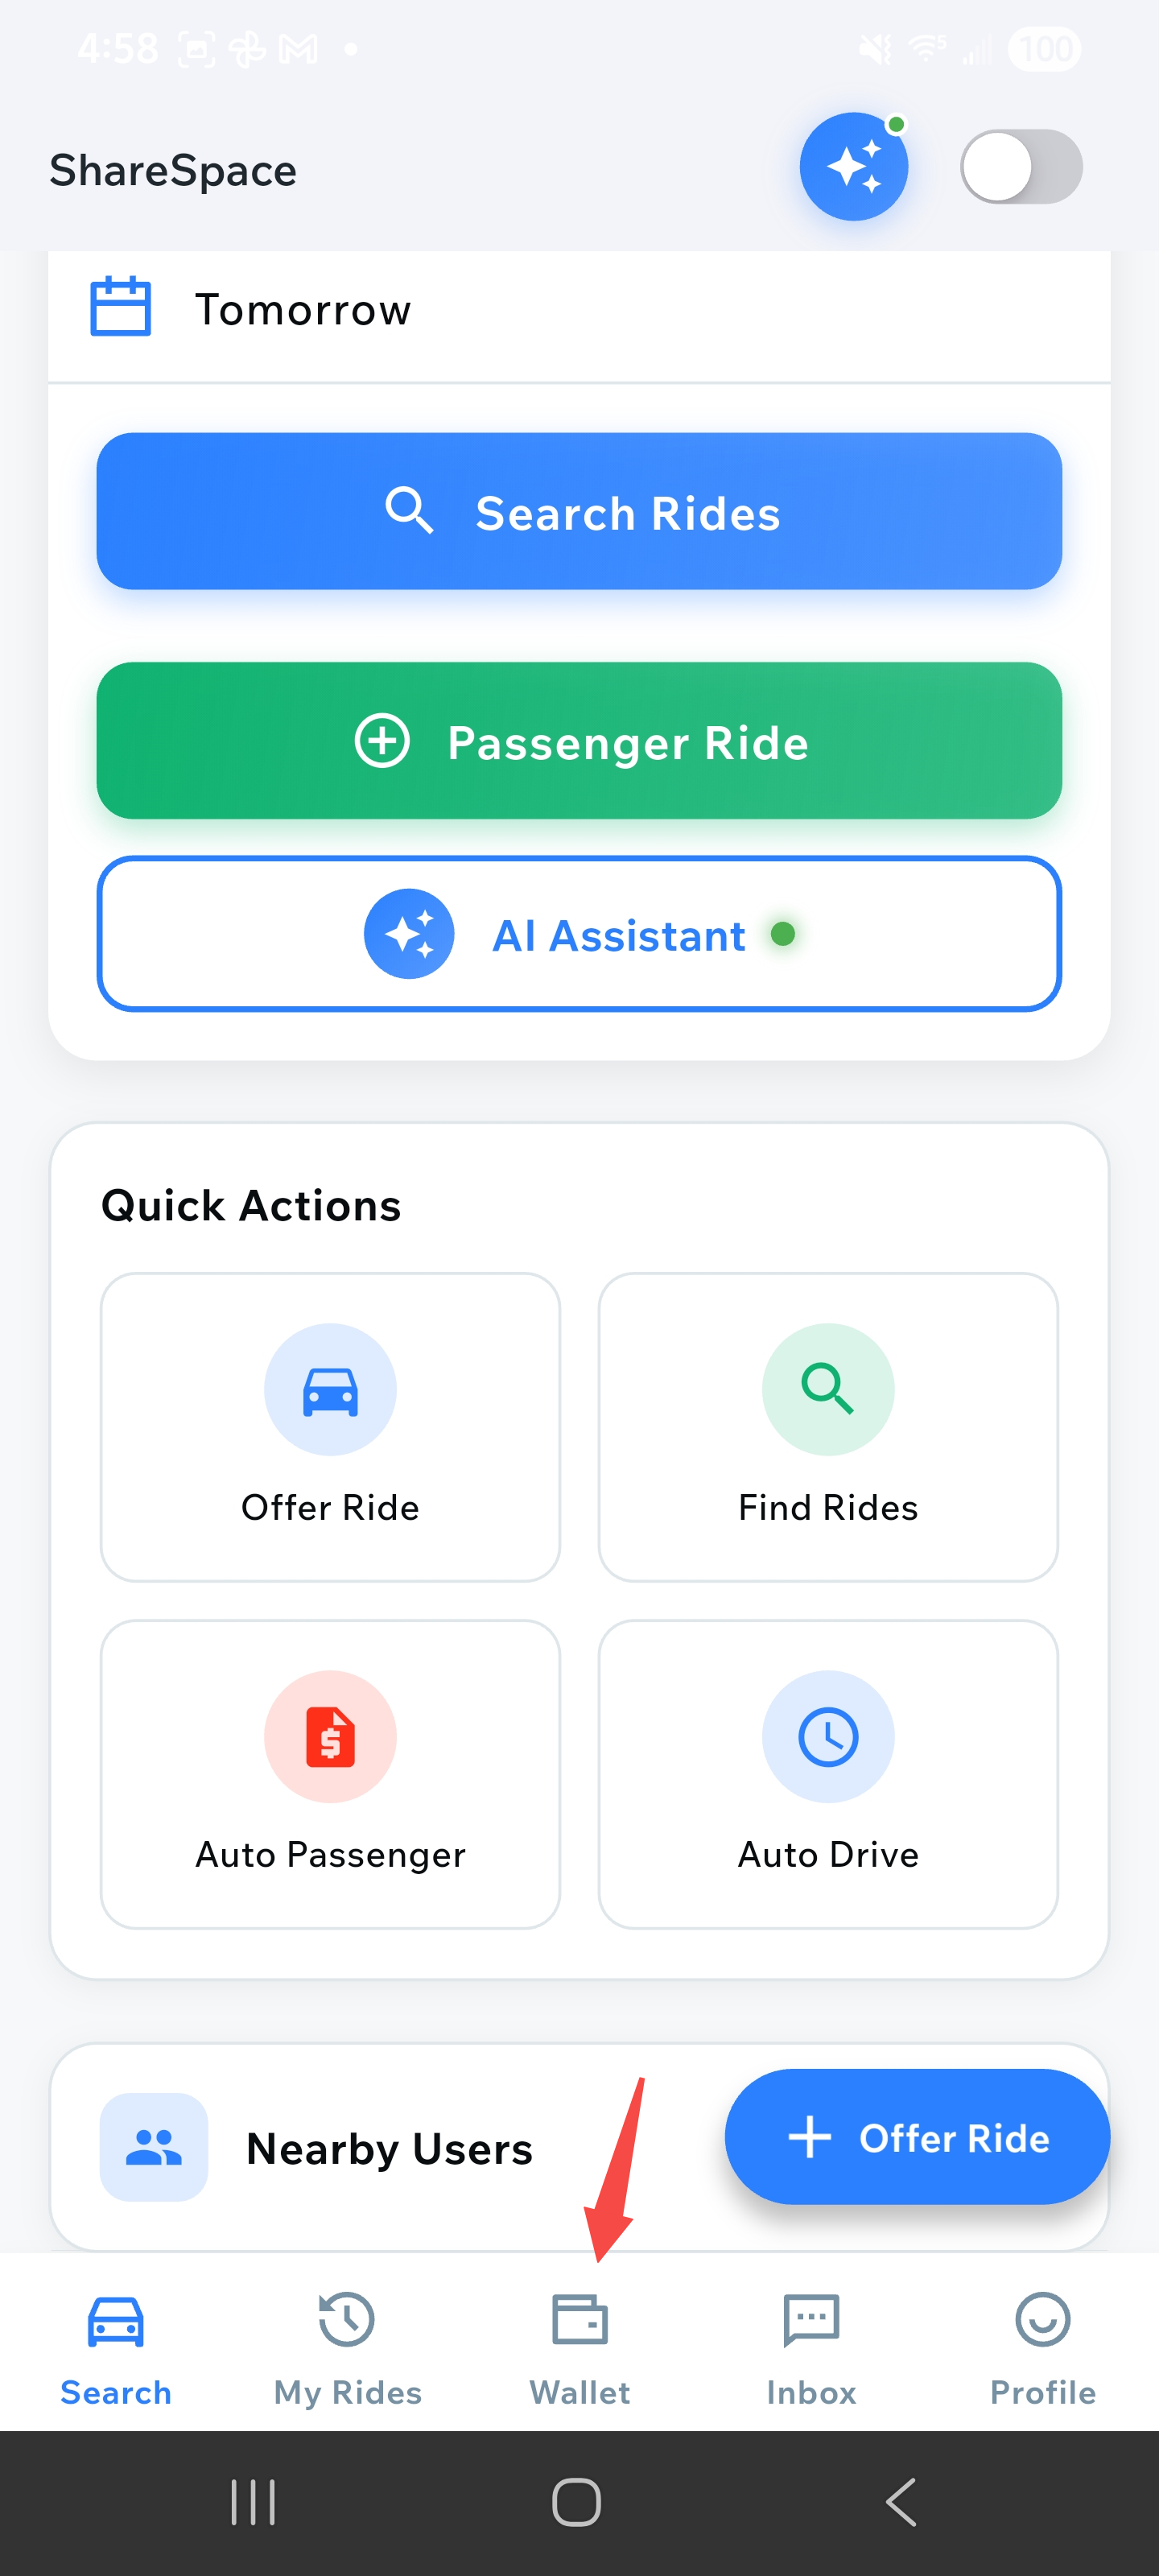
View Nearby Users on Home Screen
On the home screen, scroll down below the recent search history section. You'll see a section showing nearby users based on your location. Make sure location services are enabled for the app in your device settings.

Home screen showing nearby users below recent search history
View Quick List of Nearby Users
The nearby users section displays a quick list of users in your area. You can see their profile pictures, names, and basic information. This gives you a quick overview of who's nearby.
Quick list view of nearby users
View All Users
To see a complete list of all nearby users, tap on "View All Users" or a similar button in the nearby users section. This will take you to a dedicated screen with a comprehensive list of all users in your area.

All users list screen
Tap on User to Chat or Send Email
From the quick list, tap on any user's profile card to view their details. You'll see options to chat with them or send them an email. This allows you to connect and coordinate rides easily.
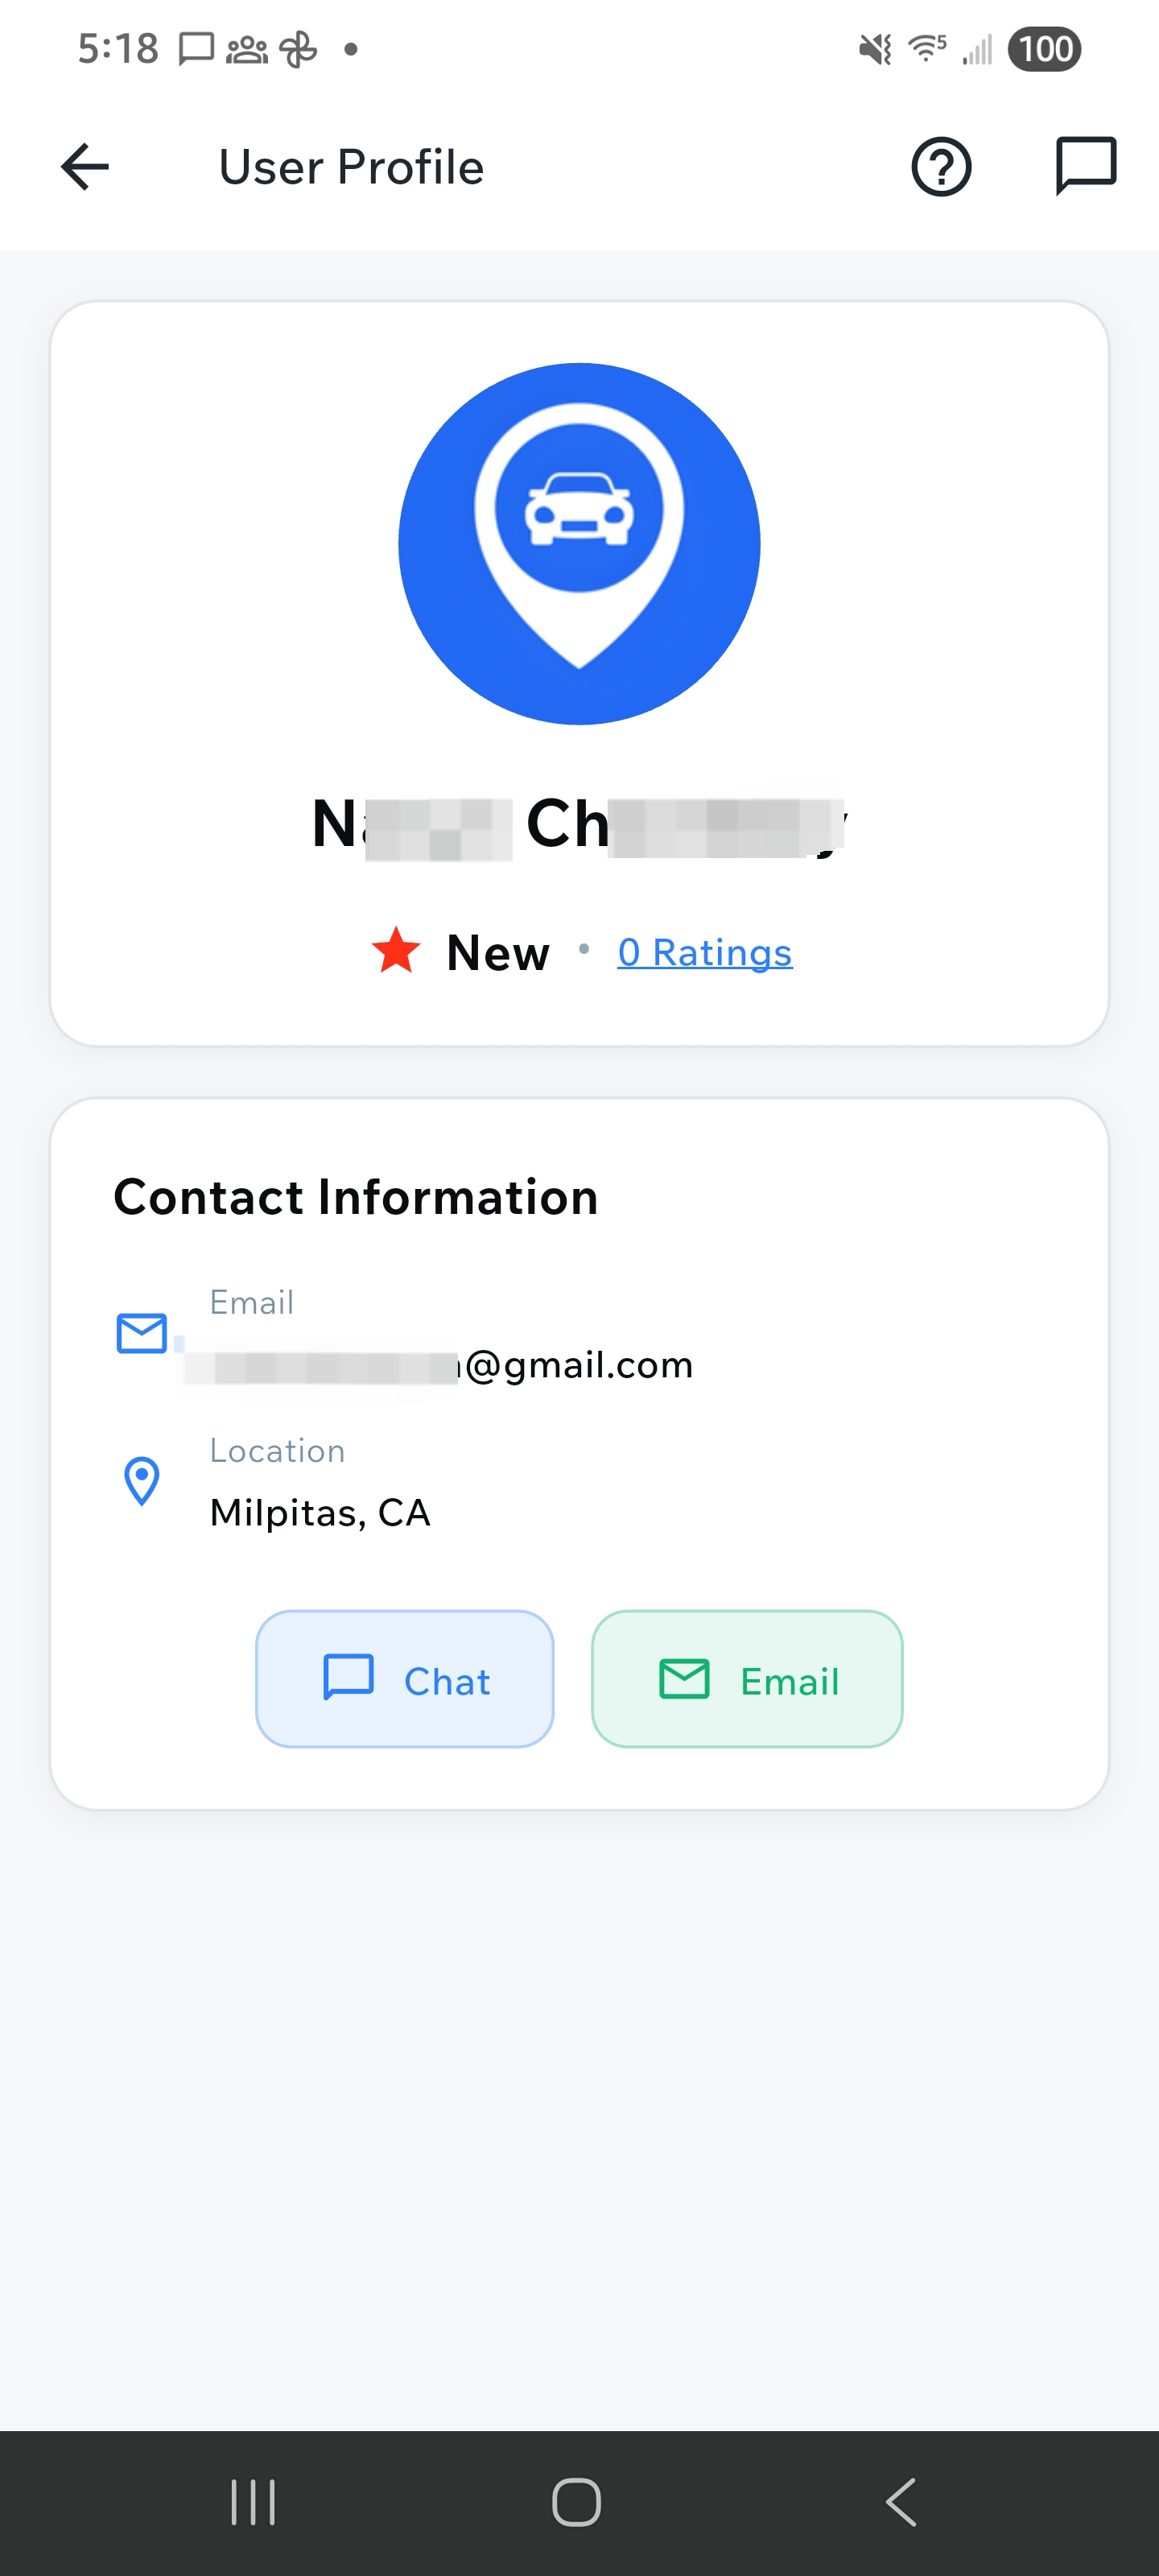
User profile with chat and email options
Filter Users by Radius
On the "All Users" screen, you can filter users based on distance radius. Use the radius filter to adjust how far you want to search for nearby users. This helps you find users within your preferred distance range.
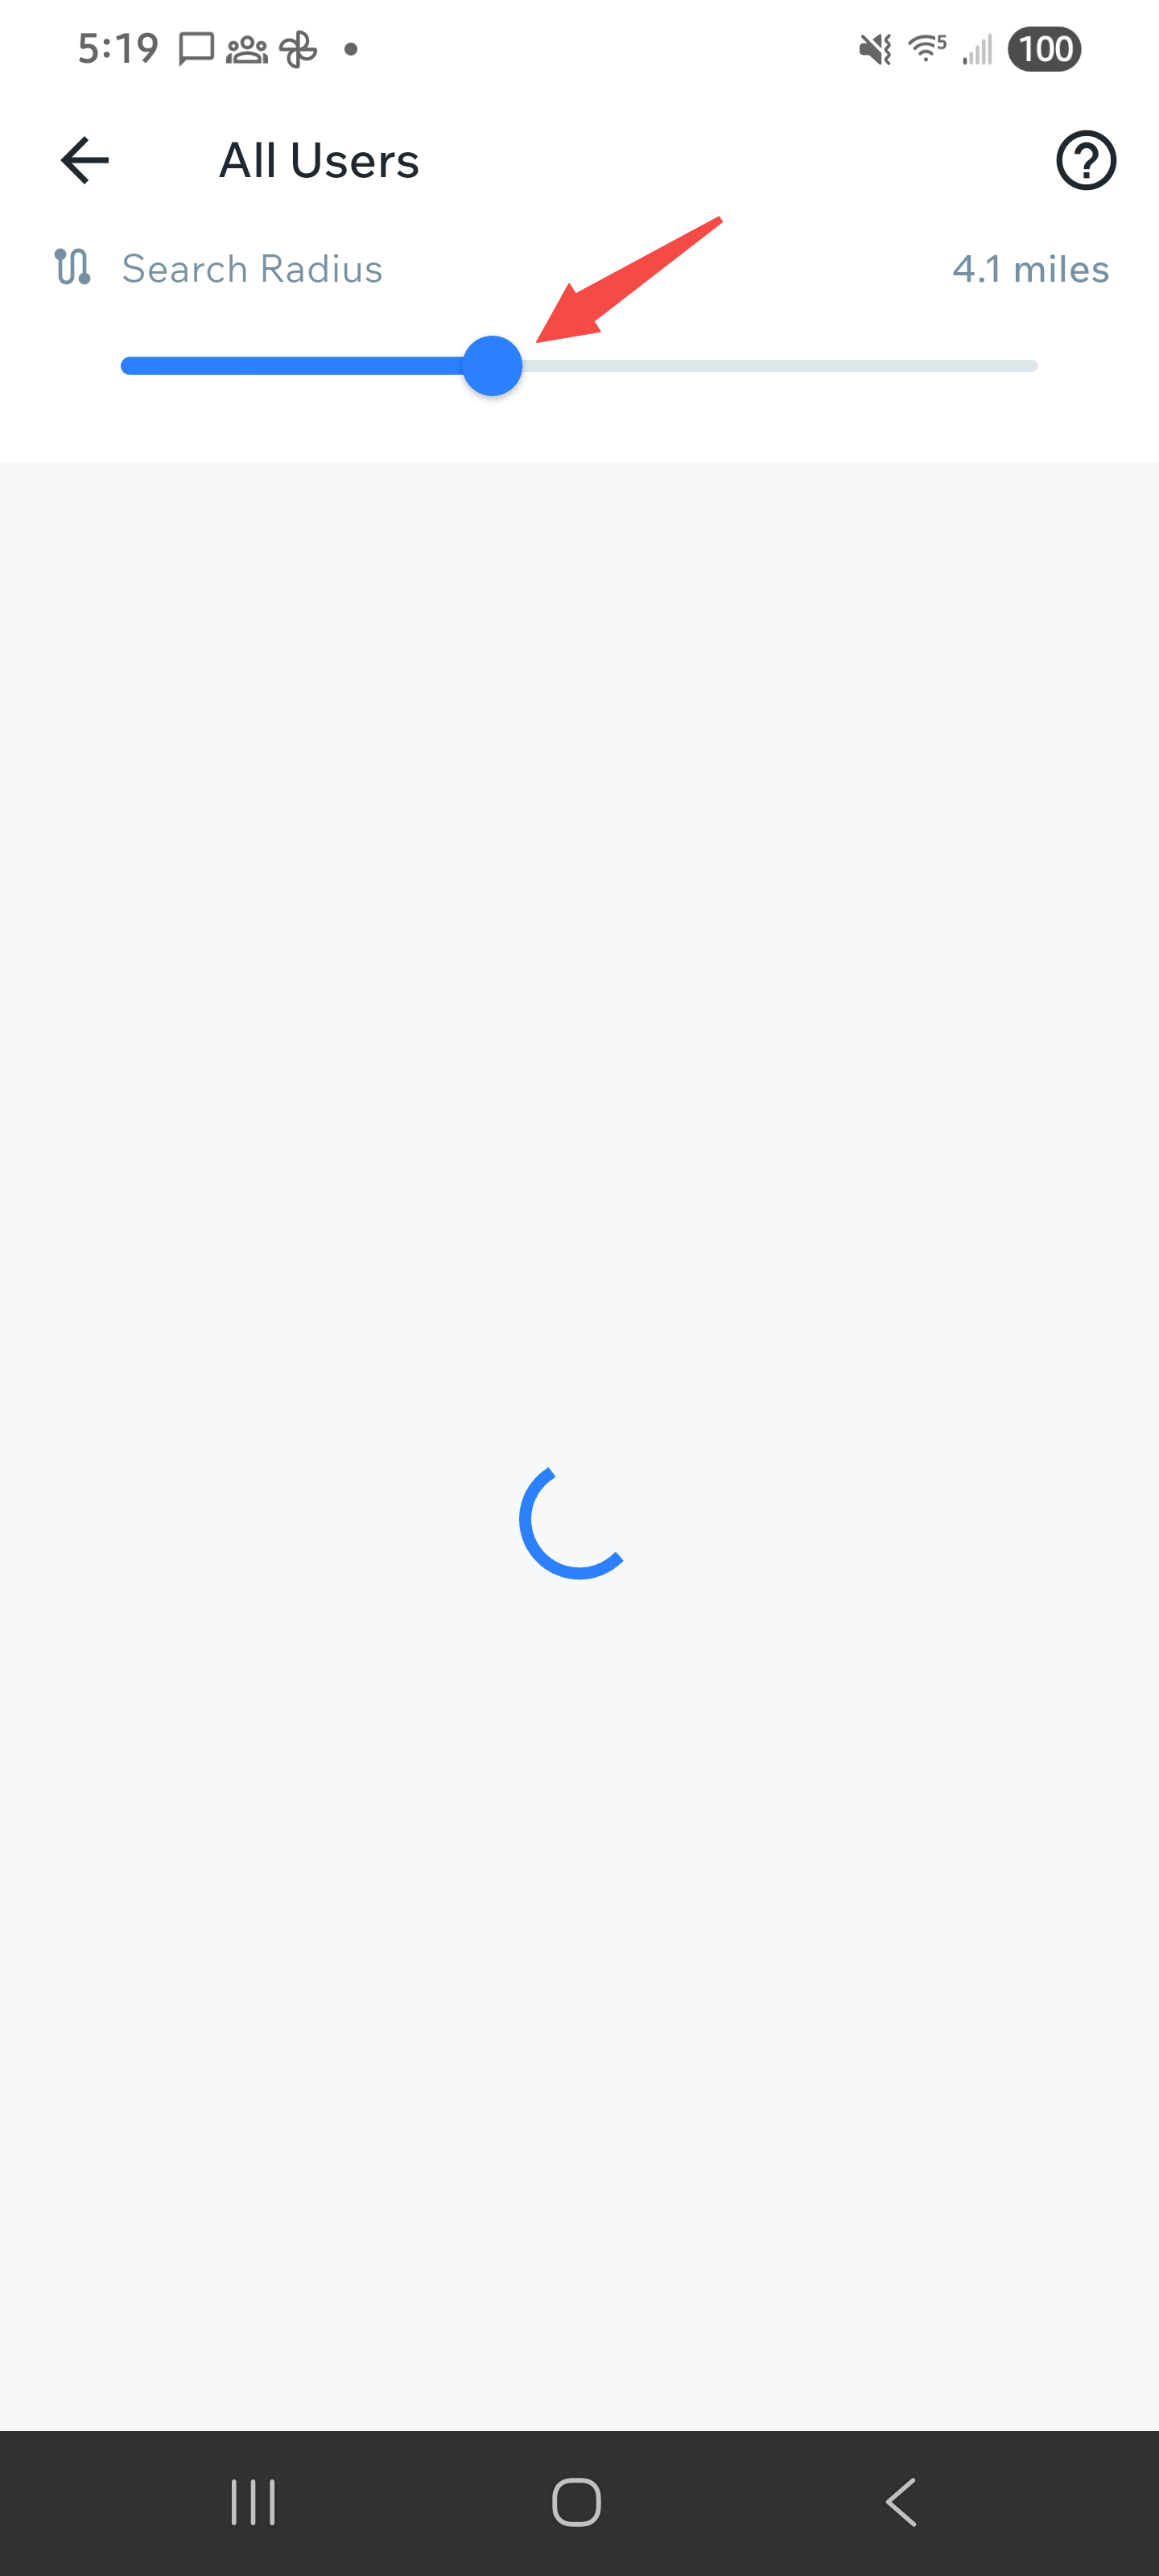
Radius filter options
Browse All Users List
After applying filters, you'll see a filtered list of all users matching your criteria. The list shows user profiles with their information, making it easy to find potential carpool partners.

Filtered list of all users
Select User from List
Tap on any user from the all users list to view their full profile. You'll see detailed information about the user, their preferences, and contact options.

User profile details from list
Send Email to User
From the user's profile, you can tap the "Send Email" or email icon to send an email to the user. This opens your email client with the user's email address pre-filled, allowing you to reach out via email.

Email interface or email options
Chat with User
Alternatively, you can tap the "Chat" button to start a conversation. This opens the chat interface where you can send messages, coordinate rides, and communicate directly with the user.

Chat interface with user
How to Fund Your Wallet
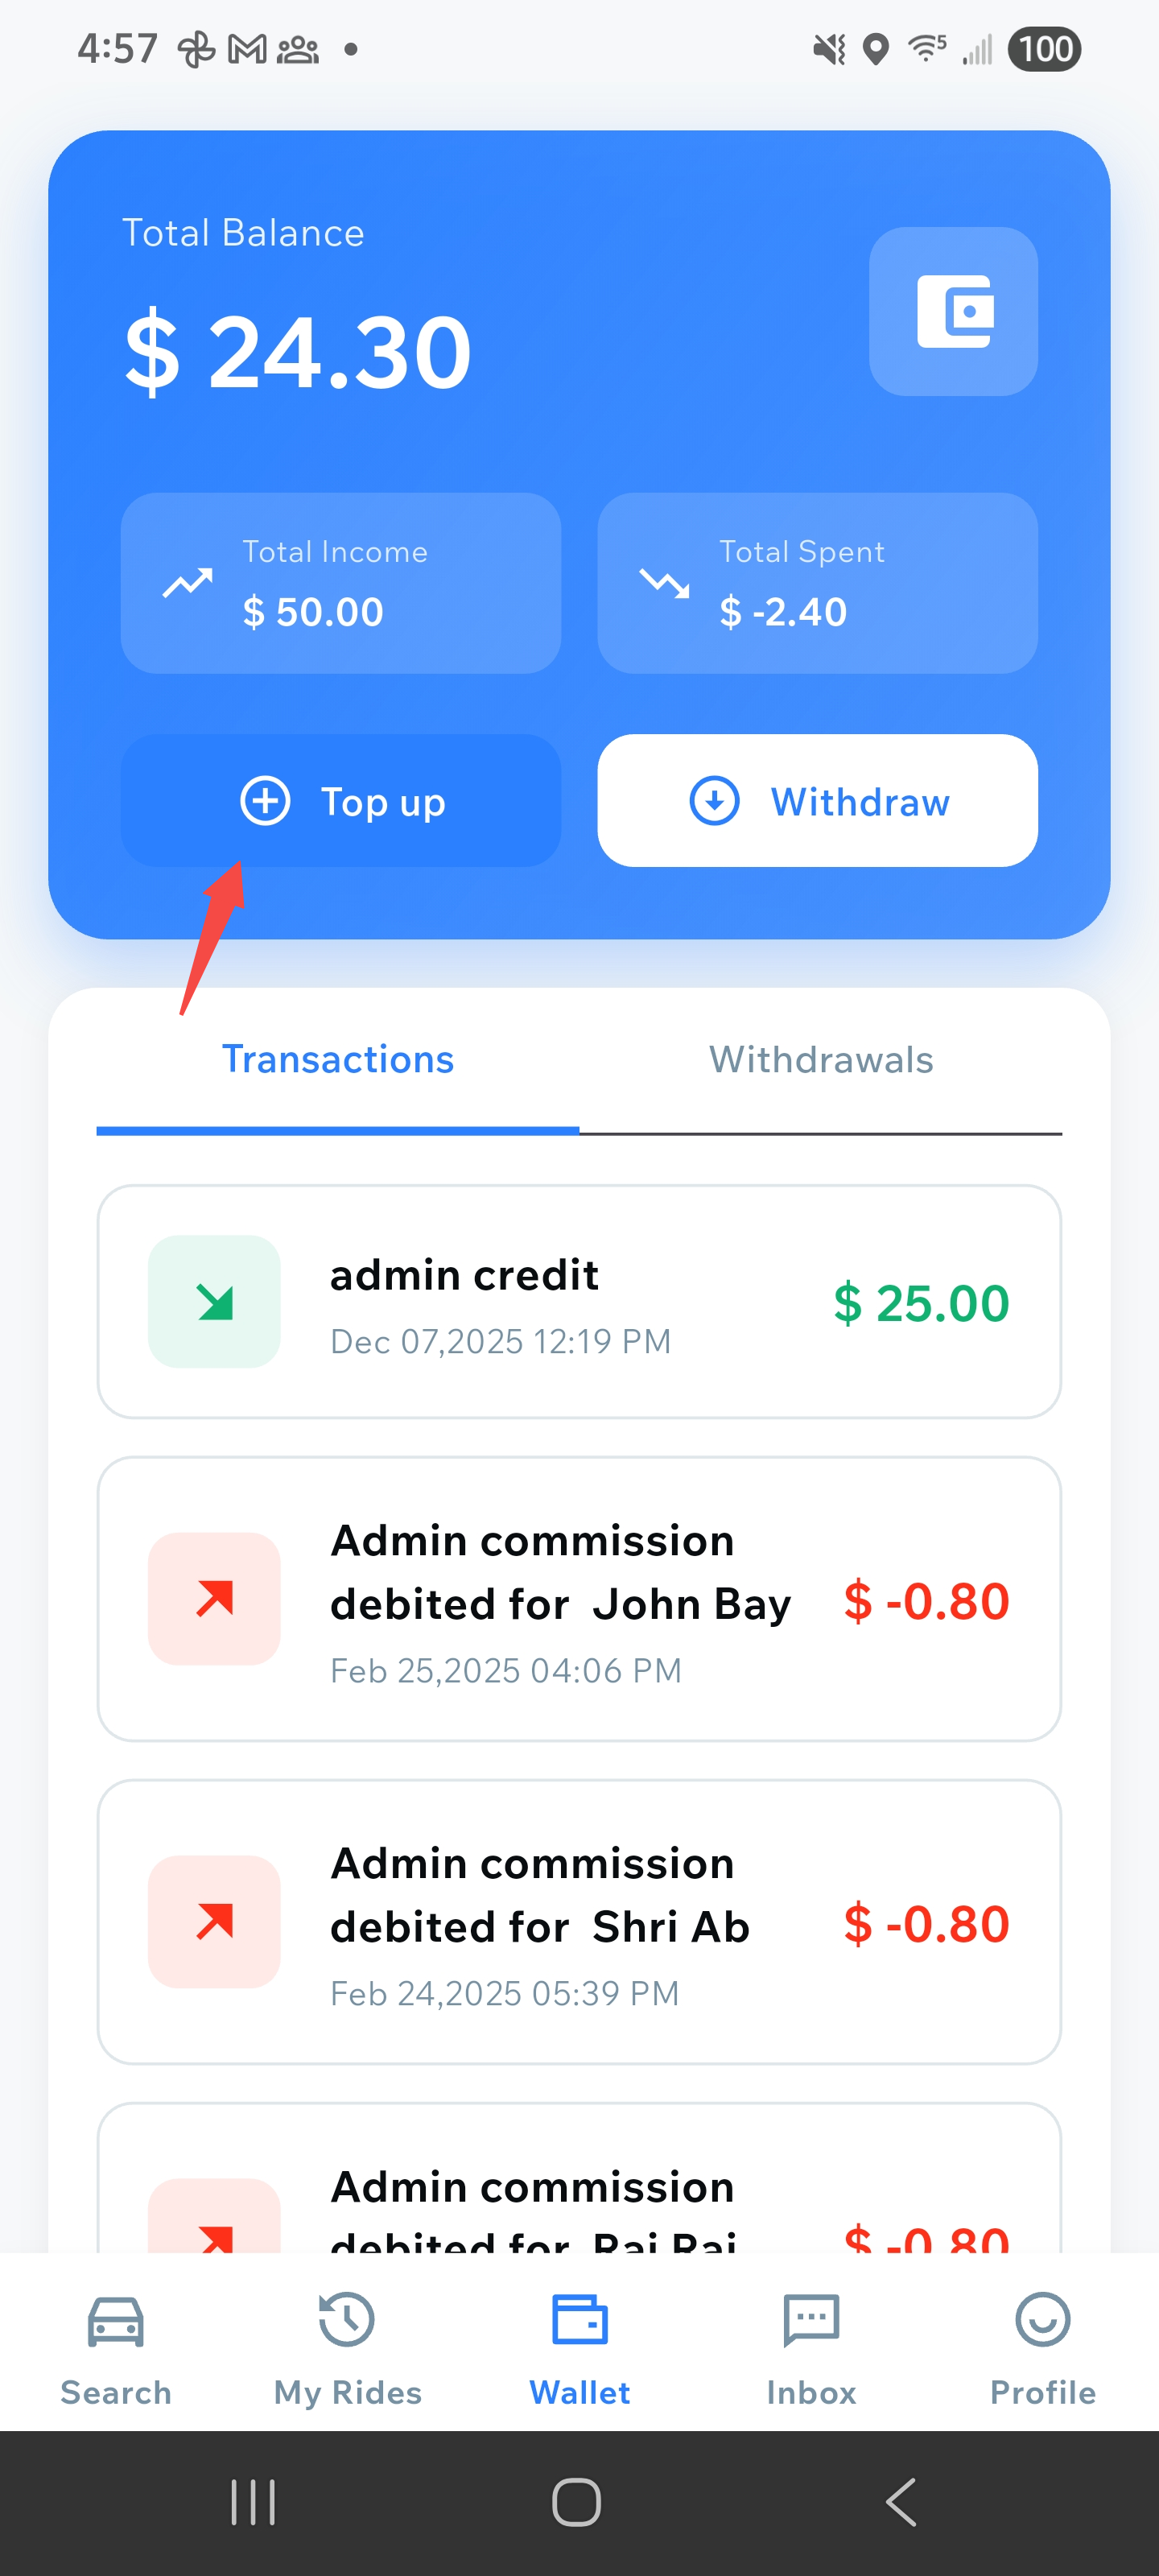
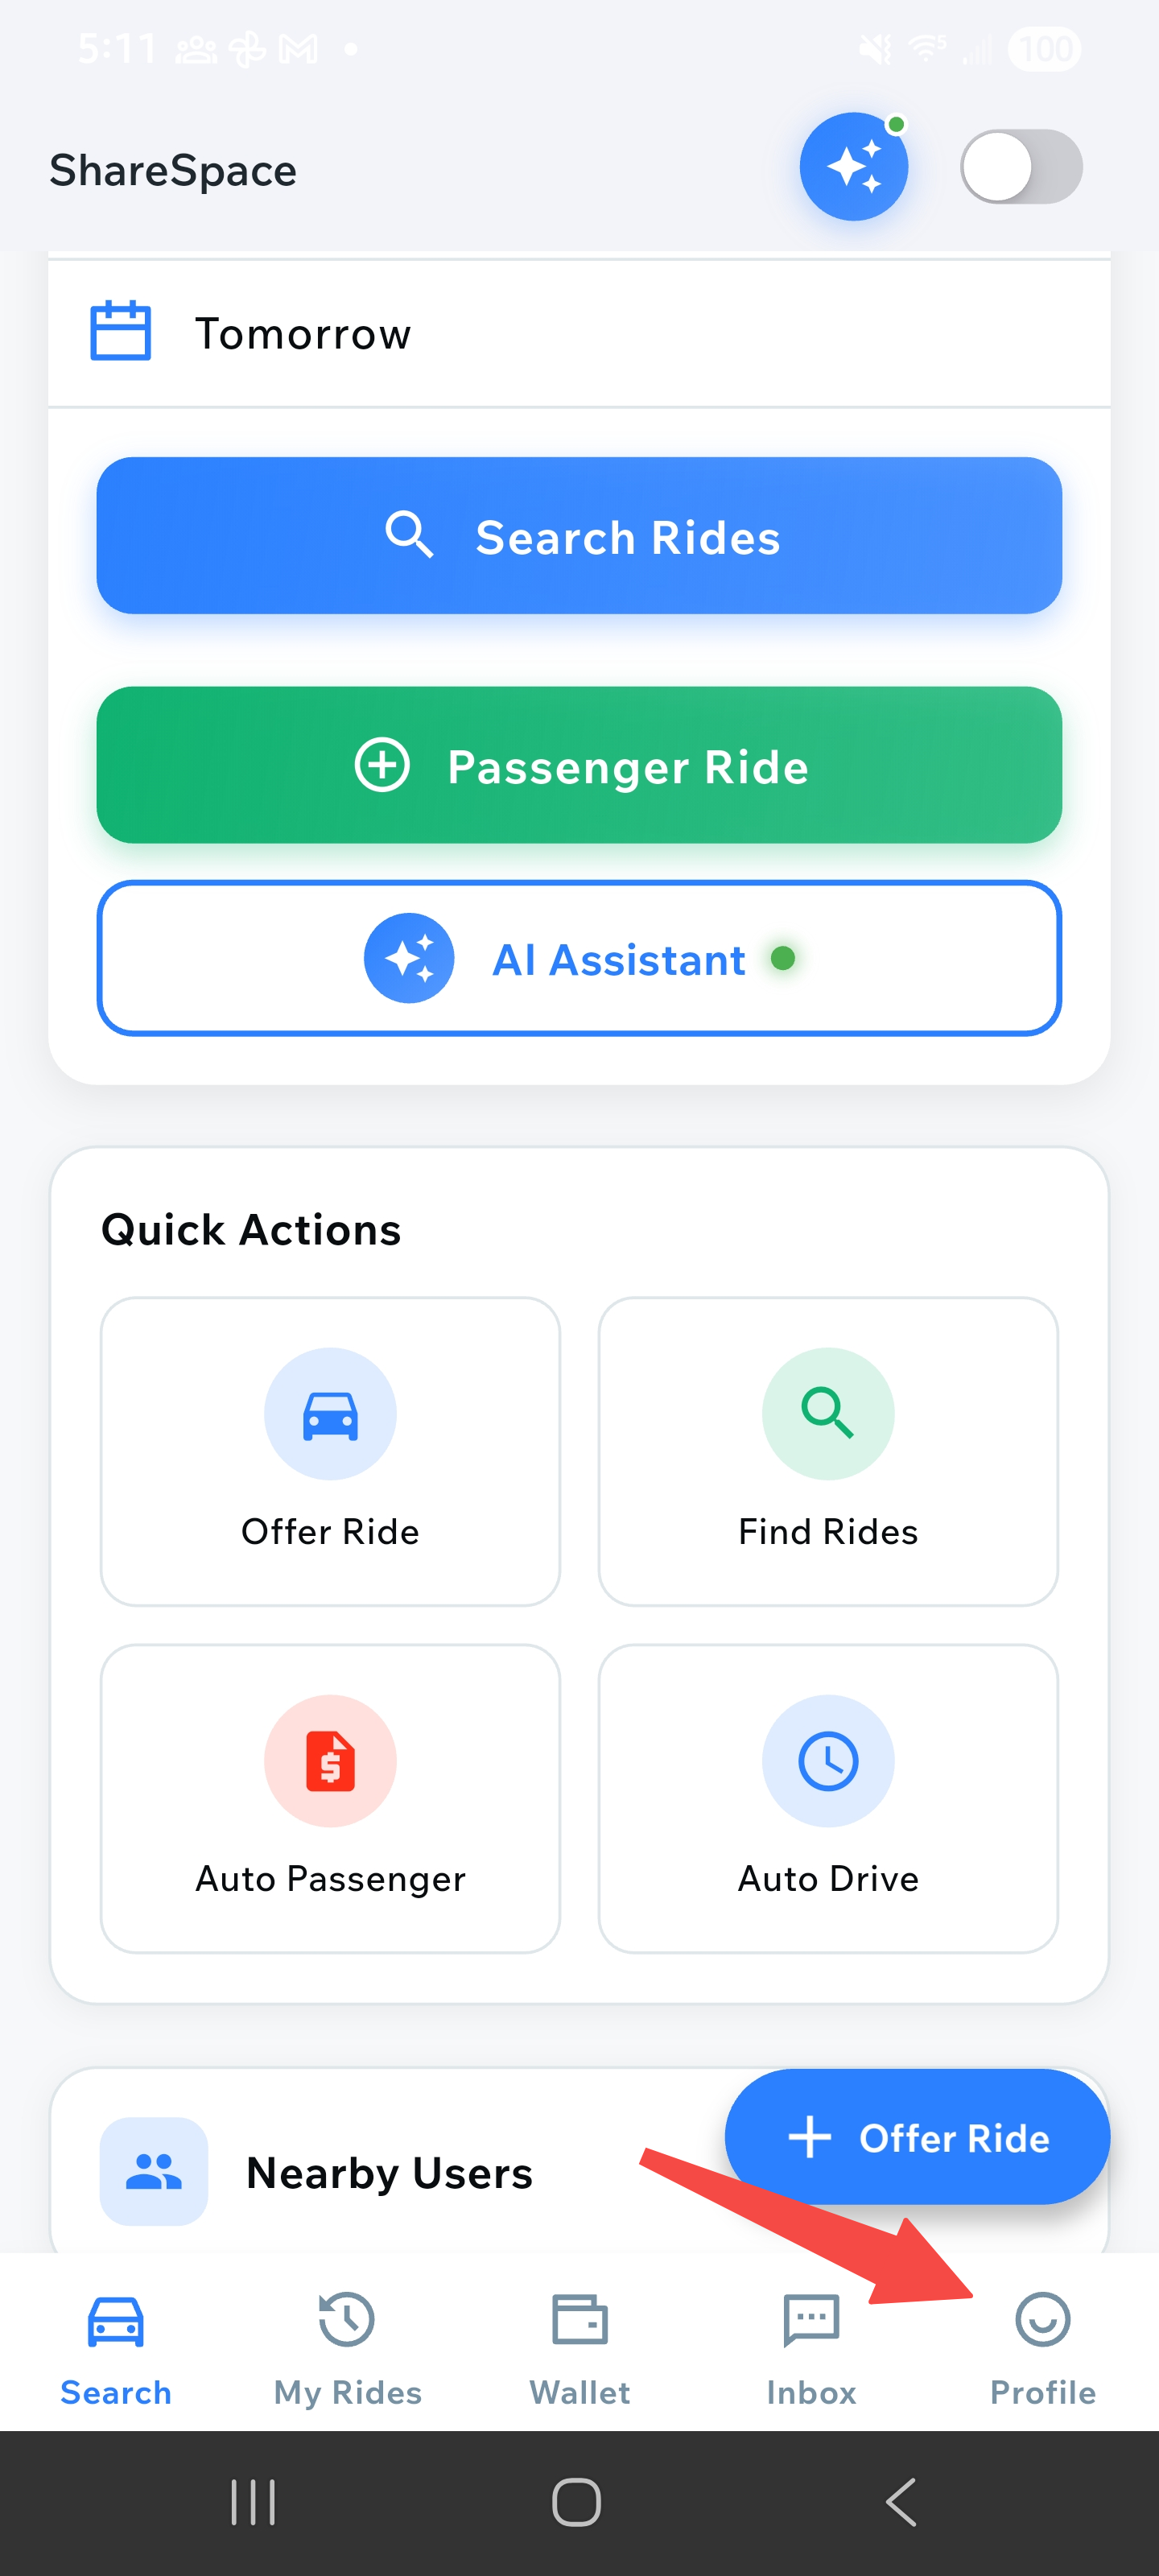
Go to Wallet
Navigate to "Wallet" from the bottom navigation bar or from the main menu. The Wallet screen shows your current balance, total income, and total spent.
Wallet screen showing balance and transaction history
Select Top Up
Tap on the "Top up" button (blue button with plus icon) at the bottom of the wallet screen. This will open the top-up interface where you can add funds to your wallet.
Top Up Wallet screen with amount input
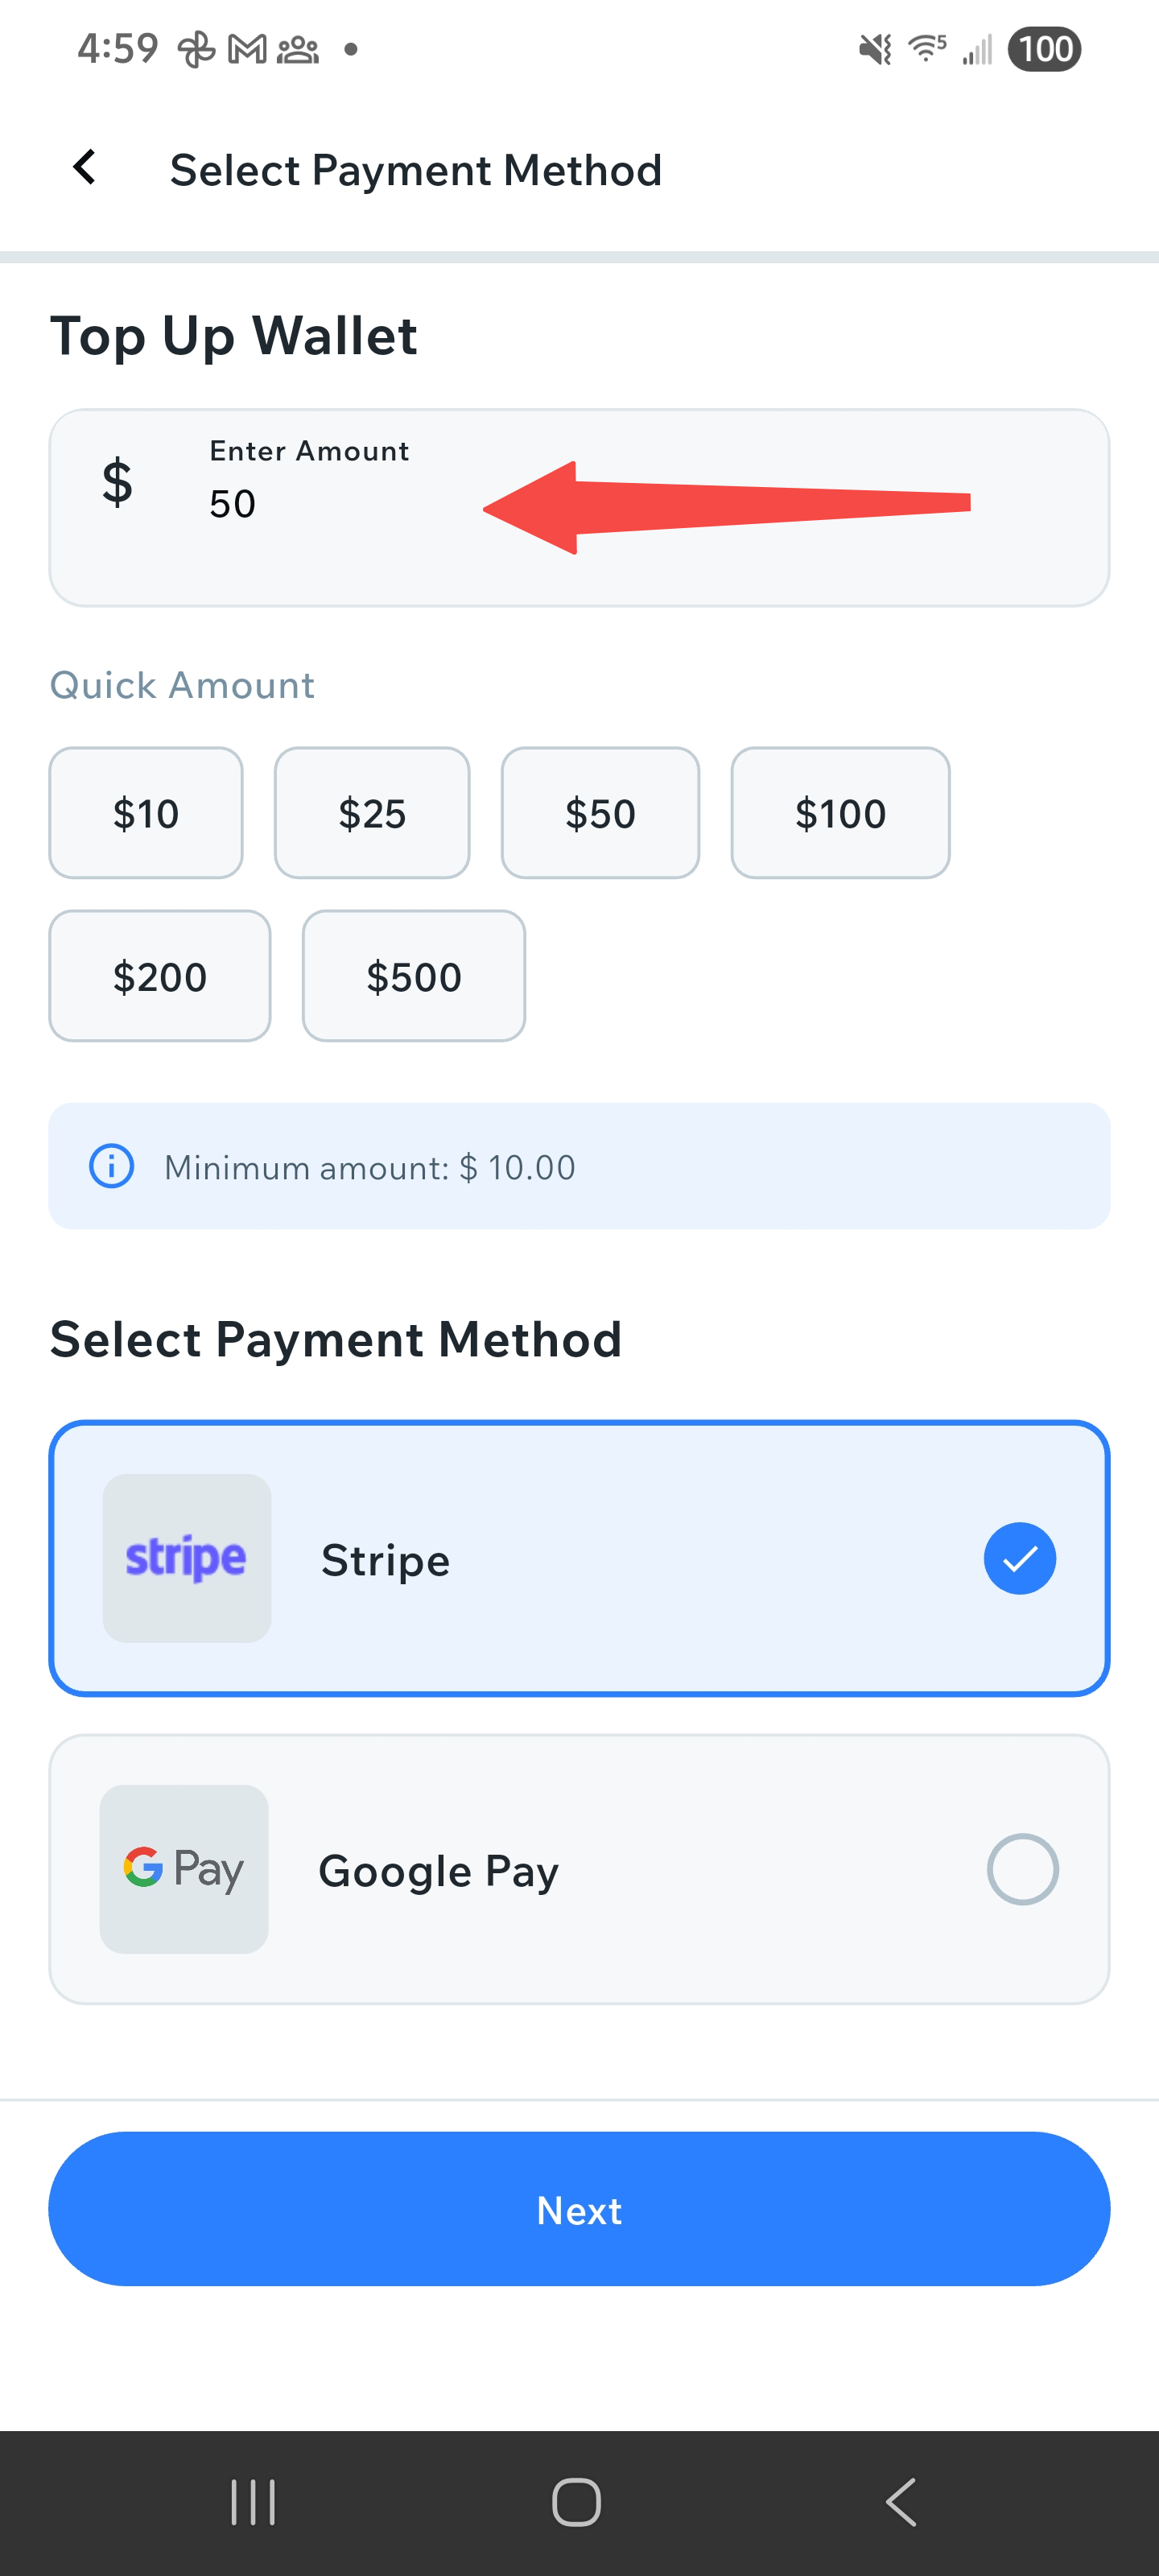
Enter Amount
Enter the amount you want to add to your wallet in the "Enter Amount" field. You can also use the quick amount buttons ($10, $25, $50, $100, $200, $500) for faster selection. Note the minimum amount requirement shown below.
Amount selection with quick amount buttons
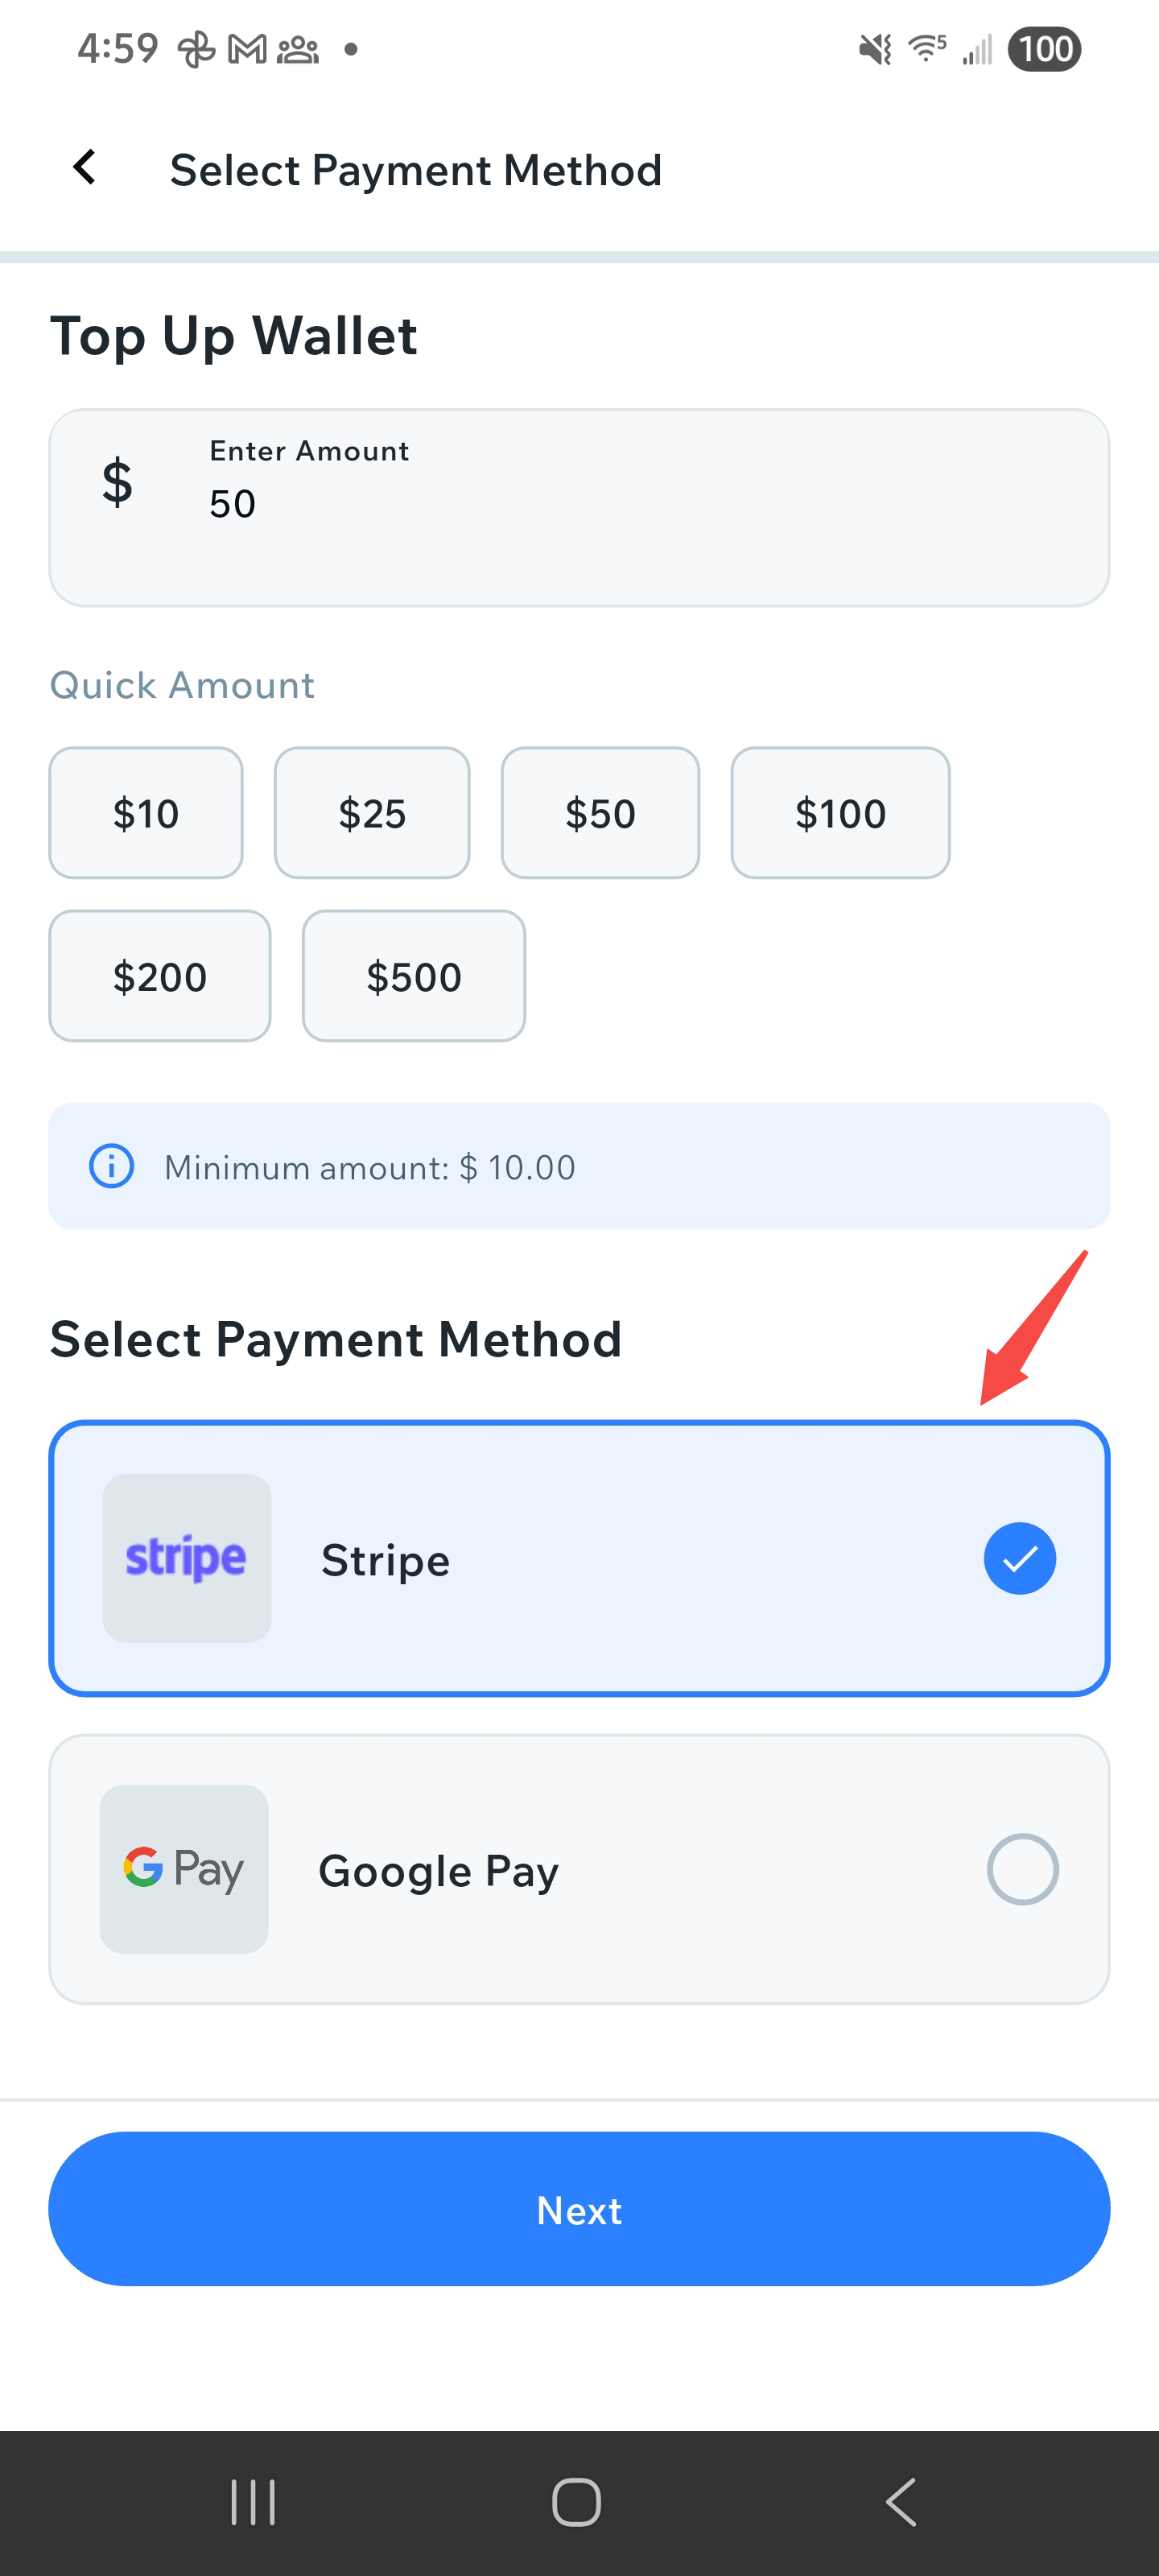
Choose Payment Method
Select your preferred payment method from the available options. You can choose between Stripe or Google Pay. Tap on the payment method you want to use, then tap "Next" to proceed with the payment.
Payment method selection screen
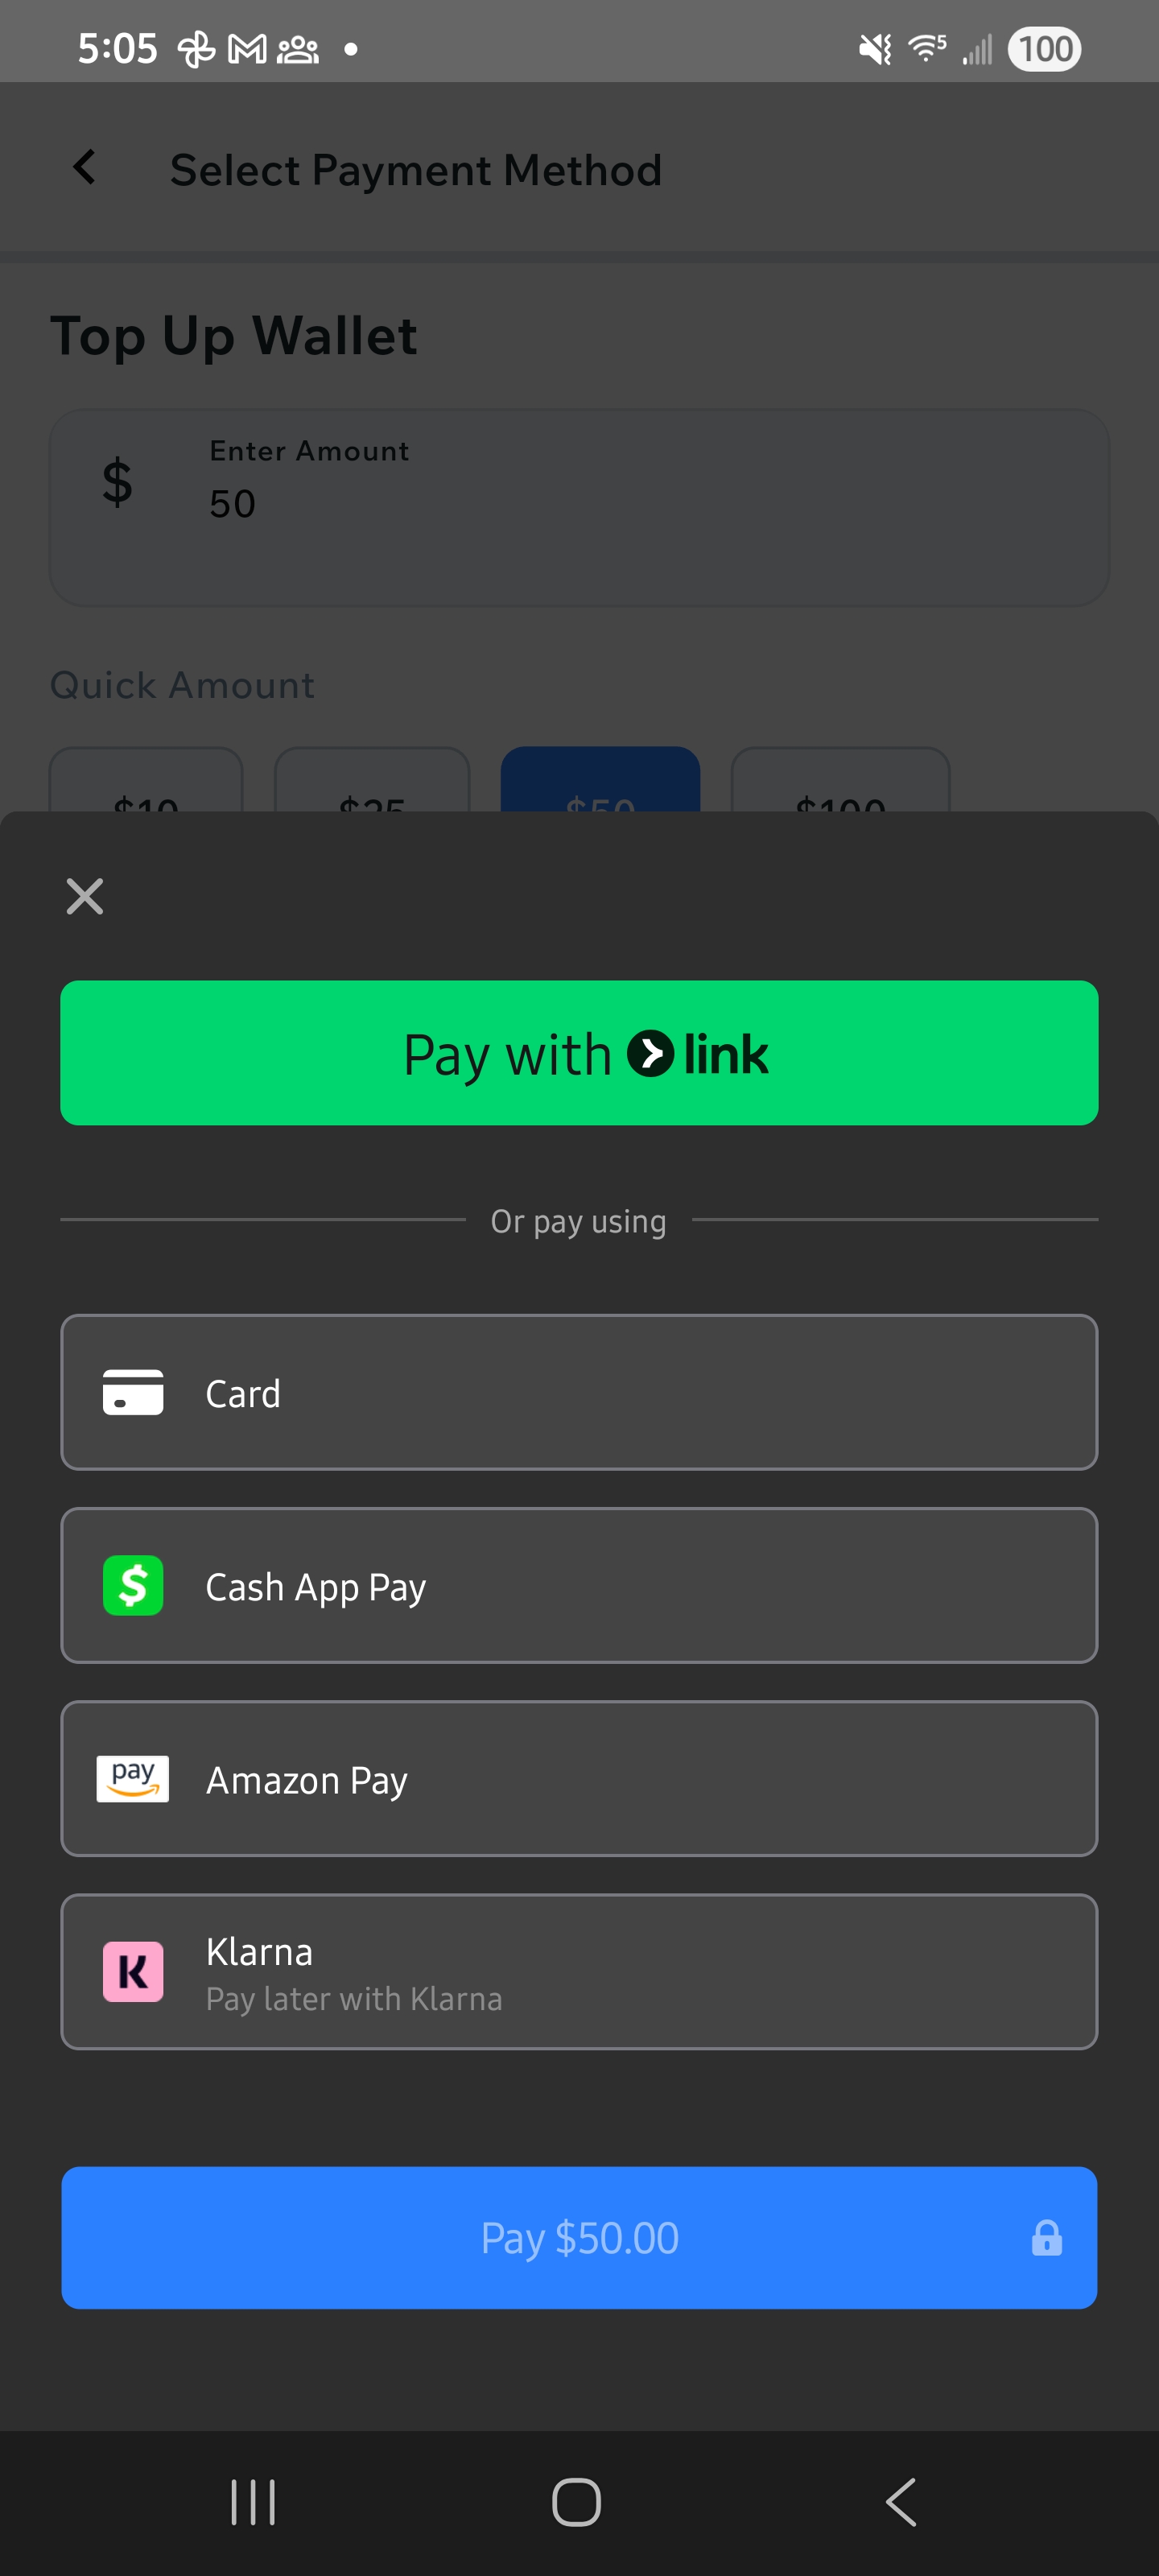
Complete Payment
Follow the payment process for your selected payment method. Complete the payment through the secure payment gateway. Once the payment is successfully processed, your wallet balance will be updated automatically. You can view the transaction in your wallet's transaction history.
Payment processing and completion
How to Update Your Profile
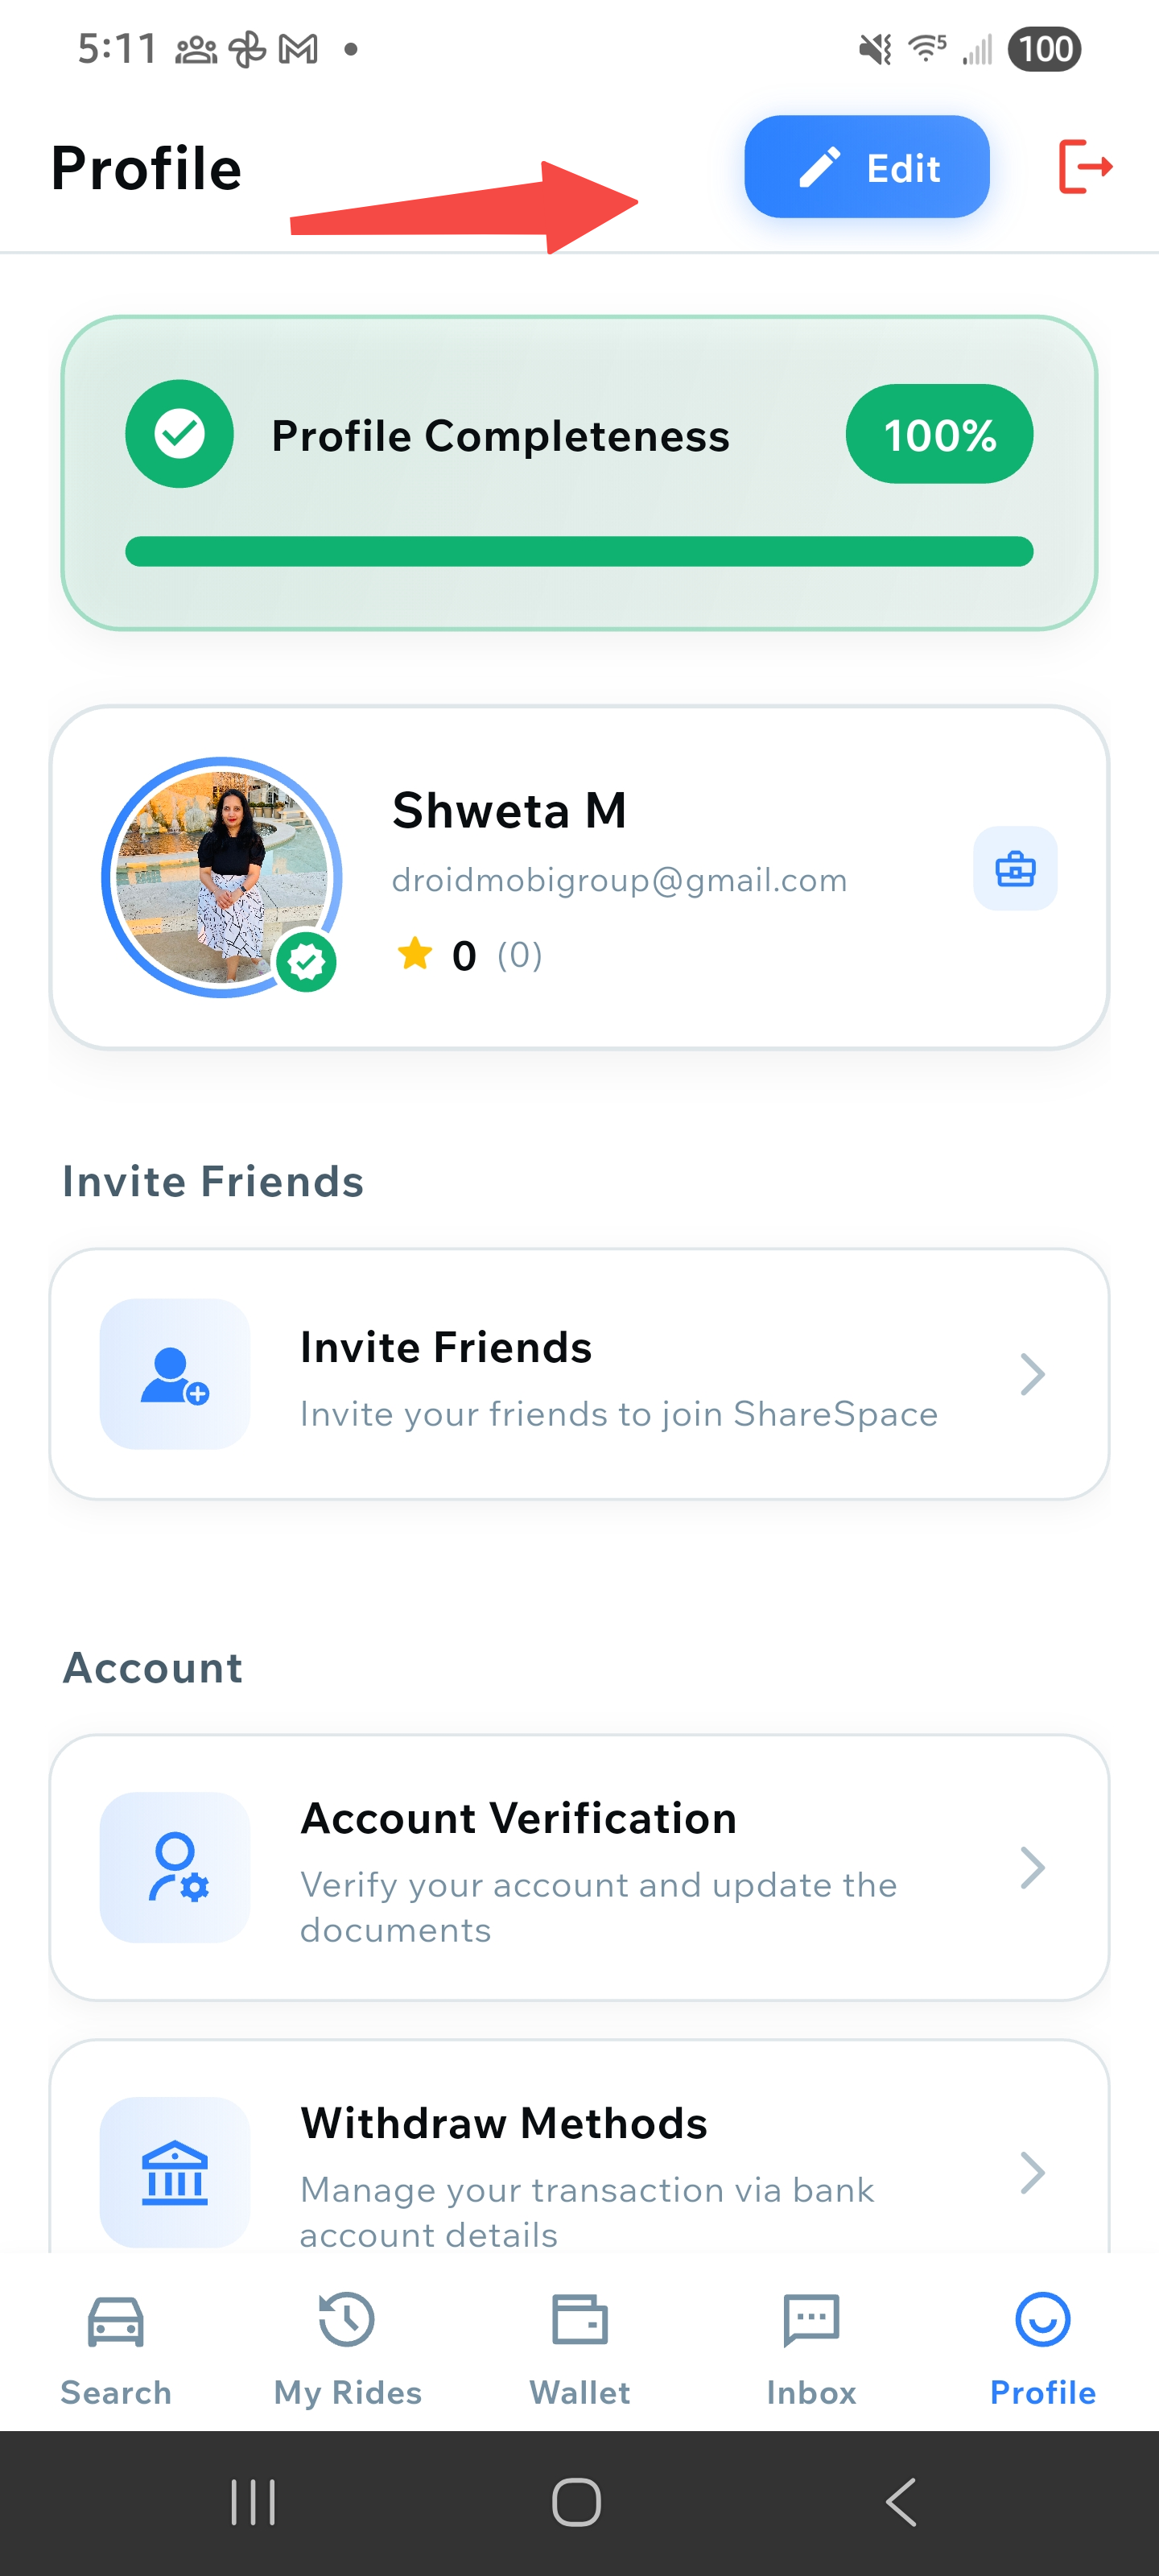
Open Profile
Tap on your profile icon or "Profile" option from the bottom navigation bar. The Profile screen shows your profile completeness, personal information, and account settings.
Profile screen showing profile completeness and information
Tap Edit
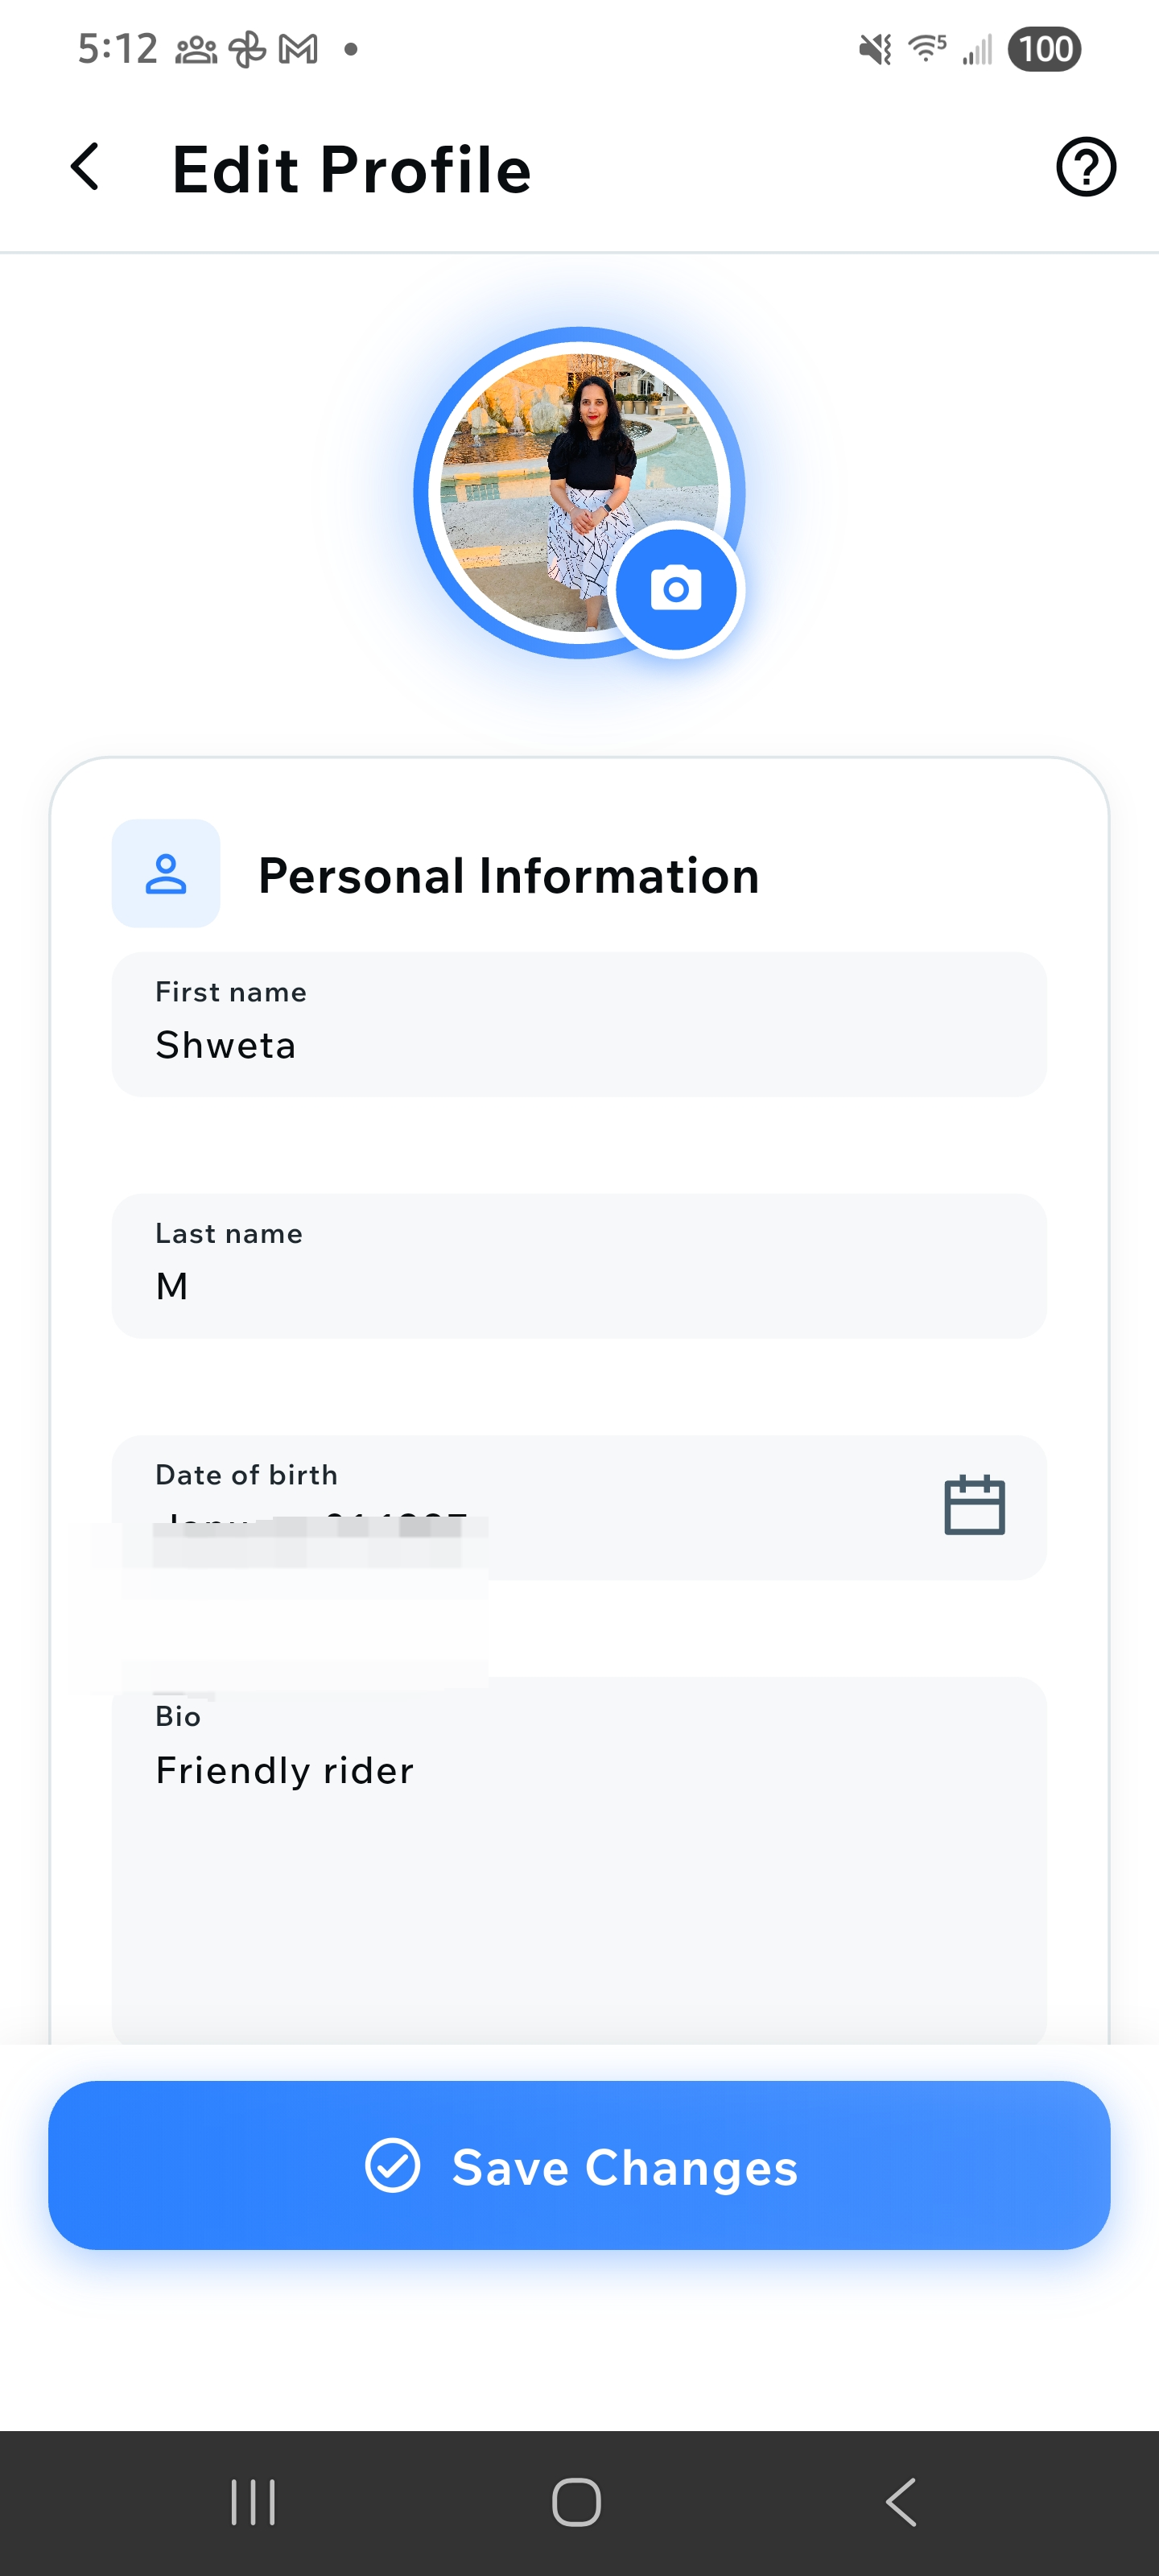
Look for the "Edit" button, usually located at the top right of your profile screen (blue button with pencil icon). Tap it to enter edit mode where you can modify your profile information.

Edit profile screen with editable fields
Update Information
Edit your personal information including name, photo, bio, gender, social media links, travel preferences, and contact information. You can also update vehicle details if you're a driver. Make sure to complete all required fields to increase your profile completeness.
Editing profile fields and information
Save Changes
After making your changes, tap "Save" or "Update" to save your updated profile information. Your profile completeness percentage will update automatically based on the information you've provided. You can verify your changes by viewing your profile again.
Updated profile with saved changes